75 Protective Hairstyles To Save for Later
Disclosure: Some of the links in this post are affiliate links. This means if you click on the link and purchase an item, I will receive an affiliate commission at no extra cost to you.
Protective hairstyles are one of the easiest ways to give your hair a break from constant daily manipulation while still having plenty of room to experiment with your look. From simple twists and braids to more elaborate updos, there are plenty of options depending on your hair length, routine, and personal style.
The best part is that protective hairstyles do not have to be boring. You can switch between chunky twists, braided buns, cornrows, tucked styles, and other creative looks without reaching for the same hairstyle every time.
If you are building a natural hair routine, it also helps to remember that a protective style is only helpful when it is actually gentle on your strands. A style that feels painfully tight, pulls at your edges, or leaves your scalp uncomfortable defeats the purpose.
Whether you want something you can wear for several days or simply need a break from daily styling, these 75 protective hairstyles give you plenty of ideas to save and revisit.
1. Medium Two-Strand Twists
Medium two-strand twists are one of the easiest protective hairstyles to keep in your rotation.
They do not require extensions, and you can adjust the size depending on how much time you have available. Medium sections are large enough to make installation manageable while still giving you plenty of styling options afterward.
Wear them loose, gather them into a bun, create a ponytail, or pin several sections toward the back.
If you are still figuring out your 4C hair type, twists are also useful because they allow you to see how your natural texture behaves without constantly manipulating it.
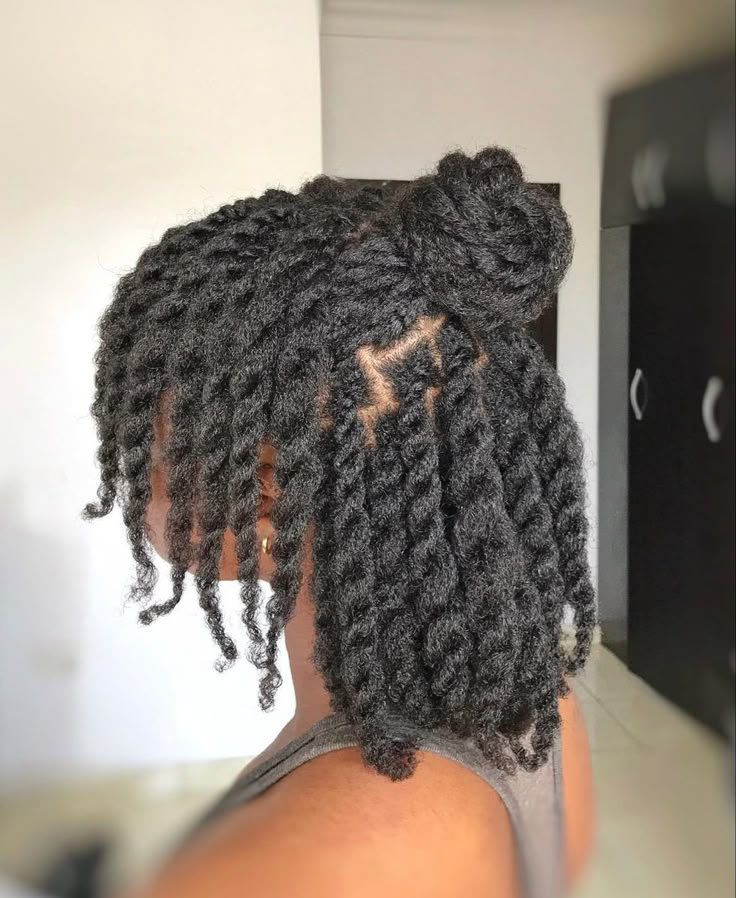
2. Chunky Twists
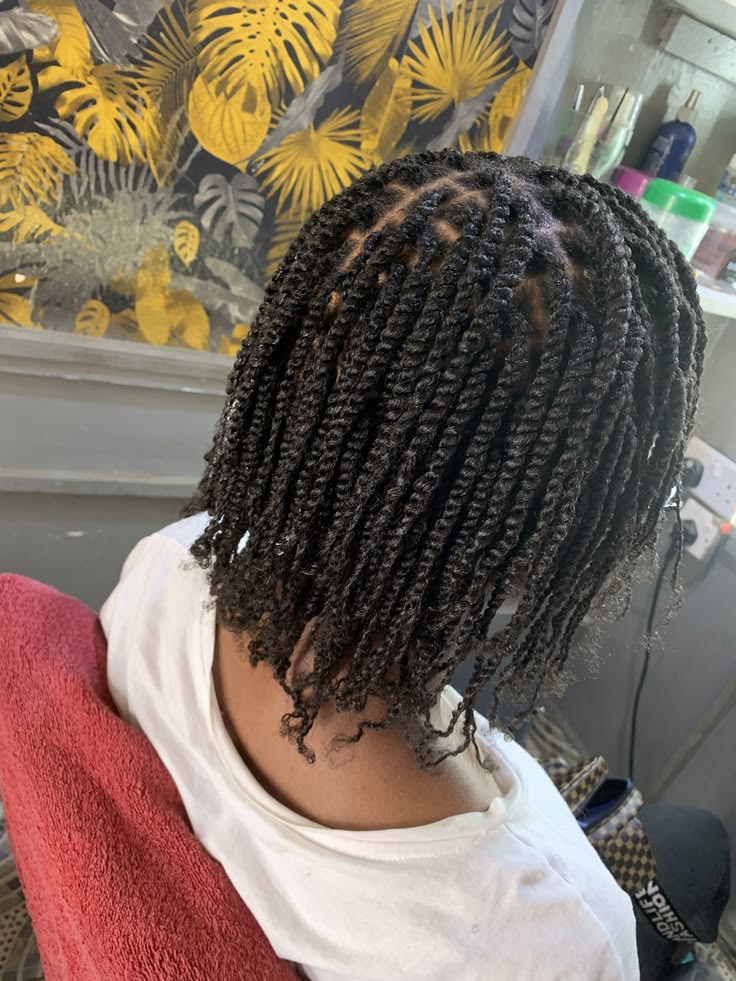
When you do not want to spend half your day installing your hair, chunky twists can be a much better option.
The larger sections make the installation faster, while the finished style still keeps most of your hair organized and reduces the need for daily combing.
Chunky twists also look great when decorated with simple cuffs or beads. You can leave them loose for a relaxed appearance or gather them into an oversized bun.
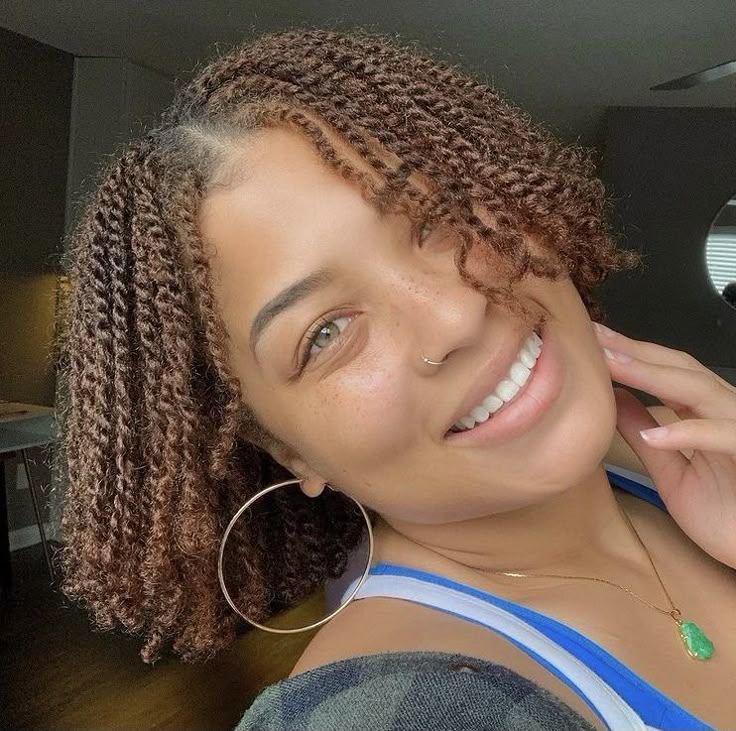
3. Mini Twists
Mini twists take more time to install, but they can give you weeks of styling possibilities.
Once installed, you can wear them down, pull them into a bun, create a half-up style, or experiment with different updos without constantly working directly on your loose hair.
They are particularly useful if you are trying to reduce daily manipulation. Instead of detangling and restyling your strands every morning, you can simply arrange the twists into the look you want.
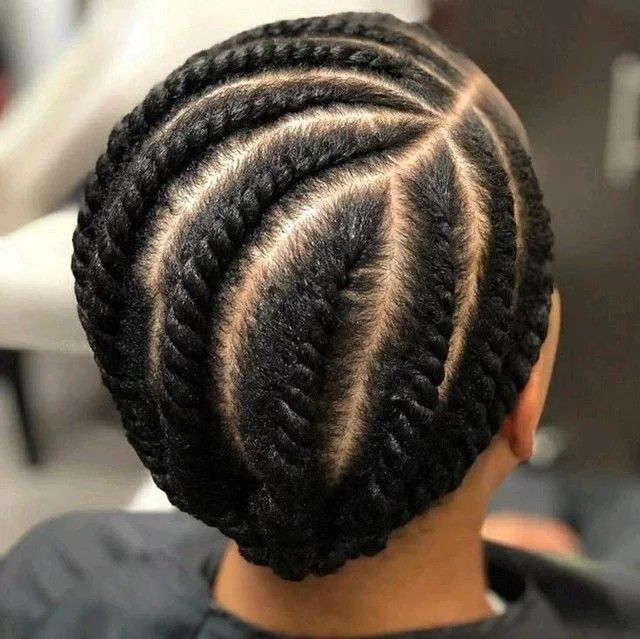
4. Flat Twists
Flat twists are another versatile option for natural hair.
Unlike regular two-strand twists, flat twists sit close to the scalp, which allows you to create interesting patterns and designs. You can send them straight backward, curve them around your head, or combine several sections into an updo.
They are also useful when you want a style that looks neat without adding extensions.
If you enjoy experimenting with twist hairstyles, flat twists can give you an entirely different appearance while still keeping your natural hair contained.
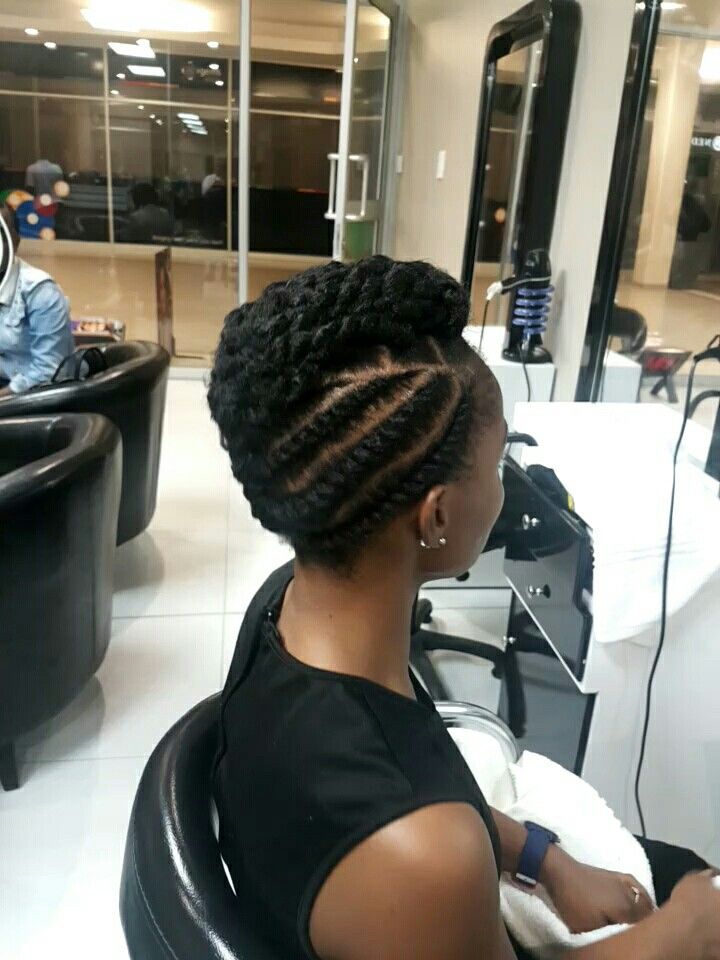
5. Flat-Twist Updo
Take your flat twists one step further by directing them toward an updo.
The twists can create the structure of the hairstyle while the tucked ends keep the rest of your hair secure. You can make the front simple or add a more detailed parting pattern.
This style works particularly well when you want something that looks polished without relying on extensions.
6. Flat-Twist Bun
A flat-twist bun gives you the neatness of a bun while adding texture around the scalp.
Create several flat twists around the front and sides, then gather the remaining hair into a low or medium bun.
Keep the base comfortable rather than pulling everything tightly. A slightly softer finish can actually make the hairstyle look more natural.
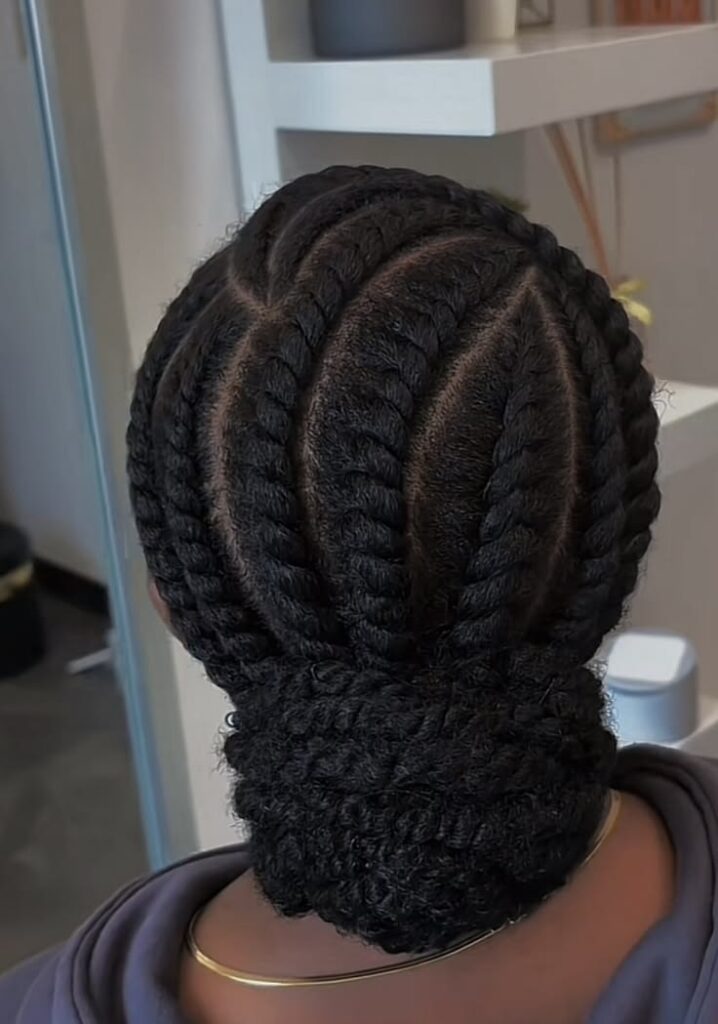
7. Twisted Crown
A twisted crown creates a beautiful shape around the head without requiring a complicated installation.
You can create twists around the front and sides before pinning the ends toward the back. Leave the center full or tuck everything away for a completely secured style.
It is a particularly nice option when you want your hair to look dressed up without adding extensions.
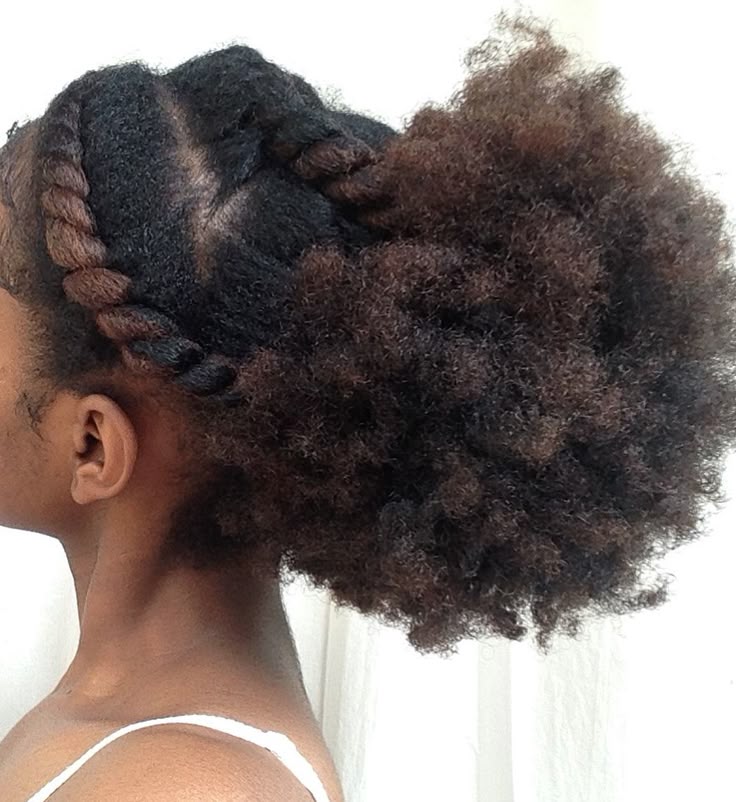
8. Crown Braid
A crown braid wraps around the head and keeps much of your hair tucked away.
You can make the braid thick and noticeable or keep it smaller for a more delicate appearance. The remaining hair can be tucked underneath or gathered into a small bun.
The style also gives you a chance to add a little personality with clips, pins, or subtle accessories.
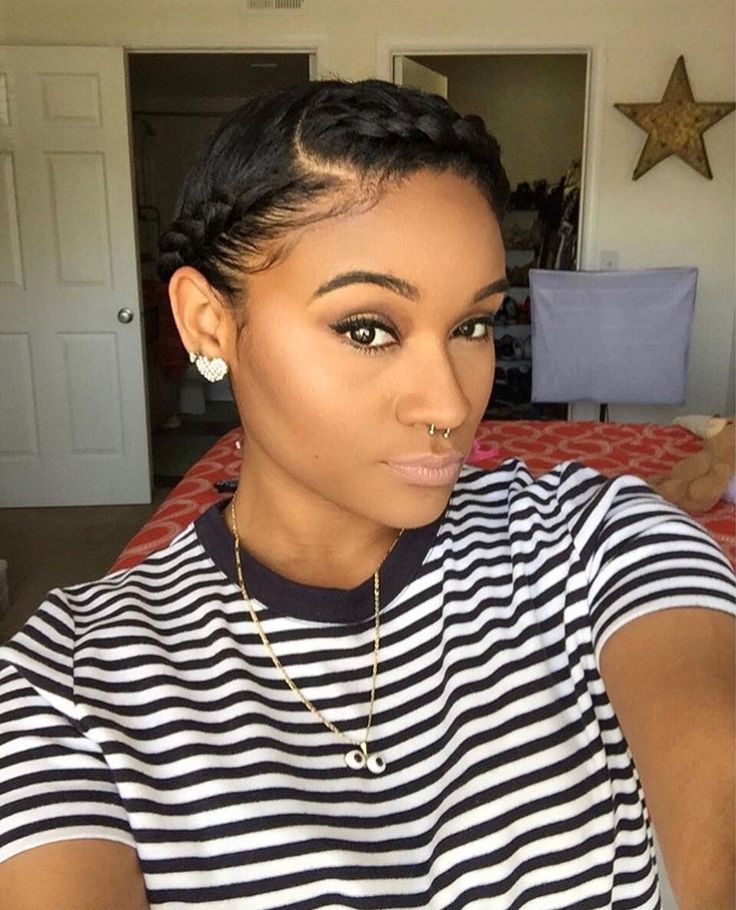
9. Halo Braid
A halo braid creates a similar wrapped effect but gives the hairstyle a softer, rounded appearance.
It can sit close to the hairline or slightly farther back depending on the look you prefer. The rest of the hair can remain tucked underneath.
This is one of those styles that looks much more complicated than it actually needs to be.
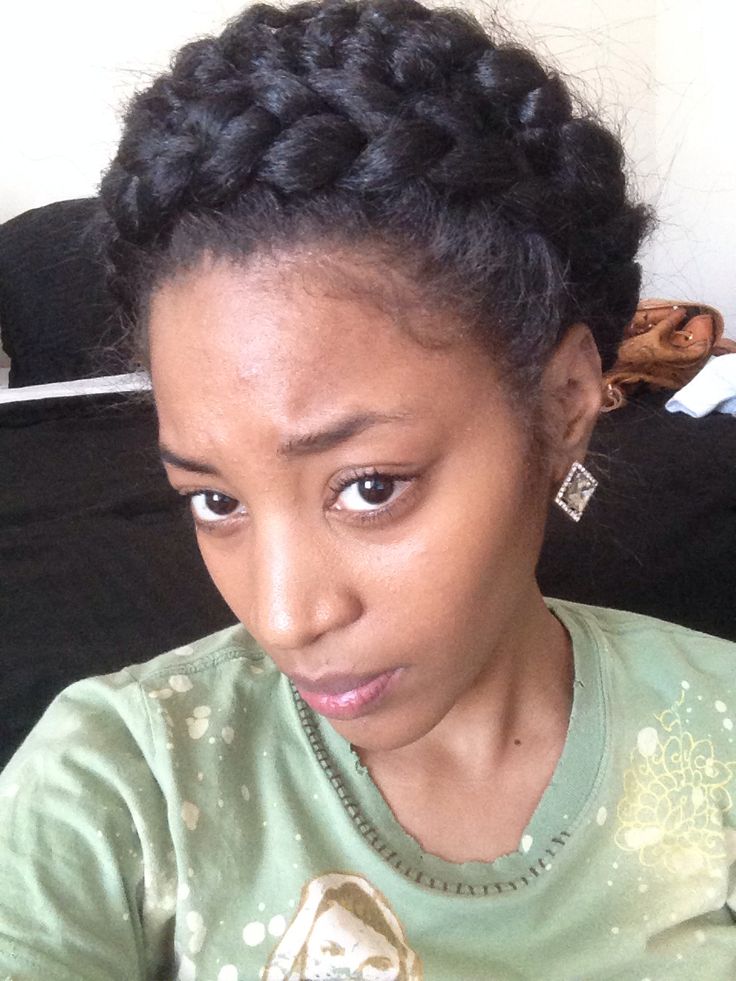
10. Straight-Back Cornrows
Straight-back cornrows are a classic for a reason.
The rows keep your hair neatly organized while making everyday styling much easier. You can choose thick rows if you want a quicker installation or smaller rows for a more detailed look.
The important thing is not to confuse neatness with tightness. Cornrows can look polished without pulling painfully at the scalp.
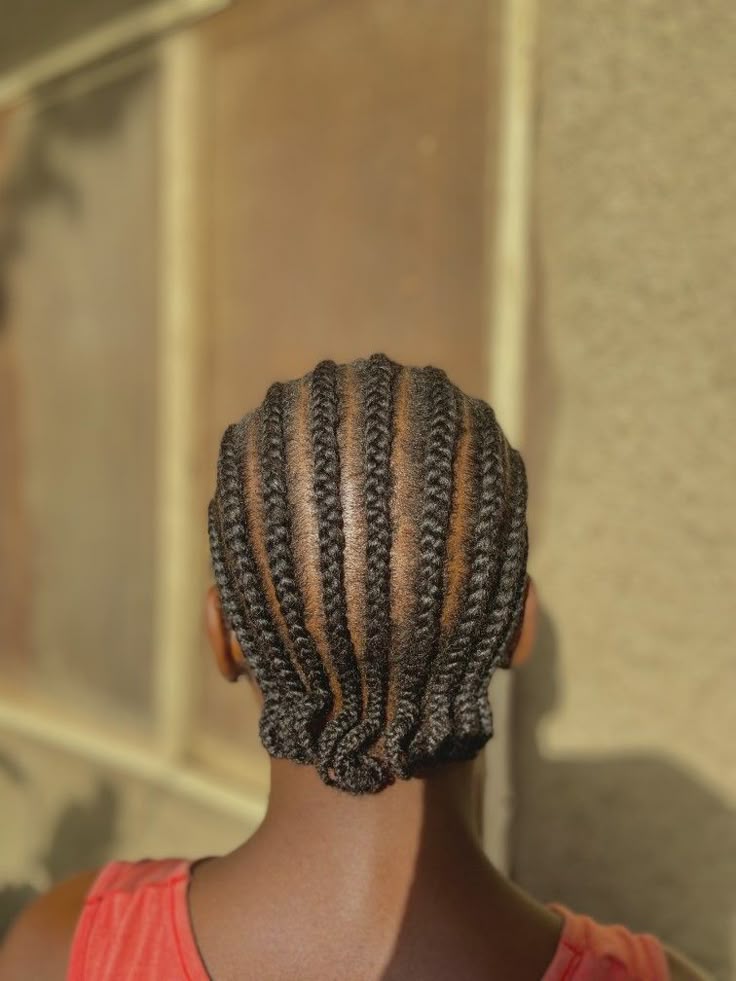
11. Side Cornrows
Instead of directing every row straight backward, angle the cornrows toward one side.
The diagonal movement gives a familiar style a completely different appearance. You can also leave the ends loose, gather them into a bun, or connect the rows into a ponytail.
For anyone who enjoys braids for growth, this is another design worth saving for a future appointment.
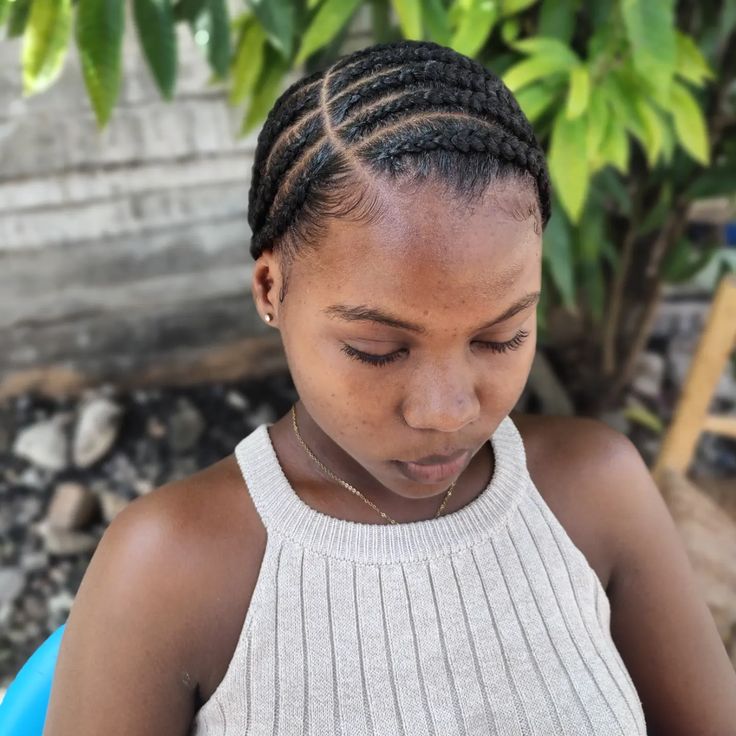
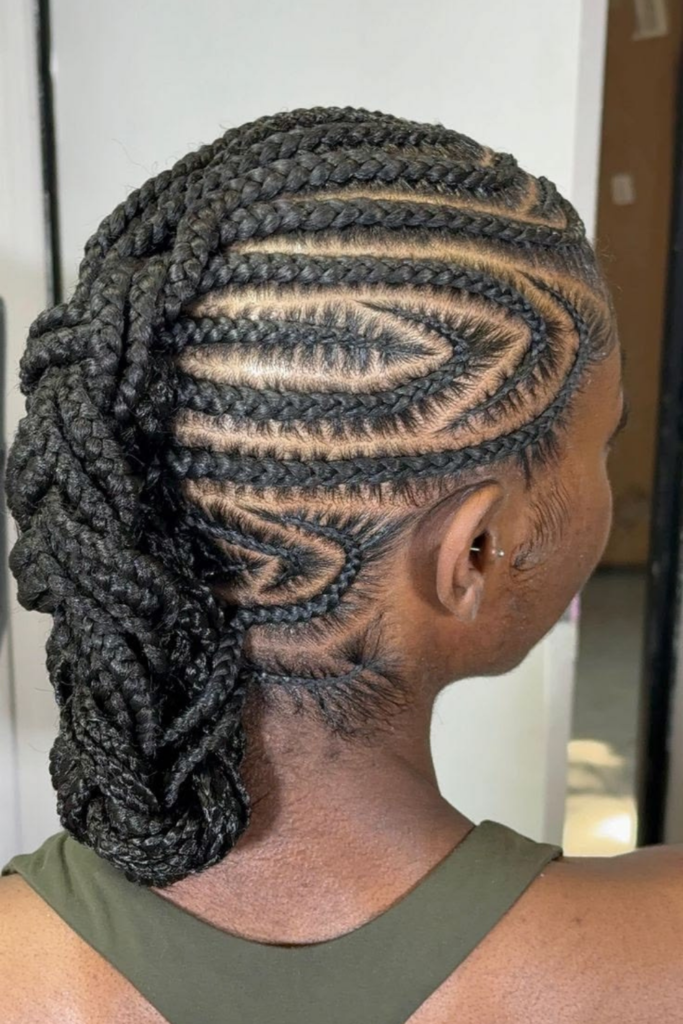
12. Zigzag Cornrows
Zigzag cornrows make the parting itself part of the hairstyle.
Instead of creating straight sections, the stylist can create curves and zigzag patterns that move across the scalp. You can keep the rest of the design simple, so the parting remains the main attraction.
This is a good option when you want a creative style without needing accessories or extra colour.
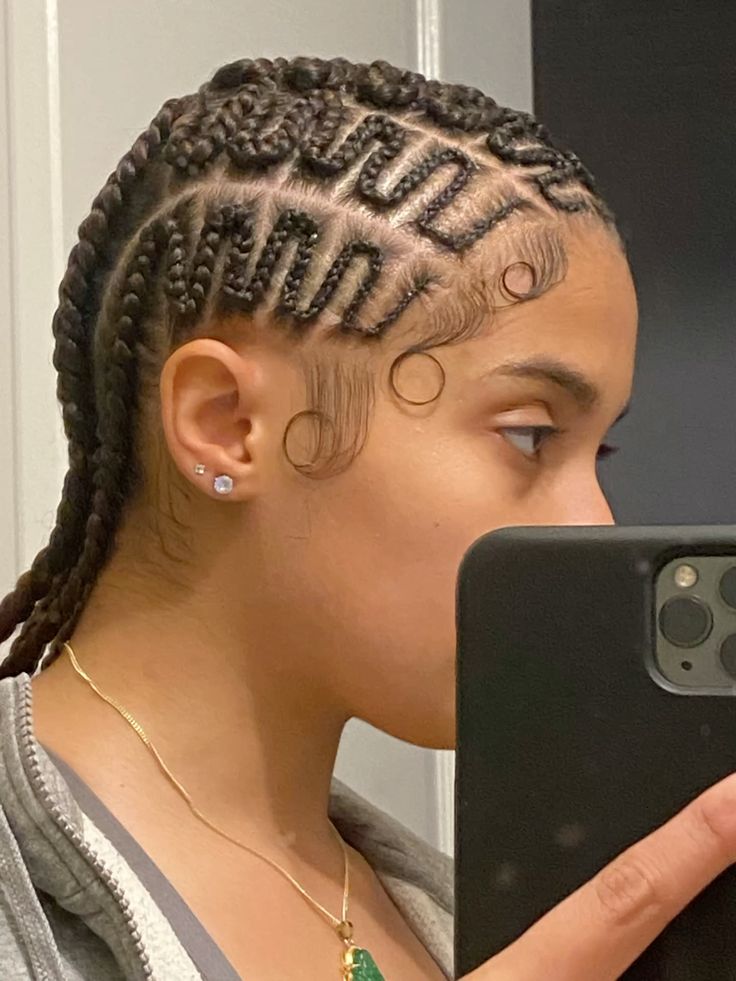
13. Heart Cornrows
A heart-shaped parting can turn a simple cornrow installation into something much more distinctive.
You can create one large heart in the center or use smaller shapes throughout the design. The rest of the cornrows can remain straightforward so the heart pattern stands out.
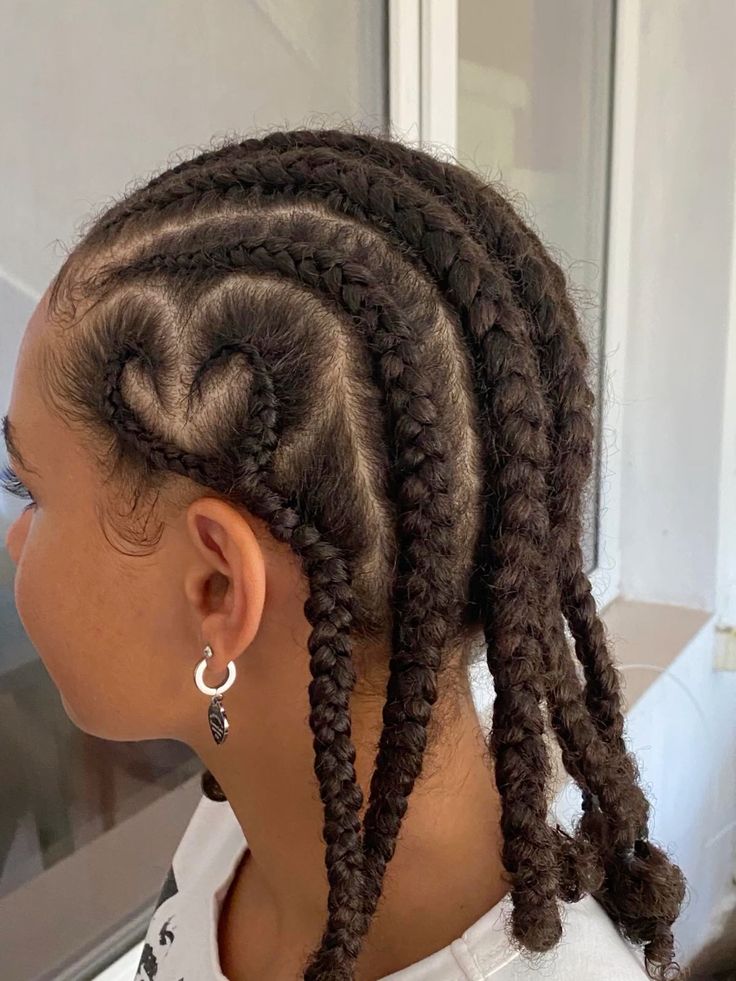
14. Criss-Cross Cornrows
Criss-cross cornrows create movement across the scalp and give the finished style a more intricate appearance.
The sections can cross over one another before continuing toward the back. This makes the hairstyle visually interesting even when you keep the rest of the installation simple.
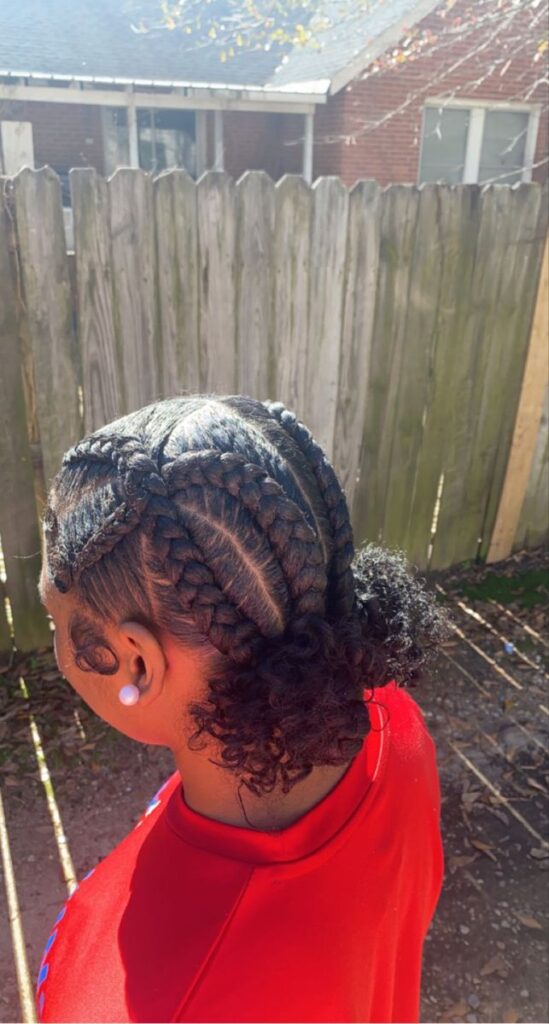
15. Cornrows With Beads
Adding beads can completely change the appearance of basic cornrows.
You can use a few beads at the ends for a subtle finish or incorporate different sizes and colours for something more playful.
Beads are particularly useful when you want your hairstyle to feel personal without changing the actual braid pattern.
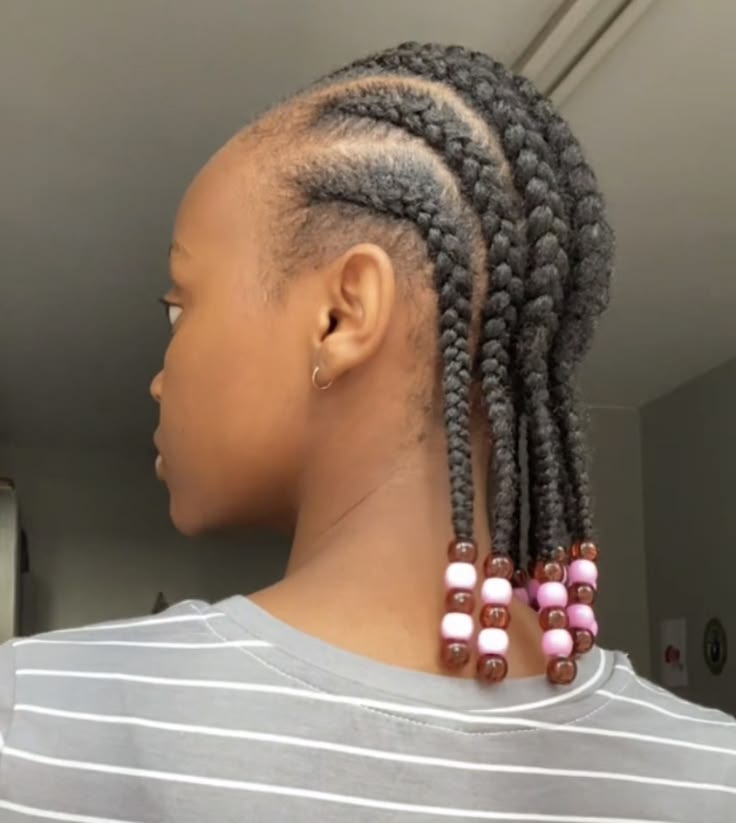
16. Cornrow Ponytail
Cornrows can also become the foundation for a ponytail.
Direct the rows toward the back and gather the remaining hair into a ponytail. You can leave the ponytail textured, braid it, twist it, or wrap it around the base.
If you are trying to improve length retention, keeping the ends contained in the finished style may be more practical than leaving them exposed every day.
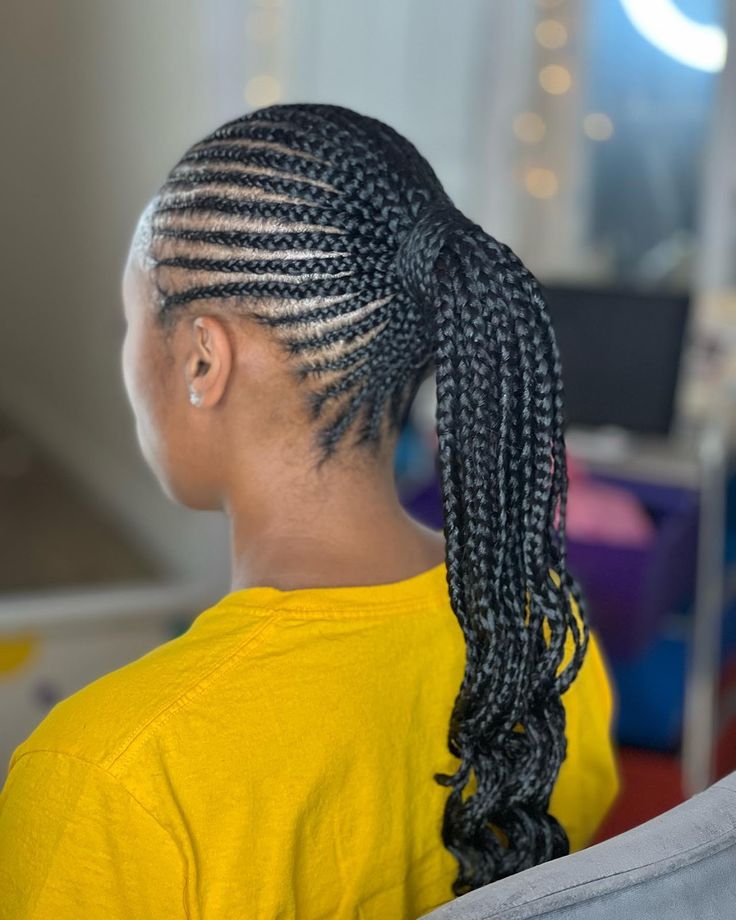
17. Cornrow Bun
Direct the cornrows toward the center of the head and tuck the ends into a bun.
The result is neat without requiring loose hair to be manipulated every morning.
A low bun creates a softer finish, while a higher bun gives you more height.
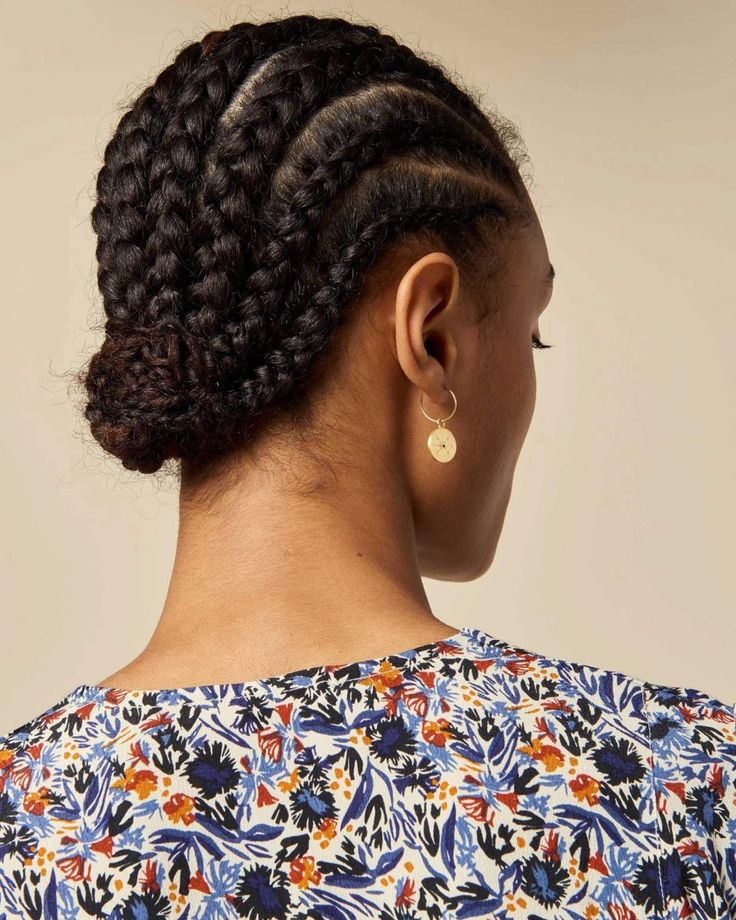
18. Feed-In Braids
Feed-in braids gradually increase in size as additional hair is incorporated into the braid.
The result is a flatter beginning around the roots and a fuller braid toward the ends. You can create straight rows or more creative curved patterns.
They are versatile enough to be worn loose, gathered into a ponytail, or transformed into an updo.
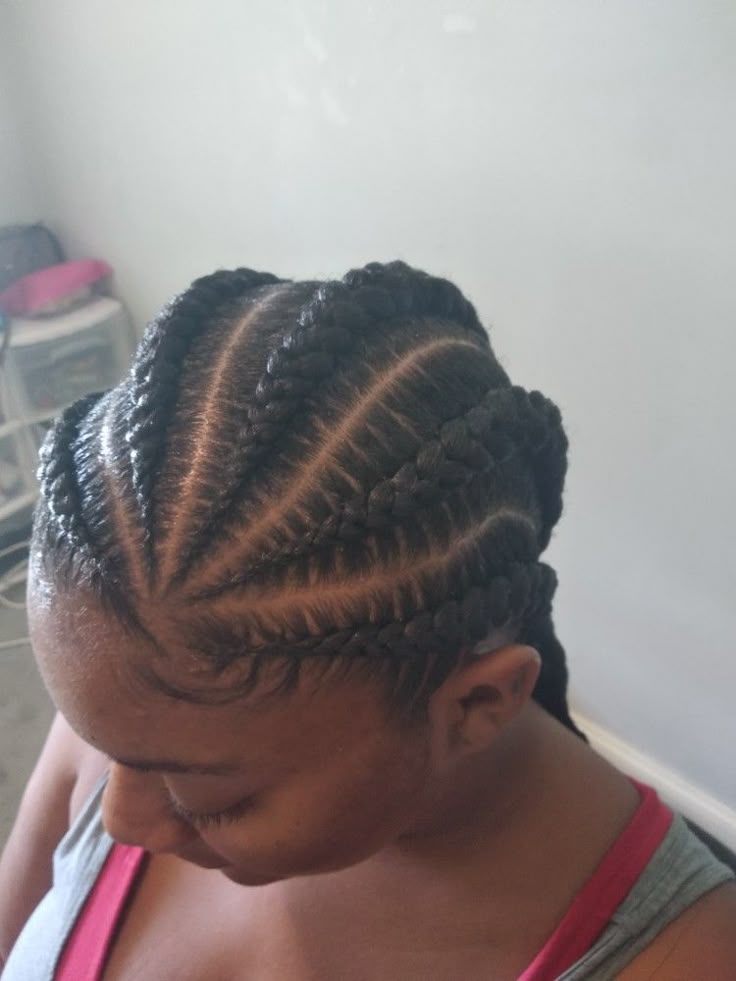
19. Feed-In Ponytail
A feed-in ponytail gives you the neatness of cornrows with the drama of a longer ponytail.
The braids can be directed backward and gathered high on the head, or you can create a lower version for a softer look.
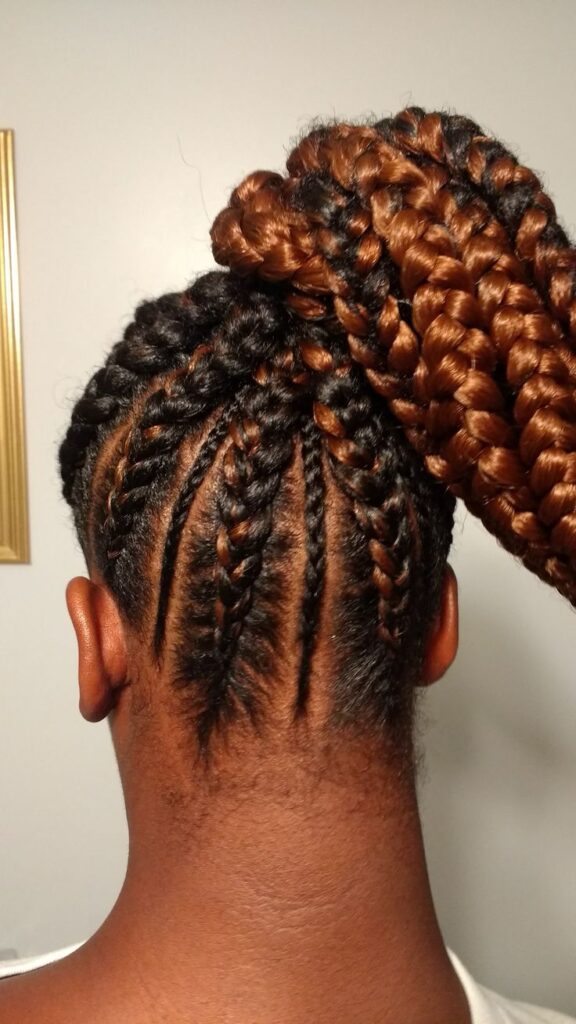
20. Side-Swept Braids
Side-swept braids create a dramatic shape by directing the braids toward one side of the head.
The style works especially well with longer braids because the extra length emphasizes the sweeping movement.
You can also save the look as inspiration when choosing braid-out ideas later, since the direction and parting can influence the resulting texture.
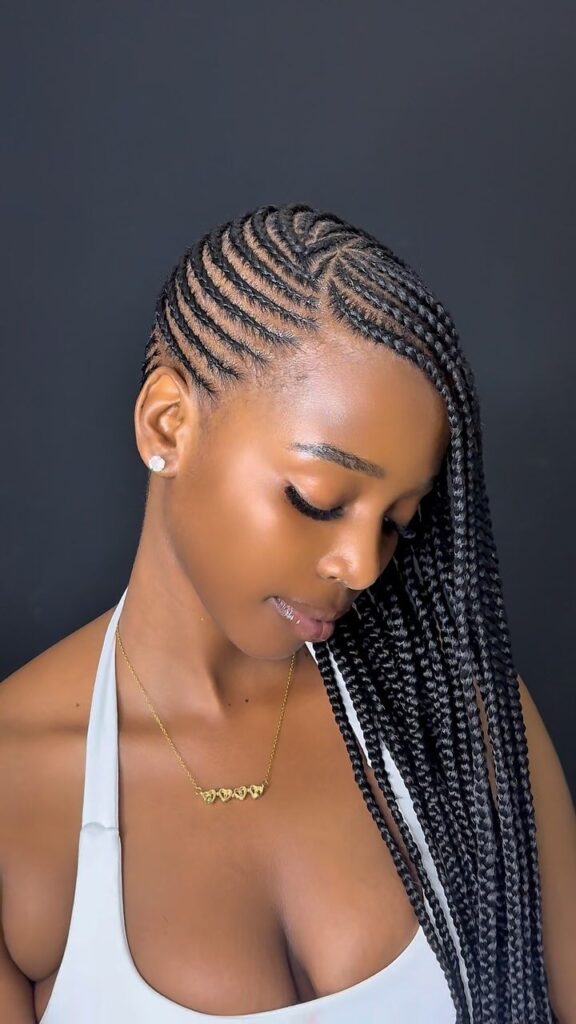
21. Box Braids
Box braids remain one of the most popular protective hairstyles because they offer so much versatility.
They can be short, medium, long, chunky, or small. Once installed, you can wear them loose or turn them into buns, ponytails, half-up styles, and other variations.
The main thing to consider is weight. Longer or very thick extensions can put more stress on your roots, so lighter options may be a better choice for fragile hair.
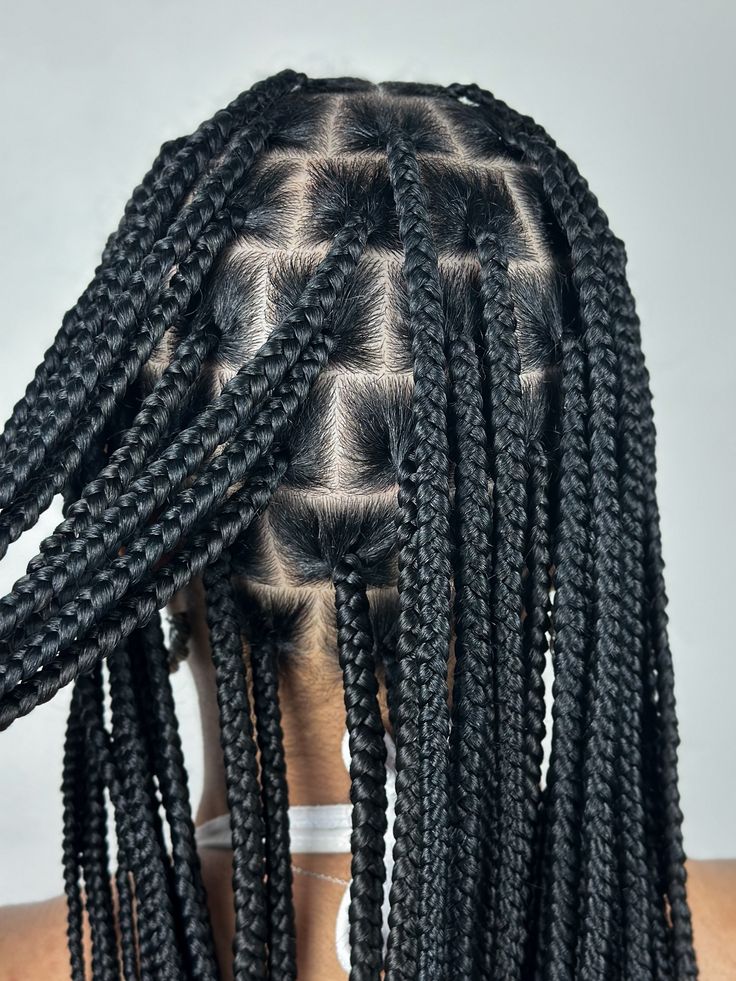
22. Knotless Braids
Knotless braids begin more gradually at the root than traditional box braids.
They create a flatter appearance and can feel less bulky around the scalp. Depending on the length and size, they can also be styled into several different updos.
If you are concerned about hair breakage, pay attention to the weight of the extensions and how tightly the braids are installed.
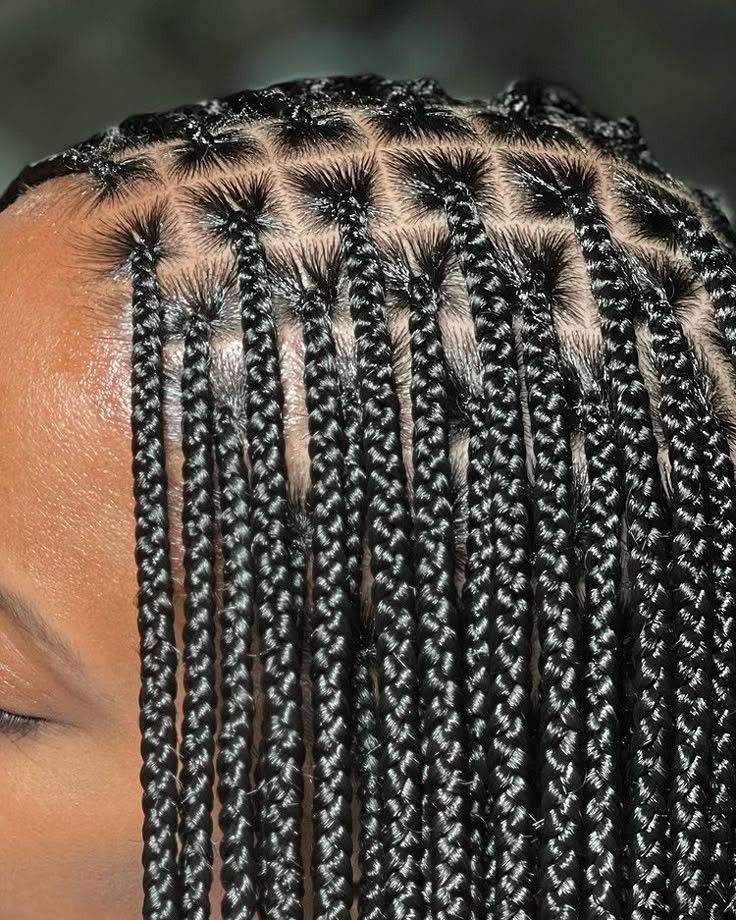
23. Short Box Braids
Short box braids are a great alternative when you like the look of braids but do not want a lot of length.
A bob-length installation is lighter and easier to move around. You can also style the braids into a small half-up bun or leave them loose.
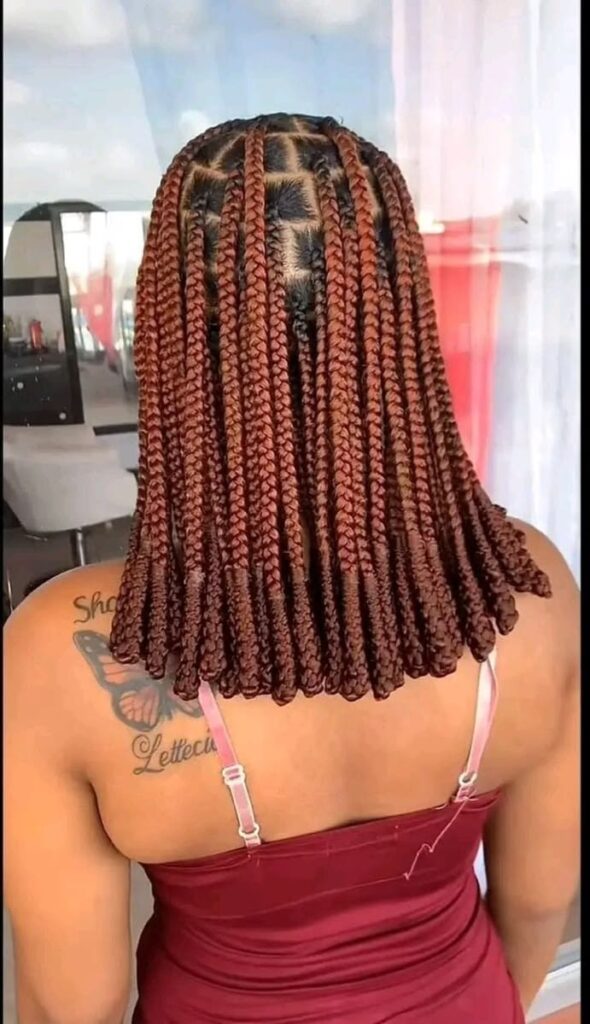
24. Braided Bob
A braided bob gives you a shorter silhouette while keeping the convenience of a braided style.
You can use a middle part for a classic look or move the part to one side for something more relaxed.
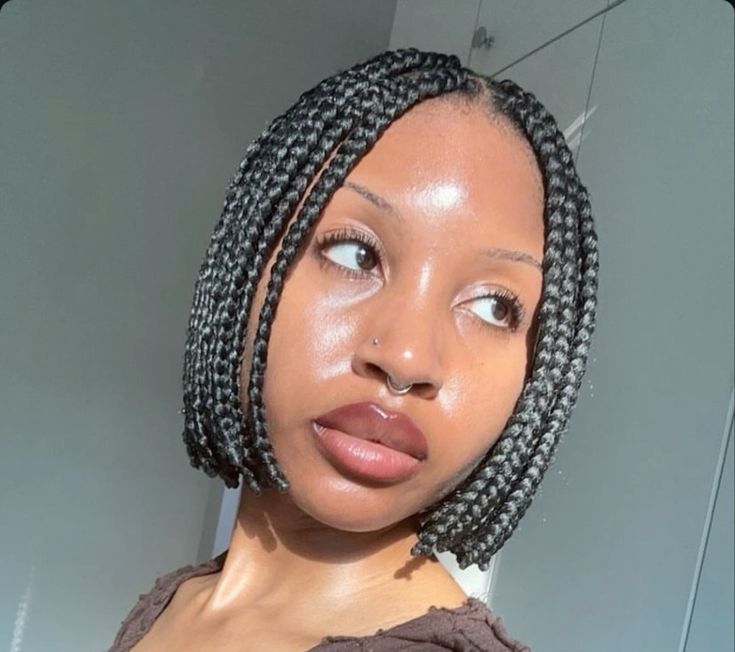
25. Braided Space Buns
Divide your braids into two sections and wrap each side into a bun.
The style feels playful and gives you an easy way to transform existing braids without taking them down.
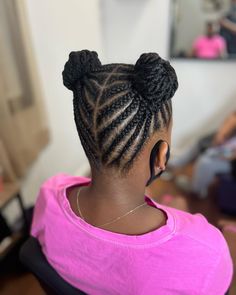
26. Braided Mohawk
Gather your braids toward the center of your head to create a mohawk-inspired shape.
You can pin the braids upward or create several raised sections for additional height.
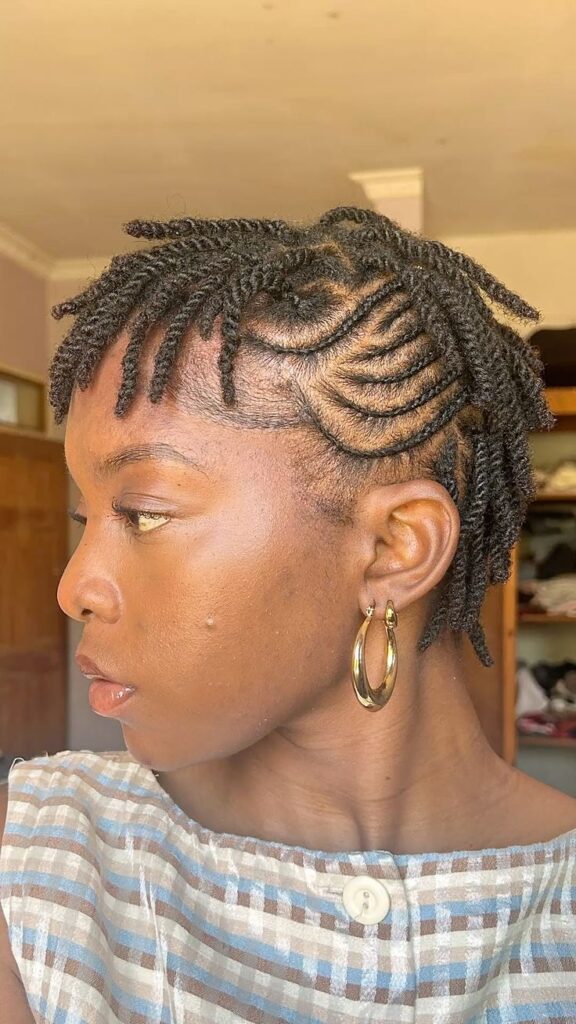
27. Braided Crown Updo
Wrap your braids around the crown and secure them into an updo.
This is a simple way to transform long braids into something that looks completely different from the original installation.
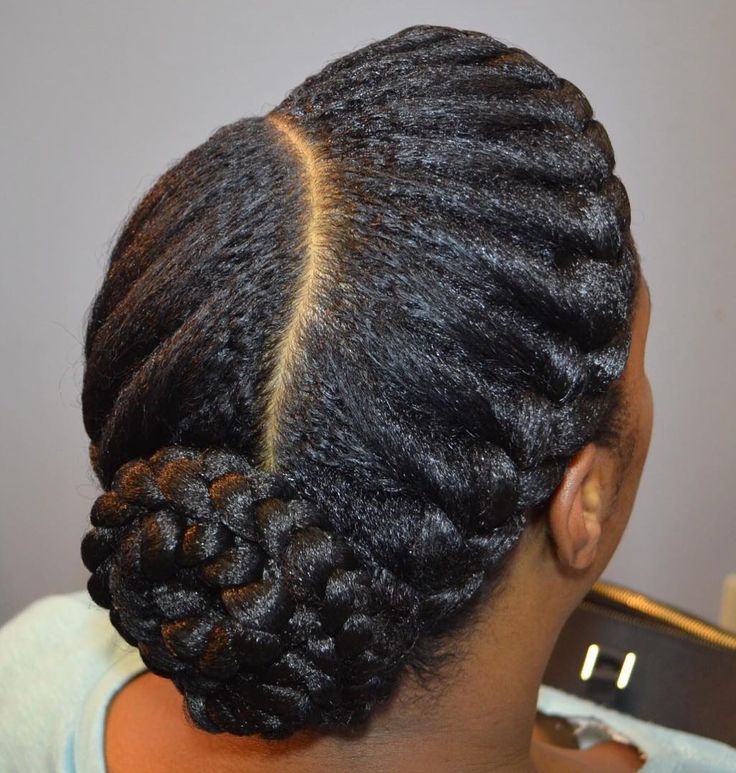
28. Crochet Braids
Crochet styles give you the opportunity to experiment with different textures while keeping your natural hair underneath.
You can choose curly, kinky, coily, wavy, or braided crochet hair depending on the look you want.
They can also be useful when you want to take a break from frequent manipulation without committing to traditional braids.
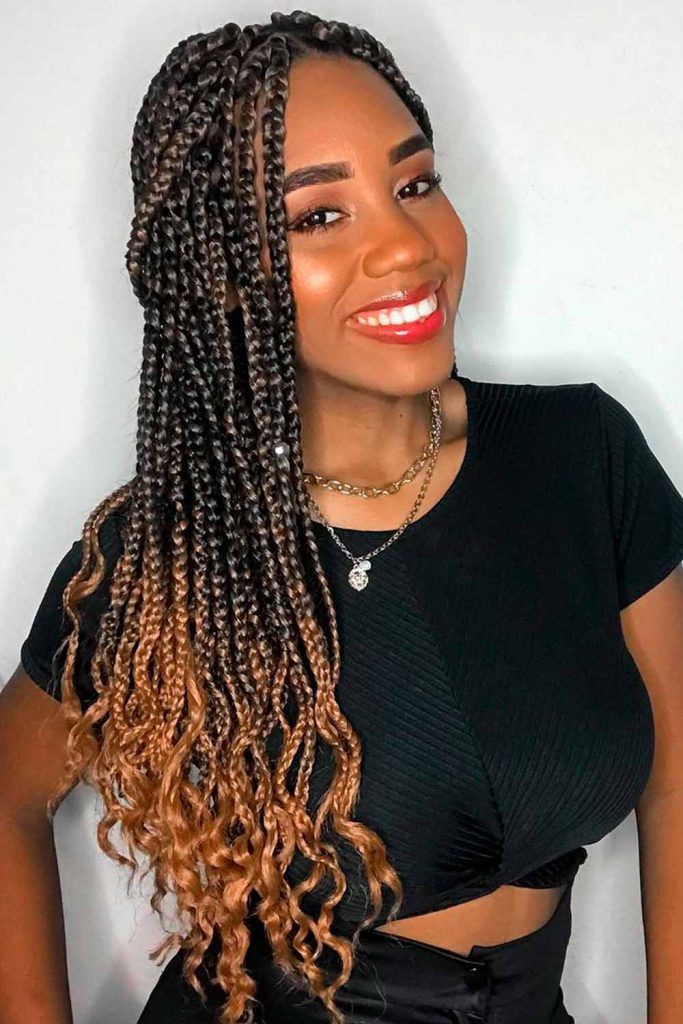
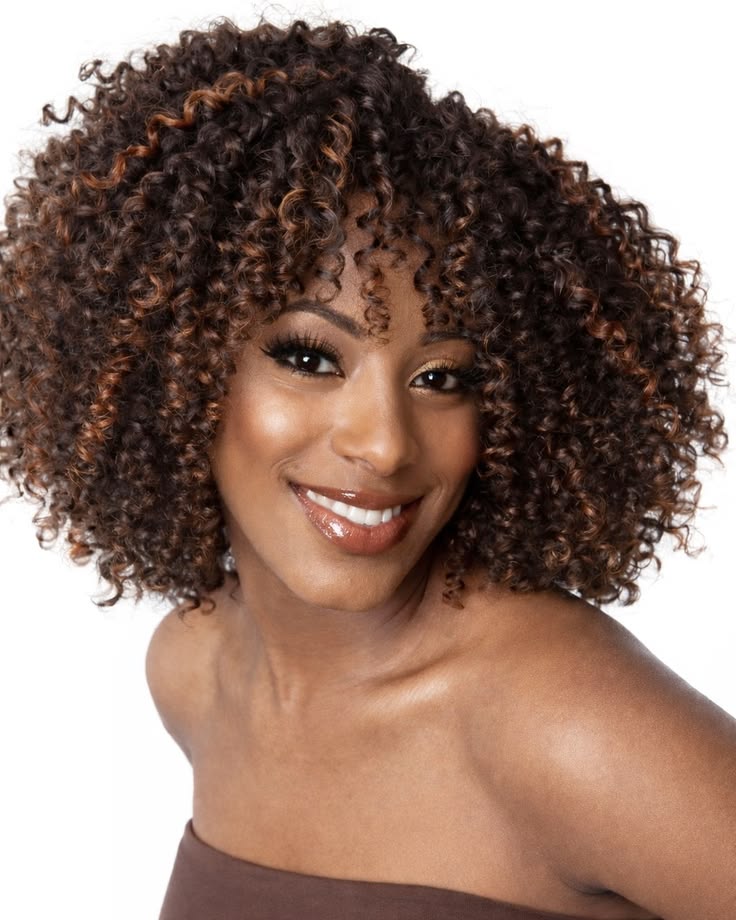
29. Crochet Afro
A crochet afro gives you lots of volume while allowing your natural hair to remain tucked underneath.
Choose a texture that matches the appearance you like and make sure the installation does not create excessive tension at the roots.
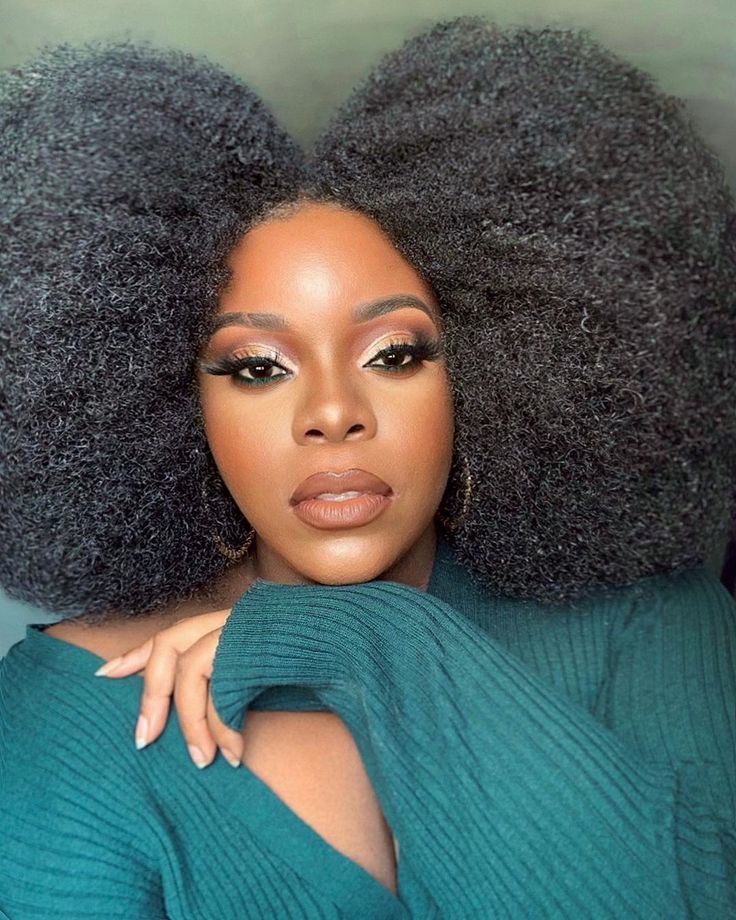
30. Crochet Curls
Curly crochet extensions can give you a completely different look without requiring you to manipulate your natural hair every morning.
There are many curl patterns available, so you can choose something soft and loose or a texture that closely resembles a tighter natural curl.
31. Faux Locs
Faux locs let you experiment with the appearance of locs without permanently forming them in your natural hair.
They can be worn loose, gathered into buns, or styled into ponytails. Because faux locs can become quite heavy, choosing an appropriate length and weight matters.
If you have been considering locs on 4C hair, faux locs can also let you explore the overall aesthetic before making a permanent decision.
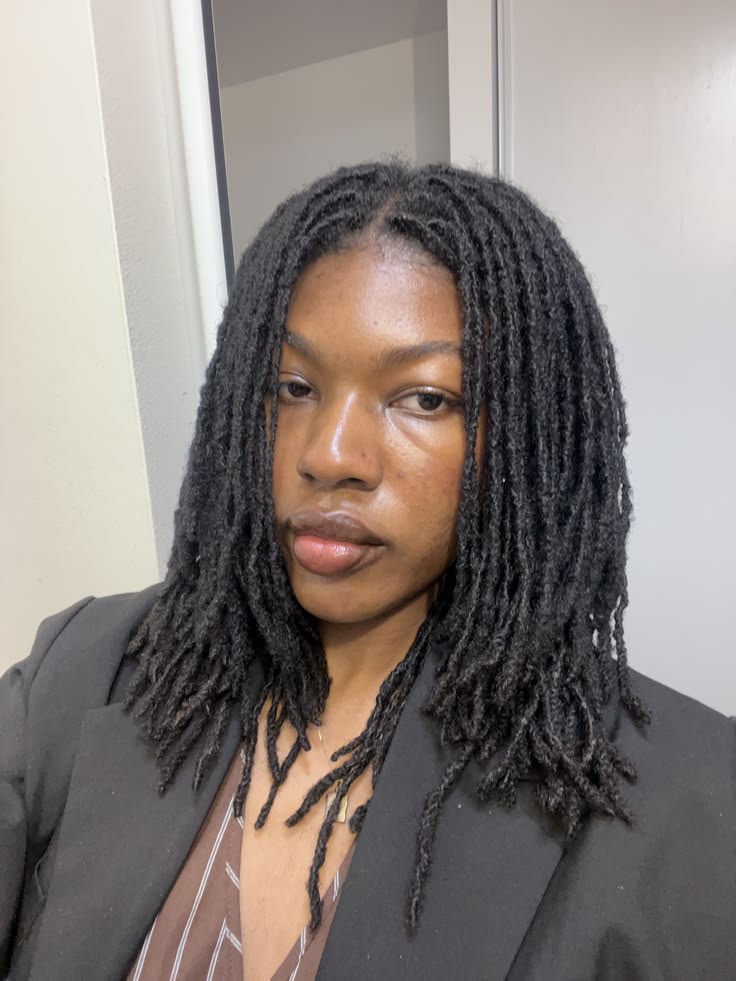
32. Short Faux Locs
Short faux locs create a bob-like shape and can feel more manageable than very long installations.
They are also easy to accessorize and can be styled with simple clips or scarves.
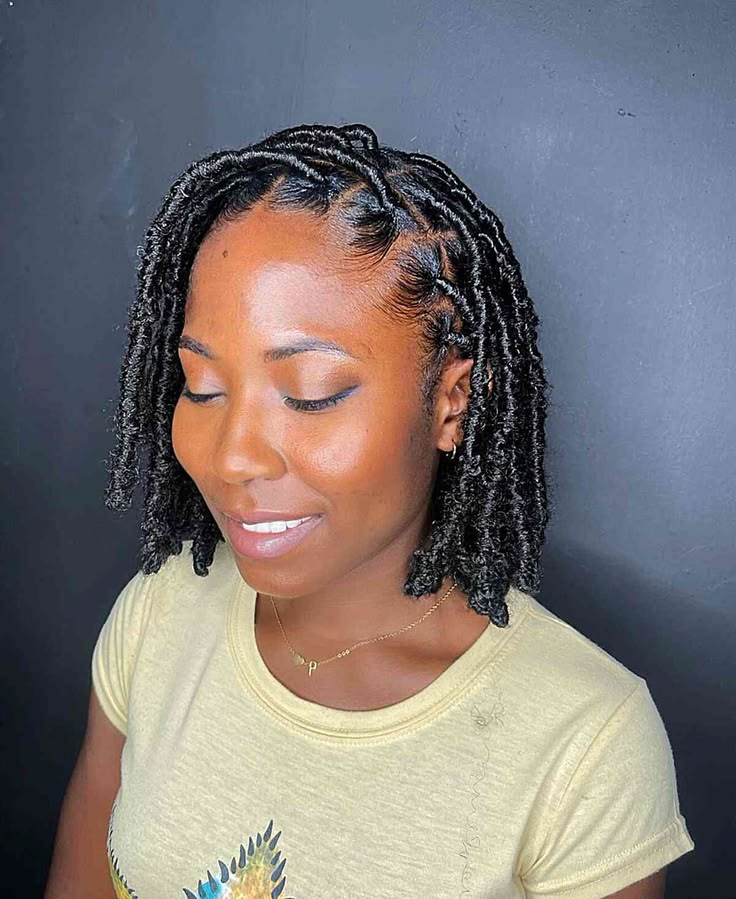
33. Faux Loc Bun
Gather faux locs into a bun when you want a more elegant variation.
The texture of the locs naturally creates volume, so the finished bun can look substantial without complicated styling.
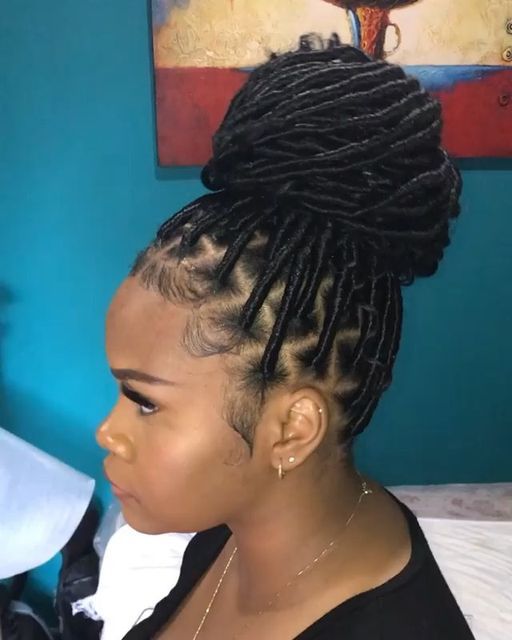
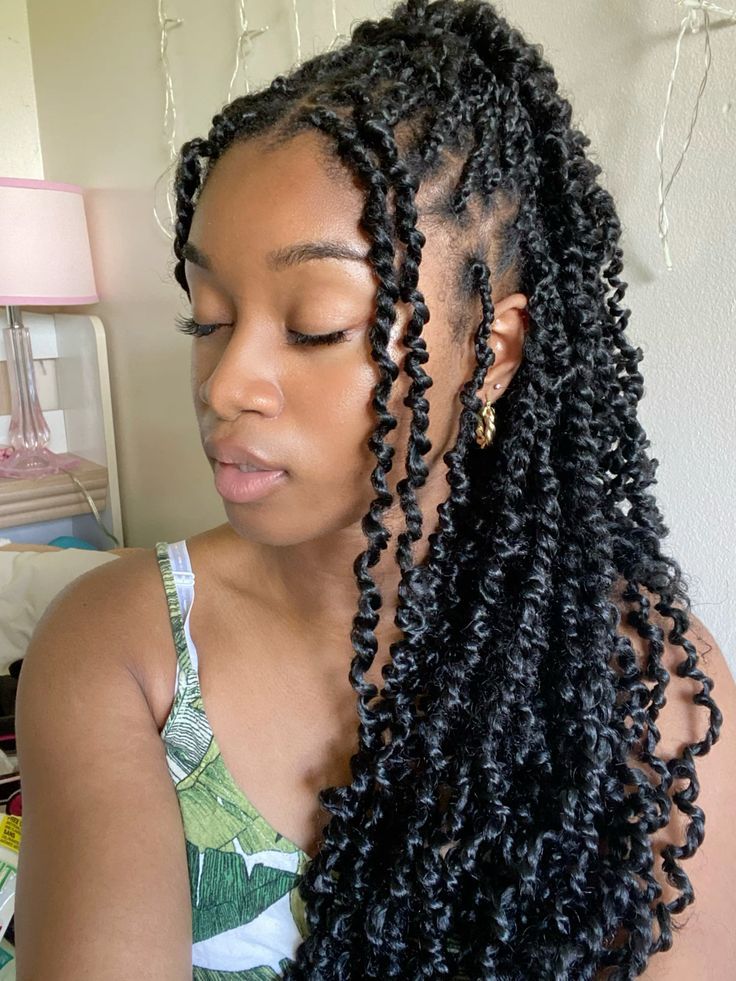
34. Passion Twists
Passion twists have a soft, textured appearance that makes them a popular choice when you want something less structured than traditional braids.
They can be worn loose or gathered into buns and ponytails.
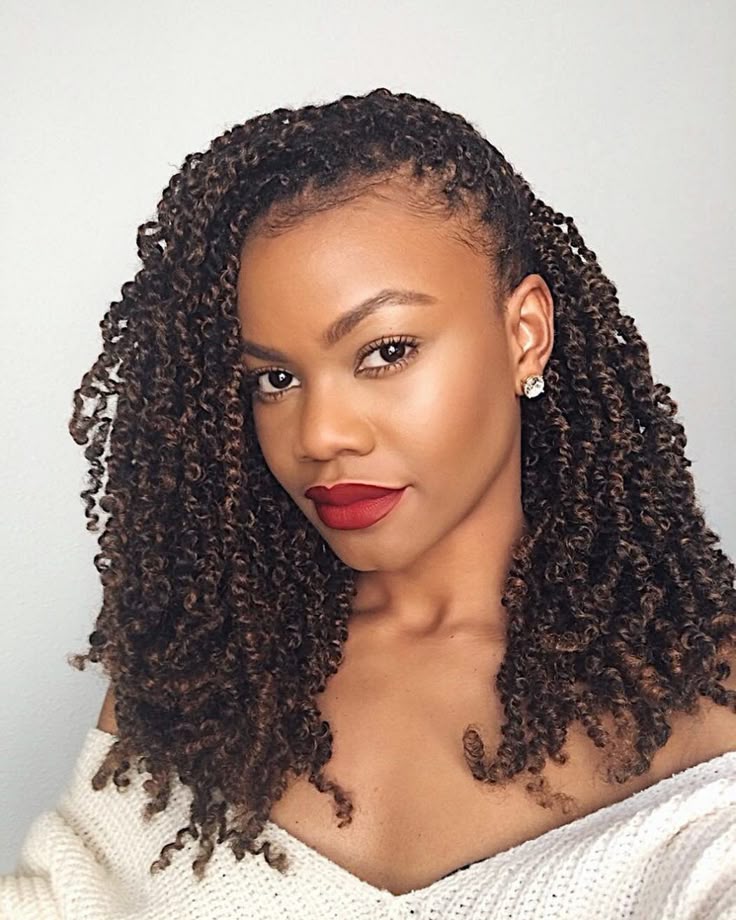
35. Spring Twists
Spring twists have a compact, textured appearance and can create a fun change from regular two-strand twists.
Their shape gives you plenty of volume without requiring you to leave your natural hair loose.
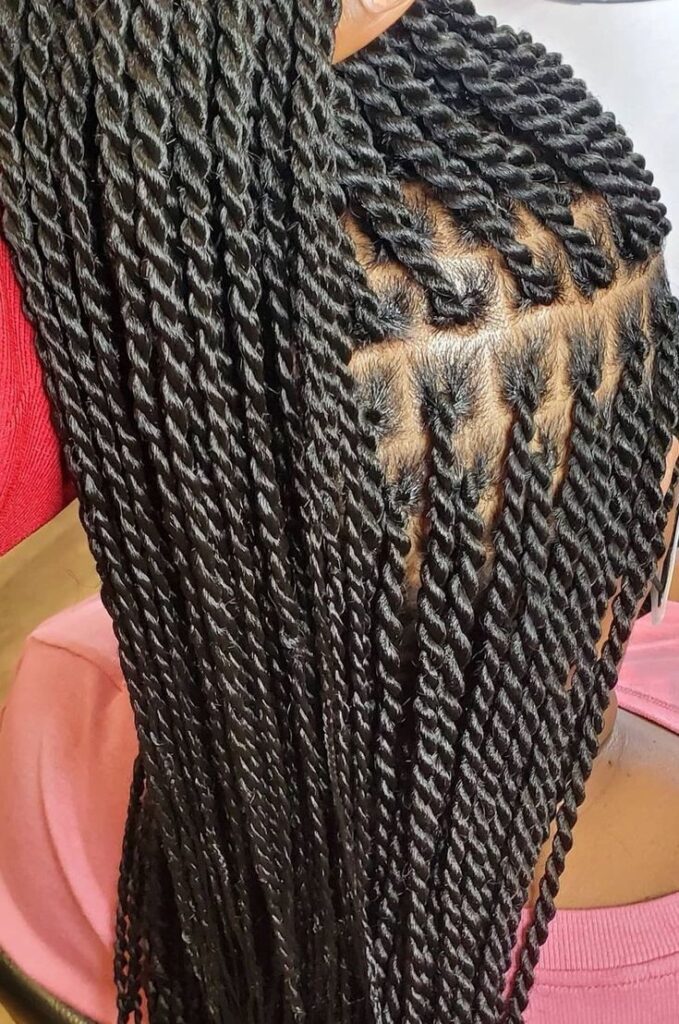
36. Senegalese Twists
Senegalese twists have a smoother, more polished appearance.
They can be worn long or short and can easily be gathered into buns or ponytails when you want to change the look.
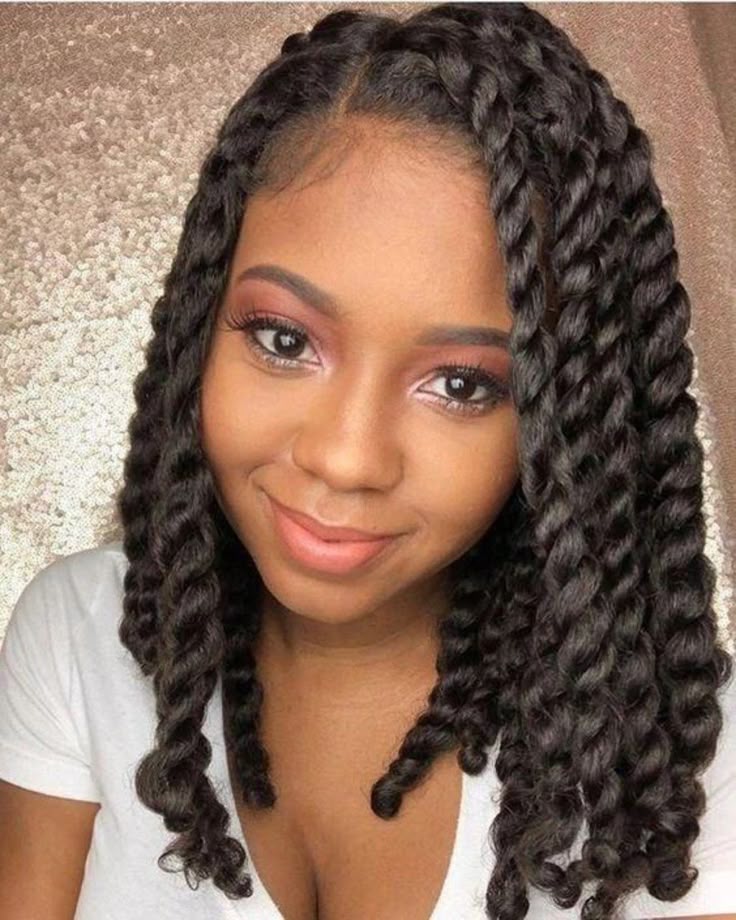
37. Havana Twists
Havana twists are thicker and have a beautiful rope-like appearance.
Their size also makes it easy to create large buns and other dramatic updos.
38. Marley Twists
Marley twists have a textured finish that works beautifully with natural hair aesthetics.
Their texture gives buns and updos extra volume, while the twists themselves keep your hair organized.
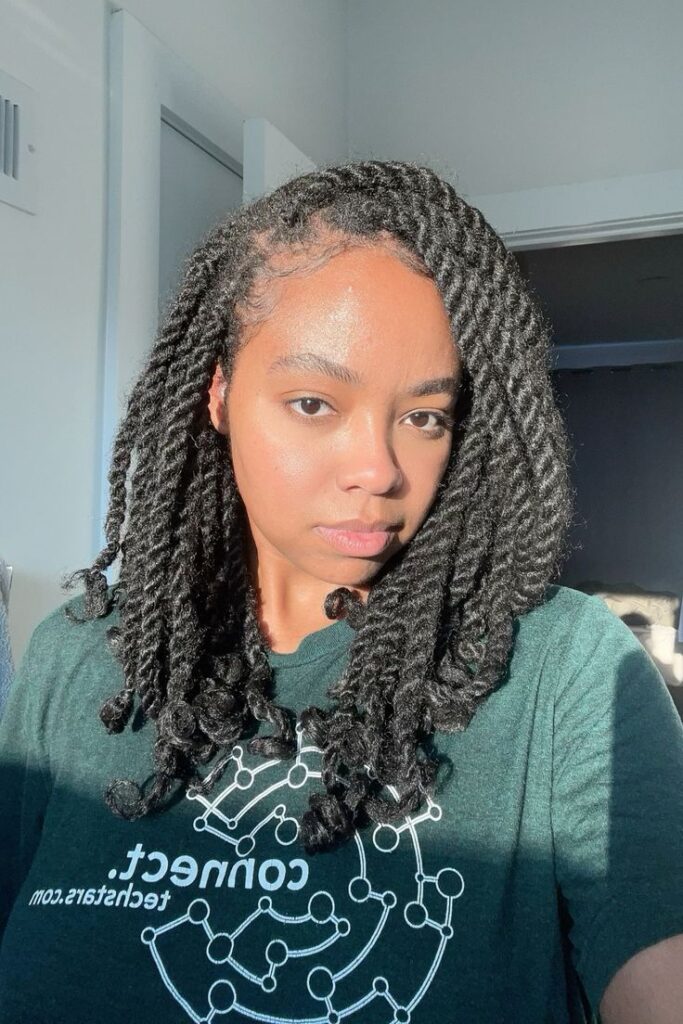
39. Rope Twists
Rope twists create a sleek, elongated appearance and can be worn in several different ways.
Leave them long and loose or gather them into a high bun when you want to change things up.
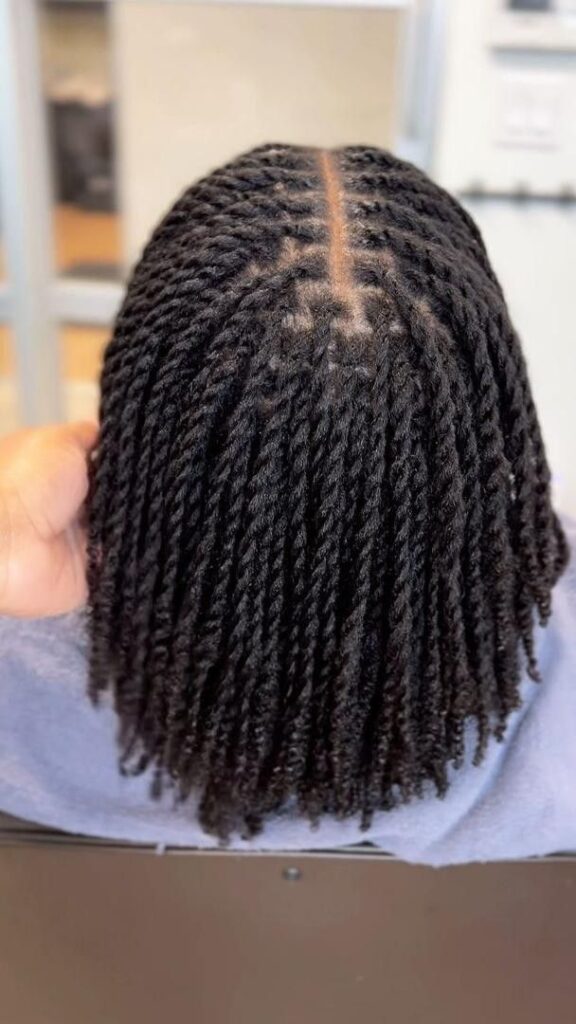
40. Senegalese Twist Bun
Gather Senegalese twists into a high bun for an elegant updo.
The smoother texture makes the bun look polished, while the twists provide plenty of visual interest.
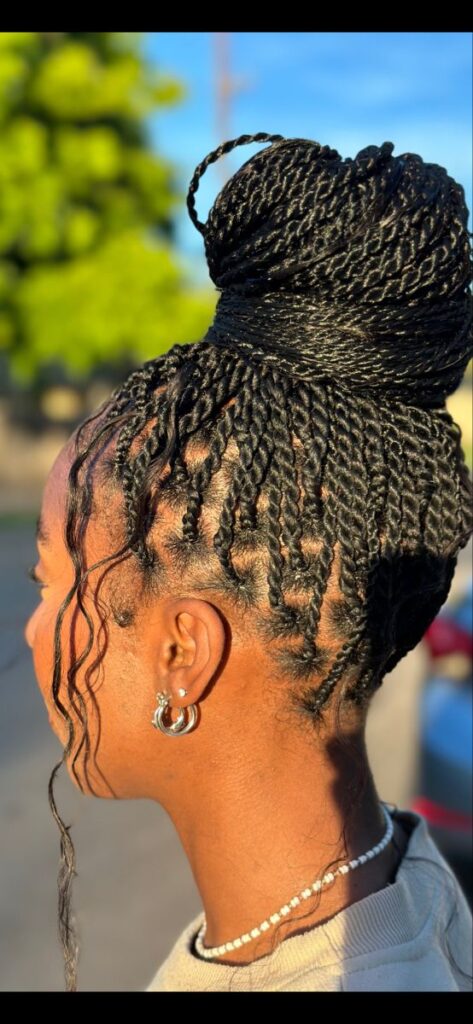
41. Passion Twist Ponytail
A passion twist ponytail is an easy way to change an existing twist installation.
Gather the twists toward the crown and secure them gently. Leave the ponytail full for a relaxed finish or wrap part of the twists around the base.
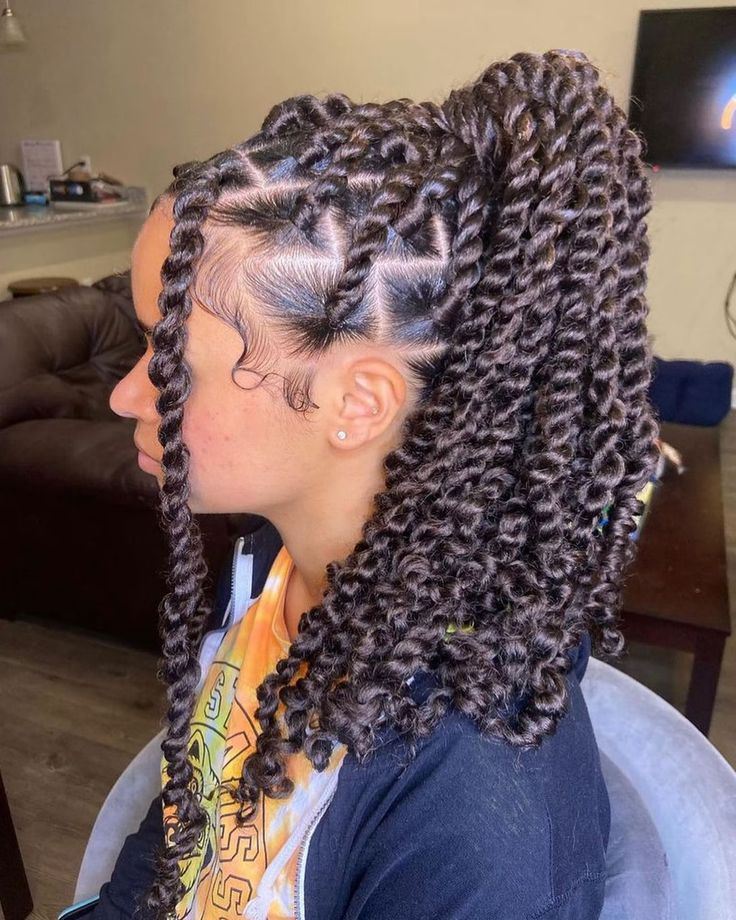
42. Twist Half-Up Bun
Gather the upper section of your twists into a bun while leaving the rest loose.
This gives you a relaxed style while keeping some hair away from your face.
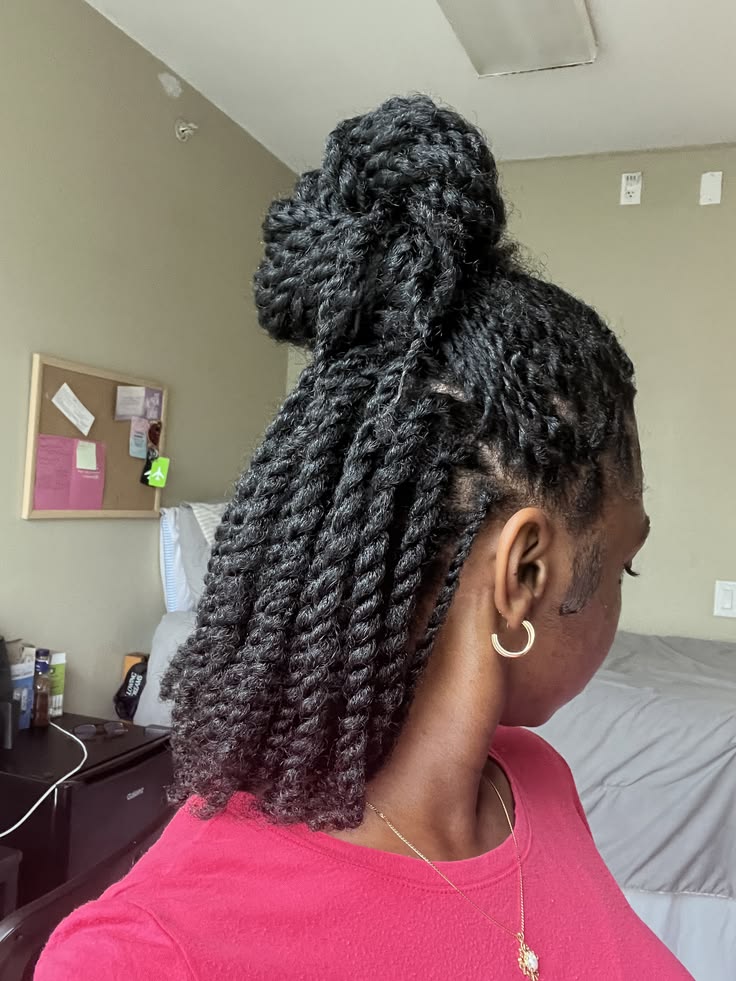
43. Twist Ponytail
A simple twisted ponytail is easy to create once your hair is already installed in twists.
Gather everything toward the back and secure it with a soft band. Avoid making the base excessively tight.
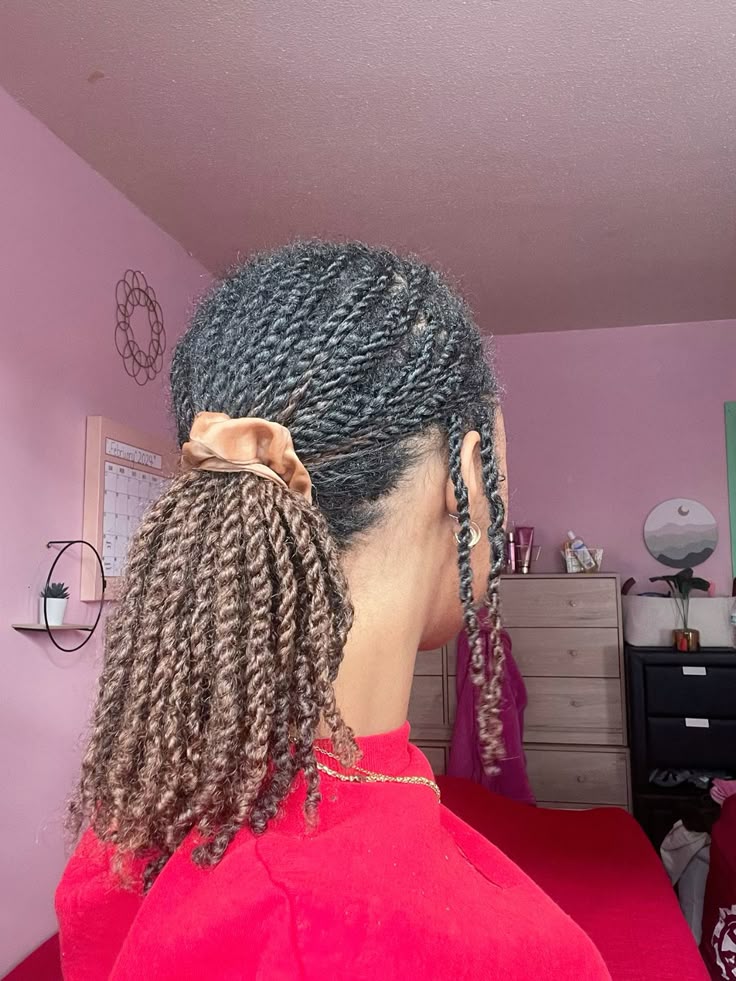
44. Bantu Knots
Bantu knots keep individual sections compact and secured close to the head.
They can be worn as the final hairstyle or unravelled later to create a textured finish.
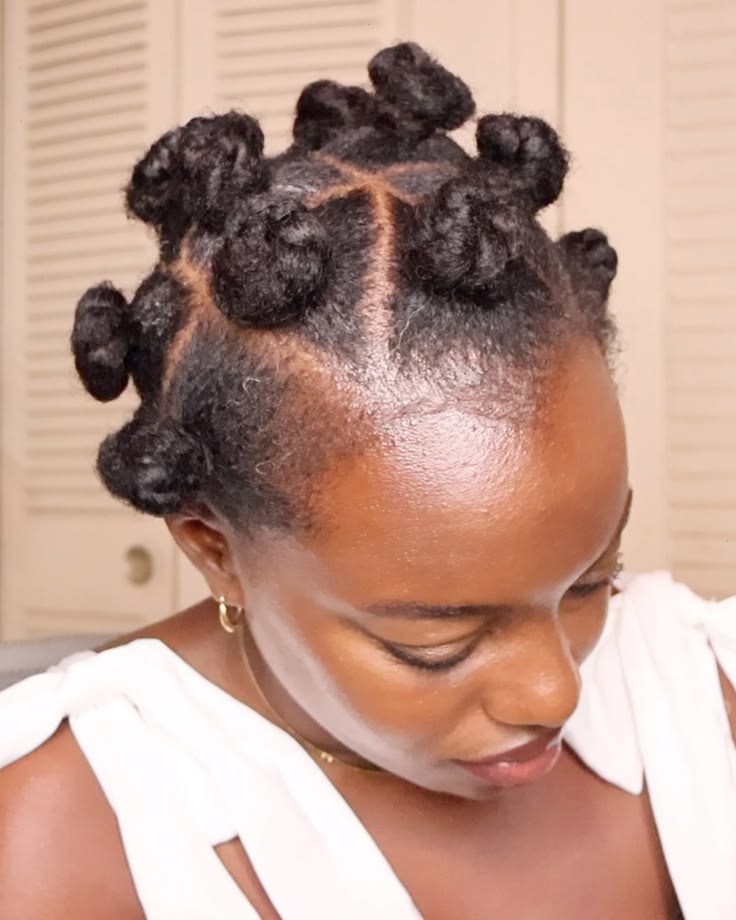
45. Bantu Knot Updo
Instead of leaving every knot separate, arrange them into a larger updo.
The result has a sculptural appearance and gives you a hairstyle that feels different from the usual bun or braid.
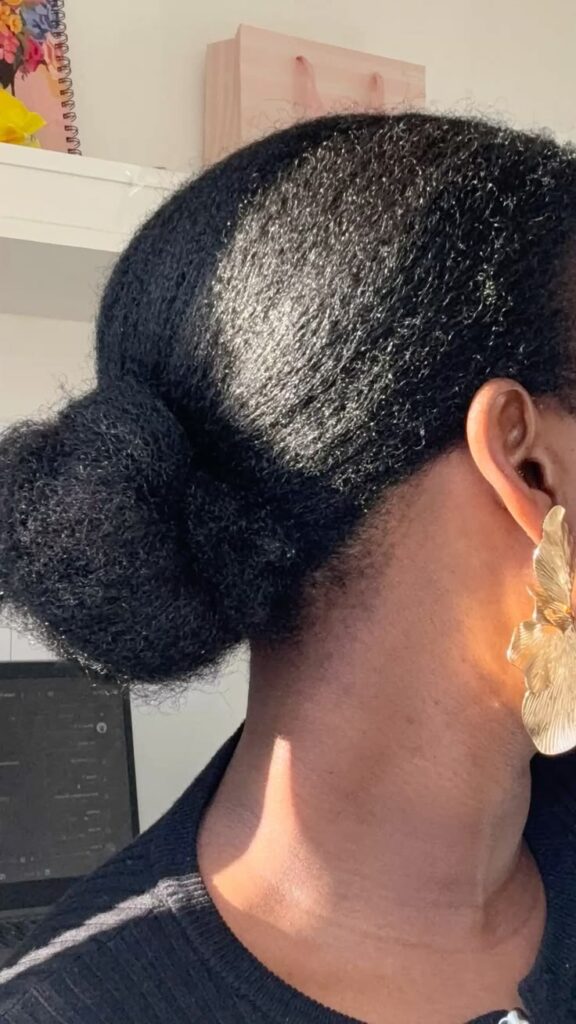
46. Low Bun
A low bun is one of the simplest ways to tuck your ends away.
Create the bun gently at the nape of the neck and avoid repeatedly brushing the same area to make it perfectly smooth.
If your goal is hair growth, a simple style like this can help reduce the amount of daily manipulation your strands receive.
47. High Bun
Gather your hair toward the crown and tuck the ends into a bun.
A high bun can look polished with a defined part or more relaxed when you allow some natural texture to remain visible.
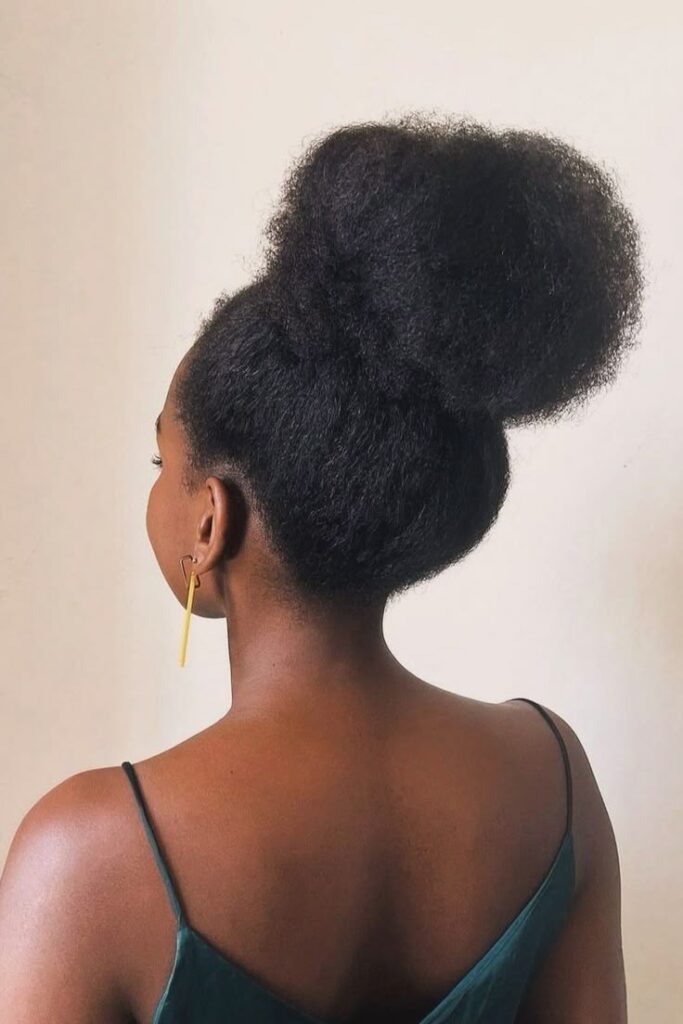
48. Tucked Afro
Shape your afro and tuck the ends underneath before securing the style with pins.
This creates the appearance of a rounded updo while keeping the ends hidden.
49. Faux Bob
A faux bob lets you enjoy the appearance of shorter hair without cutting your strands.
Tuck the ends underneath and secure them with pins. A side part can give the style a particularly elegant shape.
50. Side Bun
Move your hair toward one side before creating the bun.
That small change gives an otherwise familiar hairstyle an asymmetrical shape.
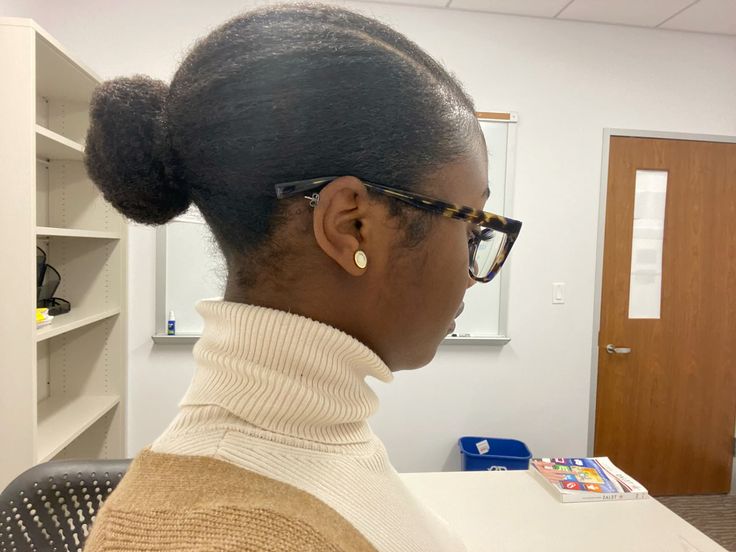
51. Low Side Chignon
A low-side chignon creates a more refined version of a simple bun.
It works particularly well when you want your hair secured while still keeping the final look sophisticated.
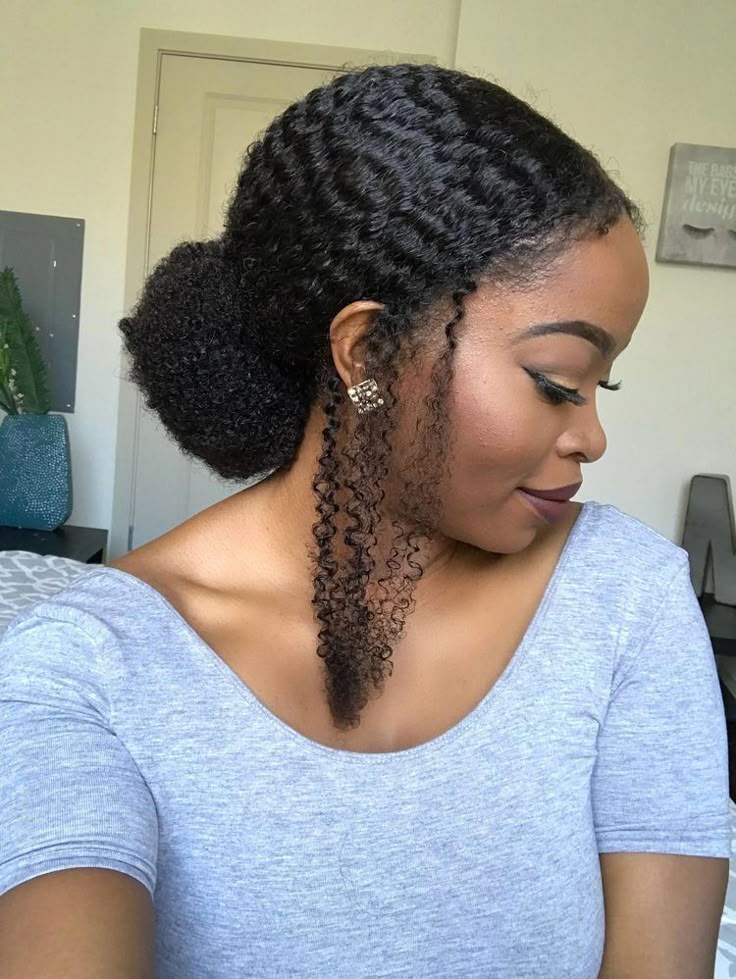
52. Flat-Twist Headband Updo
Create a flat twist across the front of your head and gather the remaining hair into an updo.
The twist works almost like a built-in headband and adds detail without requiring extensions.
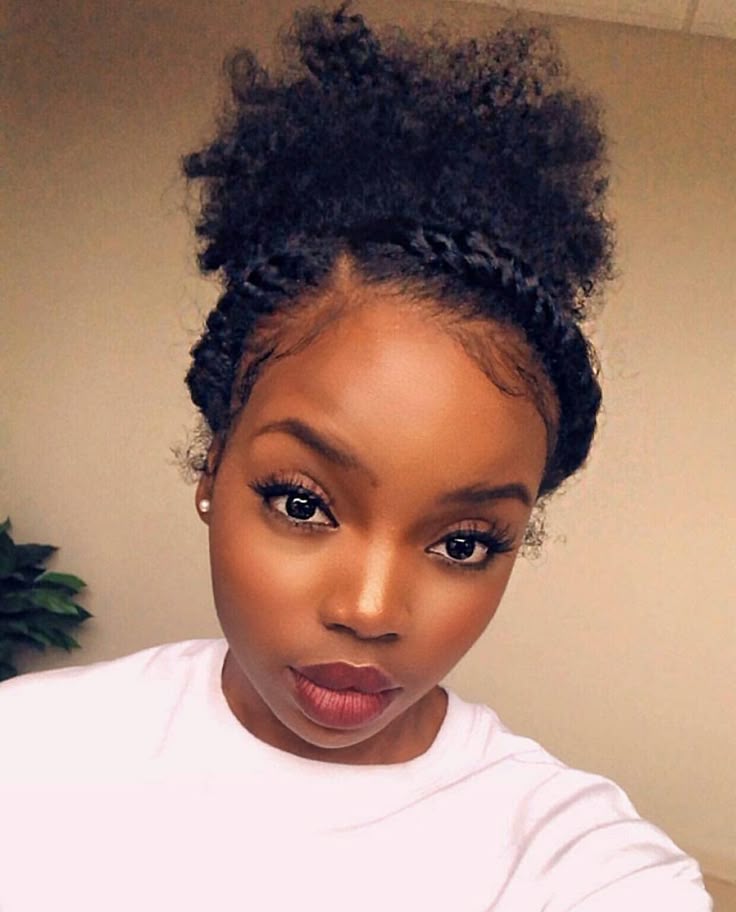
53. Side-Pinned Updo
Pin one side of your hair toward the back while leaving the opposite side fuller.
The asymmetry gives the hairstyle a polished appearance without requiring complicated braiding.
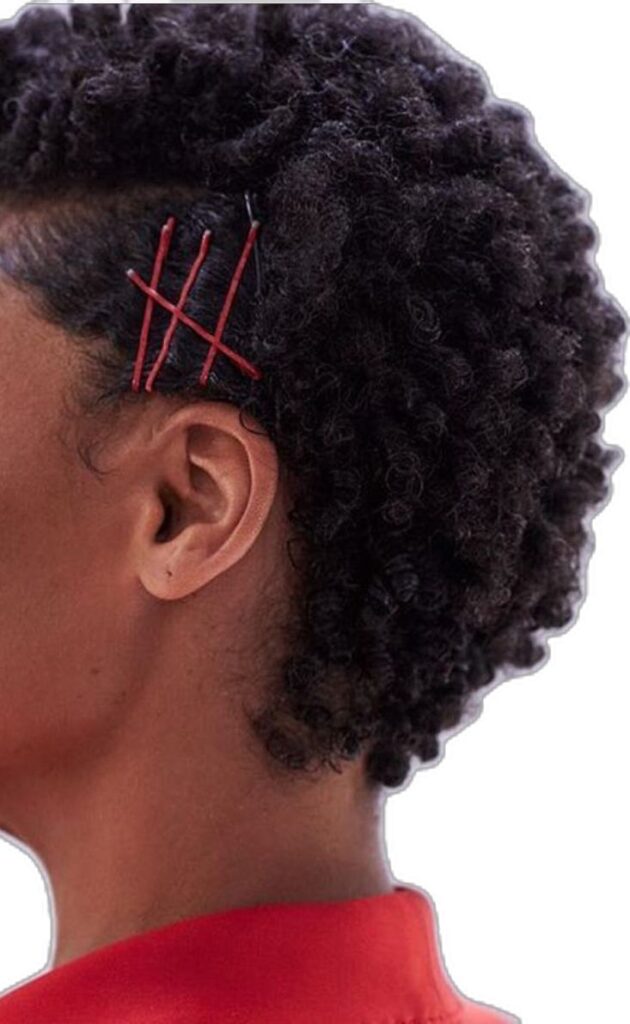
54. Rolled Updo
Roll sections of your hair toward the back and secure them with pins.
Large rolls create a softer appearance, while smaller sections give you a more detailed finish.
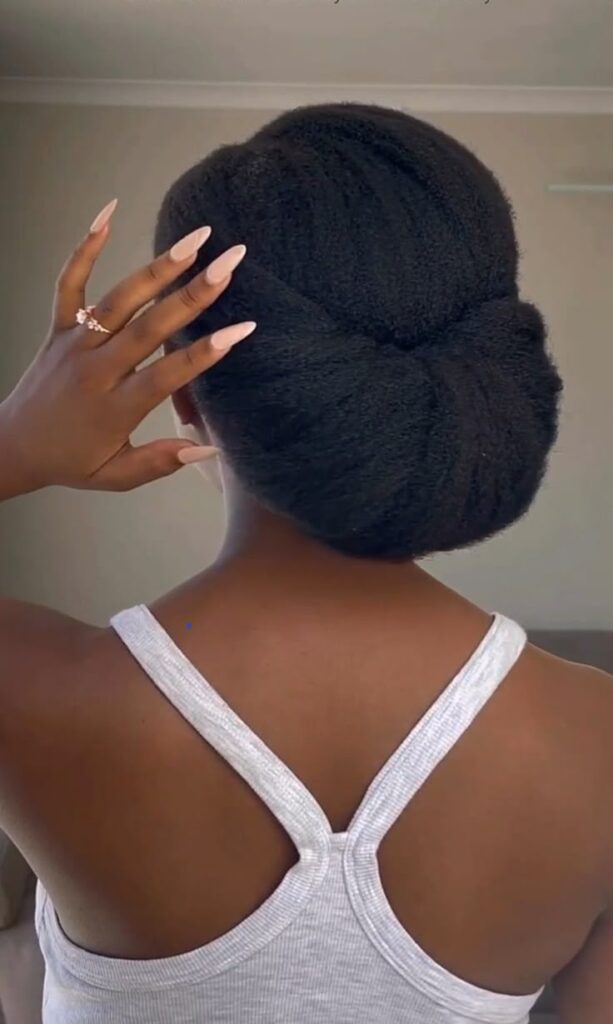
55. Pin-Curled Updo
Create small rolled sections and arrange them into an updo.
The result has a vintage-inspired feel while still keeping the ends tucked away.
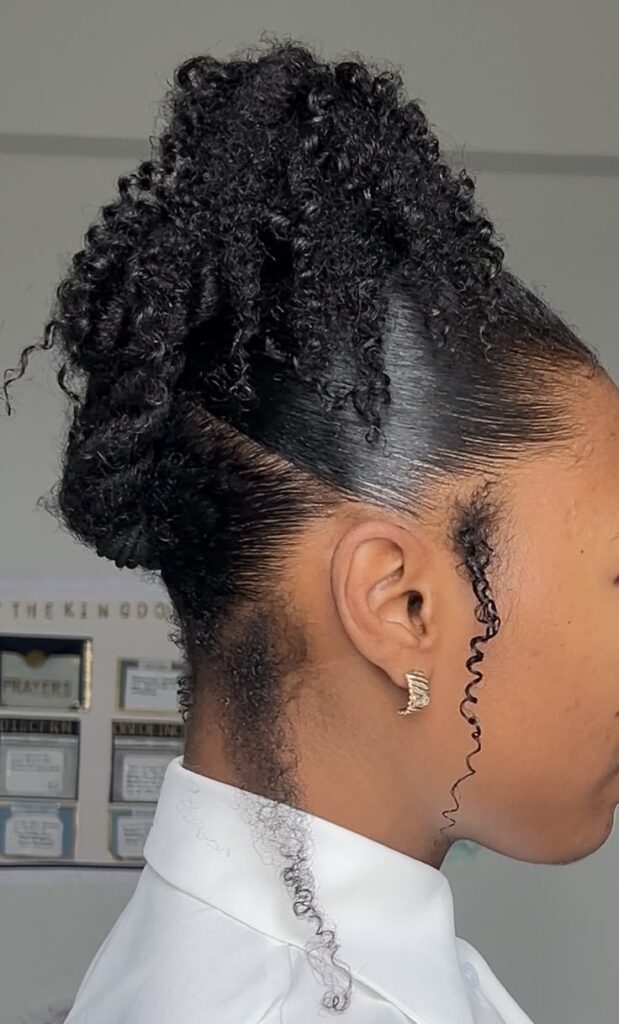
56. African Threading
African threading can stretch and secure sections of natural hair while giving you a distinctive finished look.
The wrapped sections can remain installed or be removed later to reveal elongated texture.
It can also be a useful option if you want to experiment with hair growth naturally without constantly relying on heat to stretch your strands.
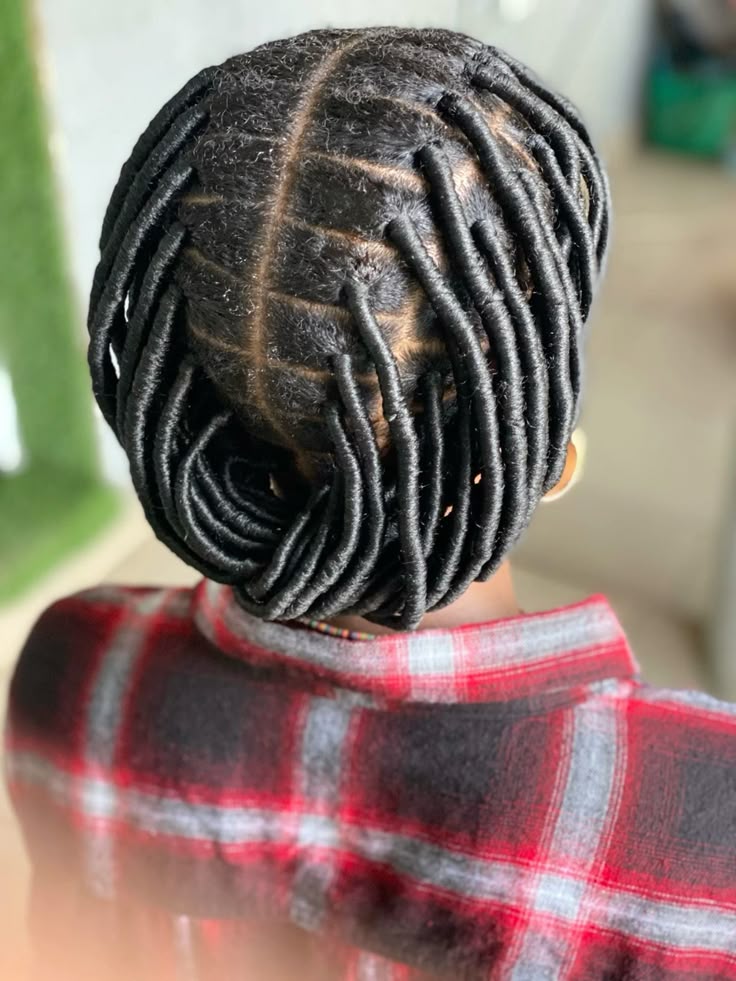
57. Threaded Updo
Take threaded sections and arrange them into an updo.
The wrapped texture creates a distinctive shape that looks very different from a traditional bun.
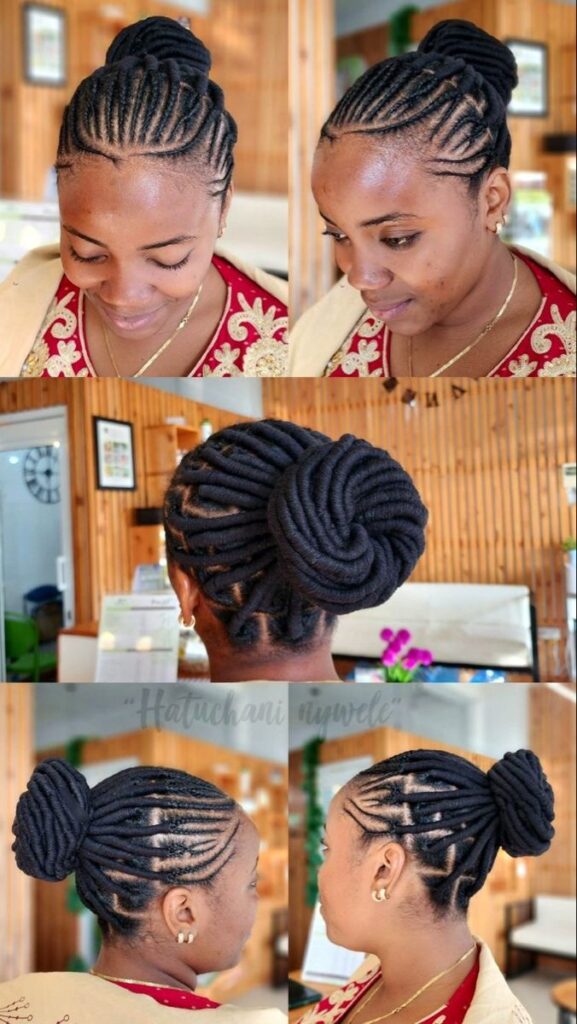
58. Low Puff
A low puff keeps your hair gathered without creating as much upward tension as a high puff.
Use a soft band and allow the natural texture of the puff to remain visible.
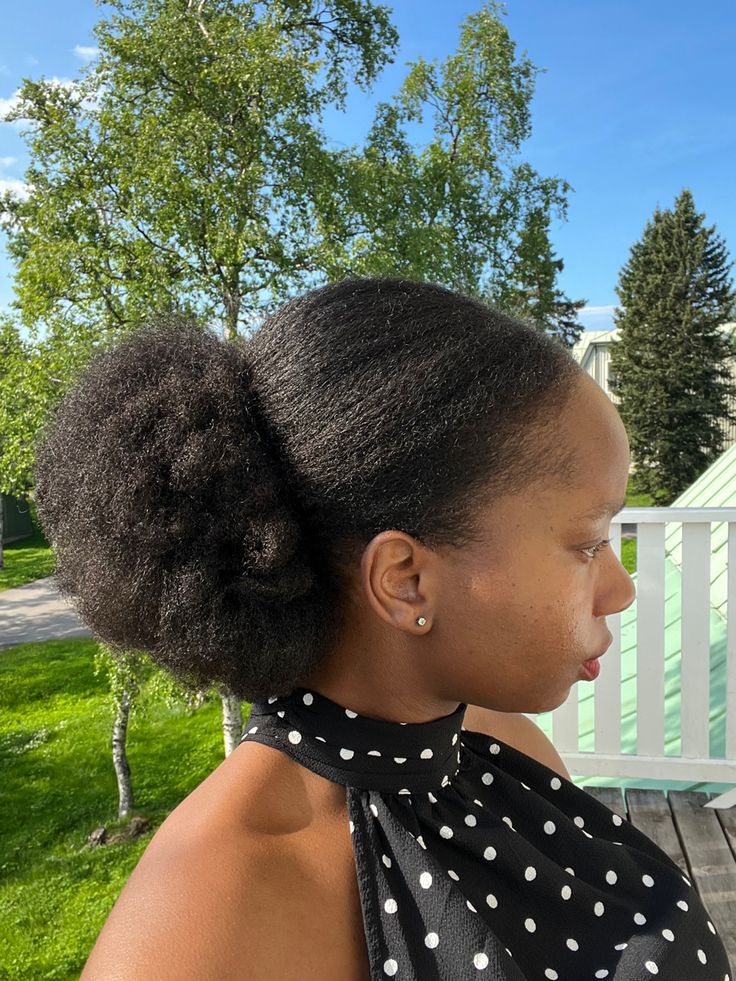
59. High Puff
The high puff is quick and easy when you want your hair away from your face.
Gather the hair gently and avoid repeatedly brushing the edges to achieve an ultra-smooth finish. Your hairline does not need to be completely slick for the style to look good.
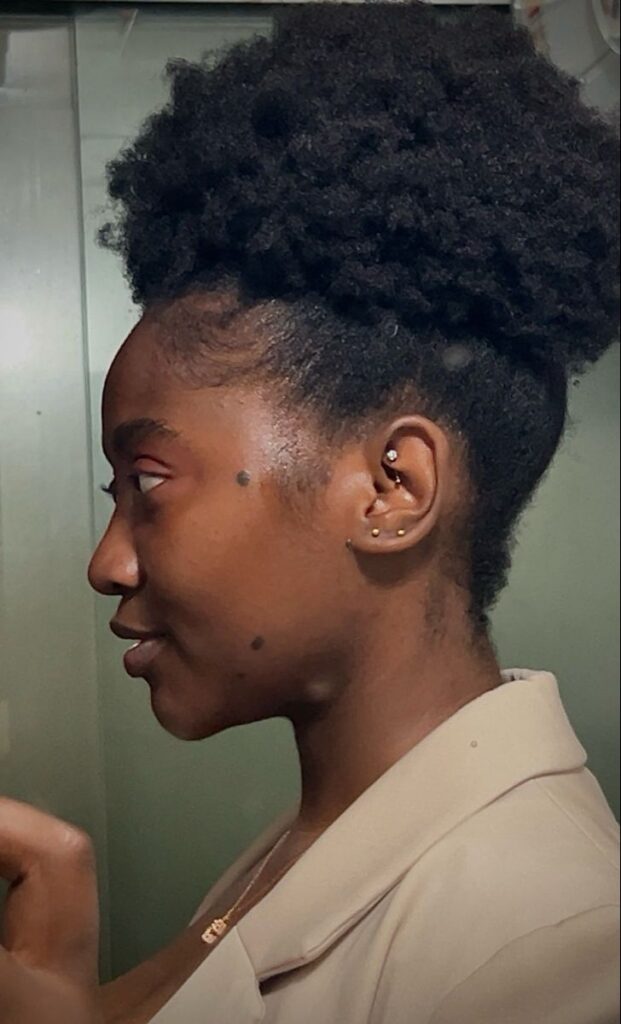
60. Puff With Scarf
Add a scarf around the base of your puff to change the appearance without changing the hairstyle itself.
You can coordinate the scarf with your outfit or choose a contrasting print to make the accessory stand out.
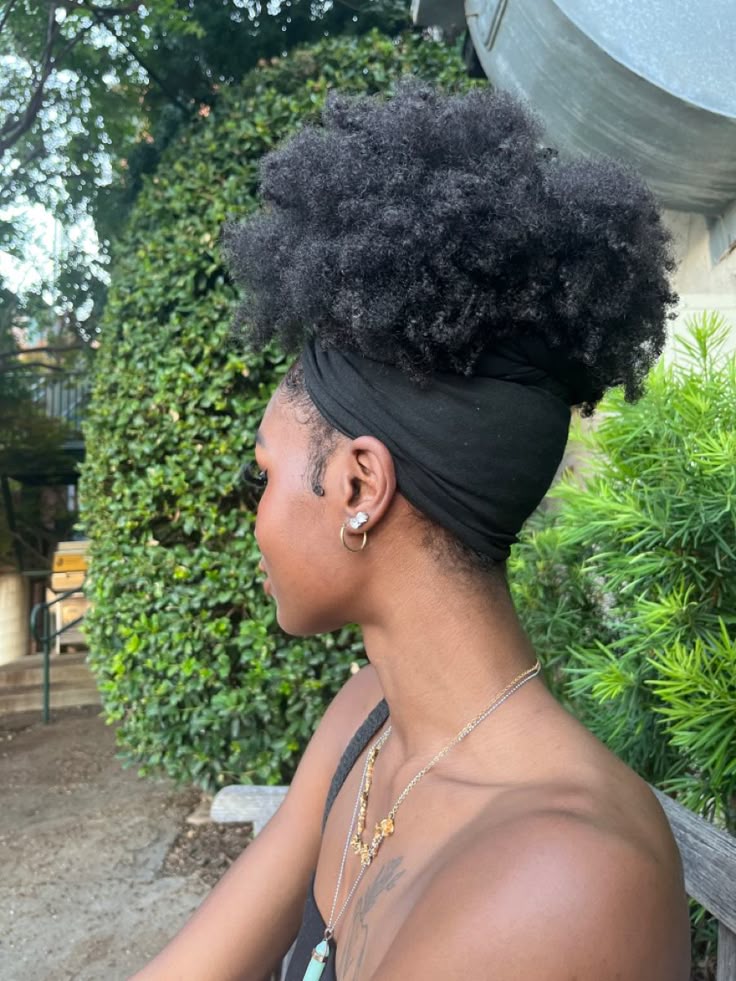
61. Afro Puff With Beads
Add beads to a few sections before gathering your hair into a puff.
The combination of natural volume and accessories creates a playful appearance without requiring extensions.
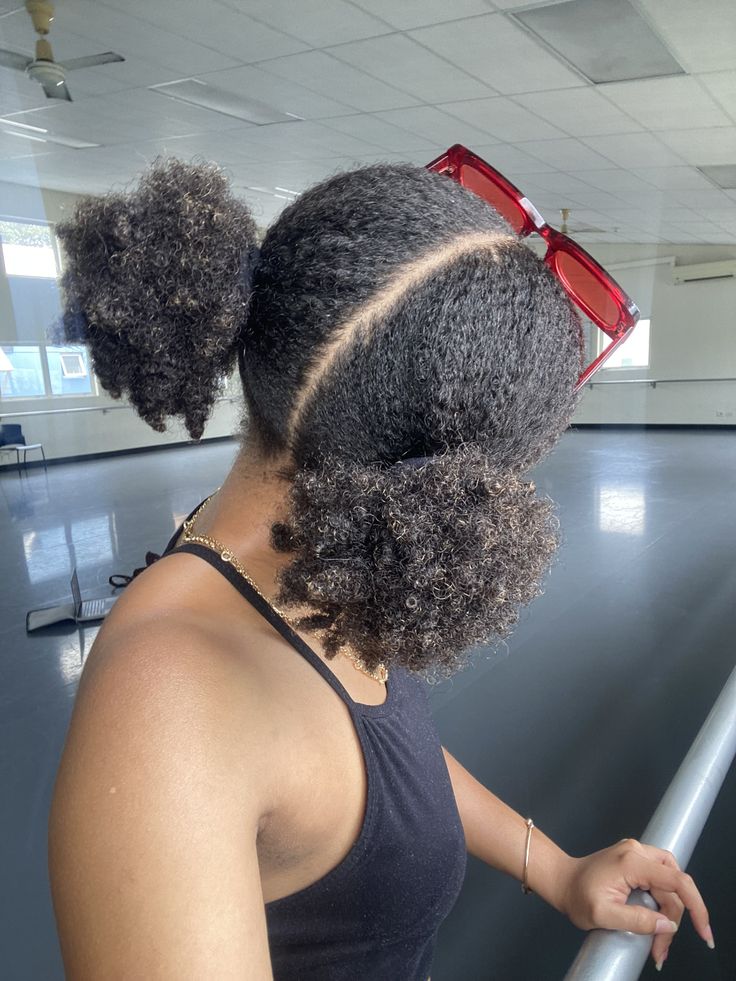
62. Pigtail Puffs
Divide your hair into two sections and create a puff on each side.
This is a simple style that gives you plenty of personality without requiring a lengthy installation.
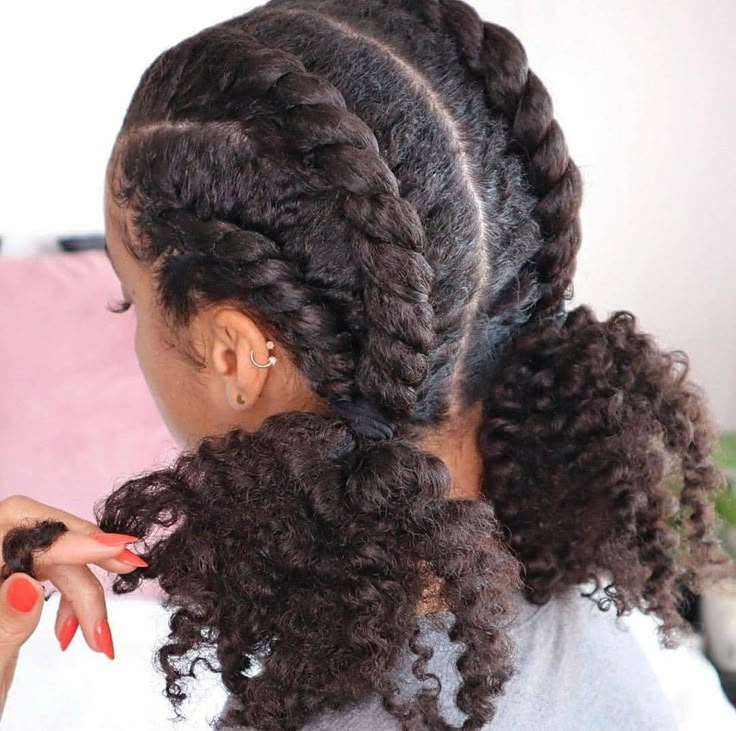
63. Flat-Twist Pigtails
Create flat twists on both sides and gather the ends into puffs or buns.
The combination gives the hairstyle more structure than ordinary pigtails while keeping the look playful.
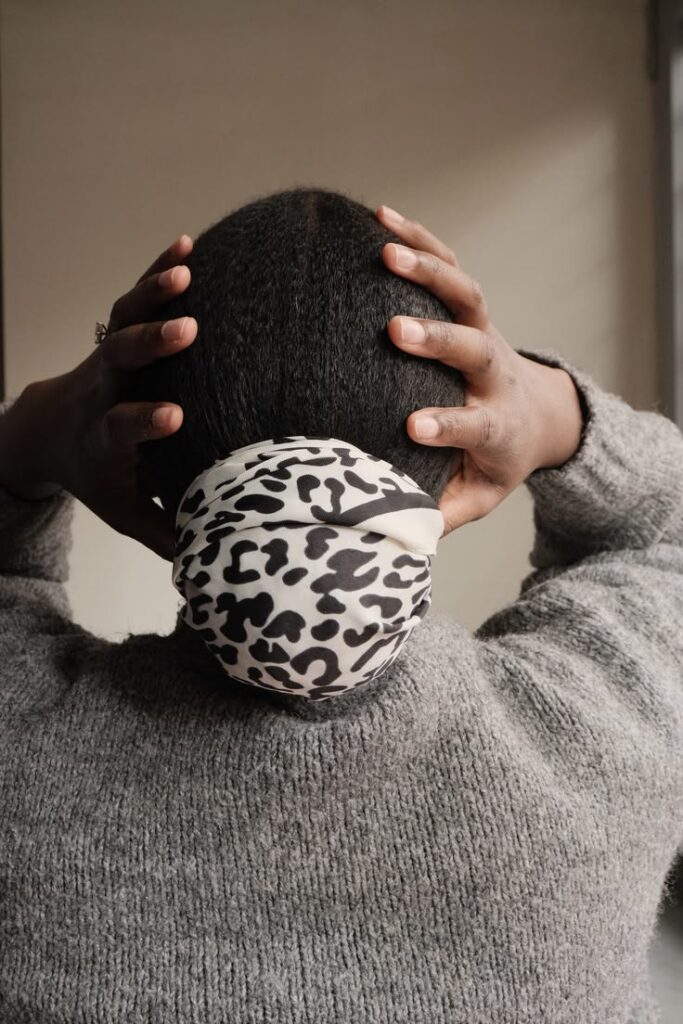
64. Scarf-Wrapped Bun
Create a simple bun and wrap a scarf around its base.
This is an easy way to make a familiar style feel completely different without taking your hair down.
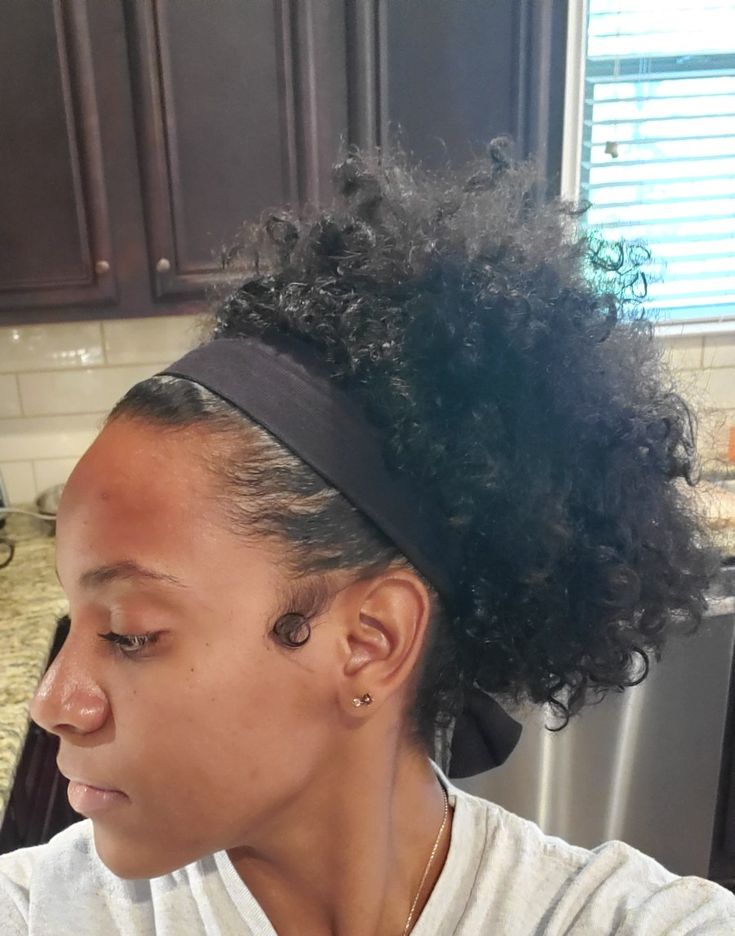
65. Headband Updo
A soft headband can help shape your hair into an updo without requiring elaborate braiding.
Choose a fabric-covered option that feels comfortable rather than one that grips the hair tightly.
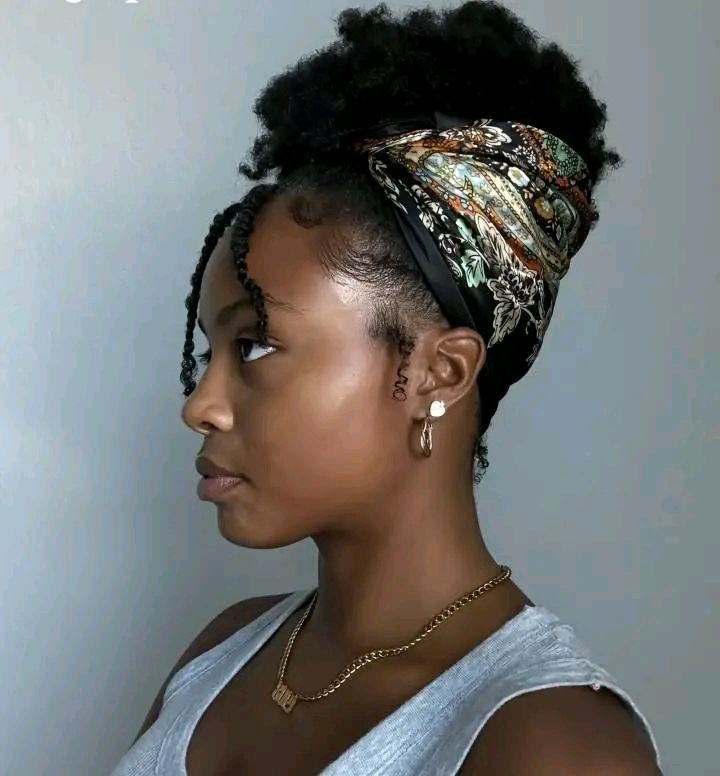
66. Satin Scarf Wrap
A satin scarf can turn a simple gathered hairstyle into a polished look.
Wrap it around the head while leaving some hair visible or cover the hairstyle completely when you want maximum protection from everyday friction.
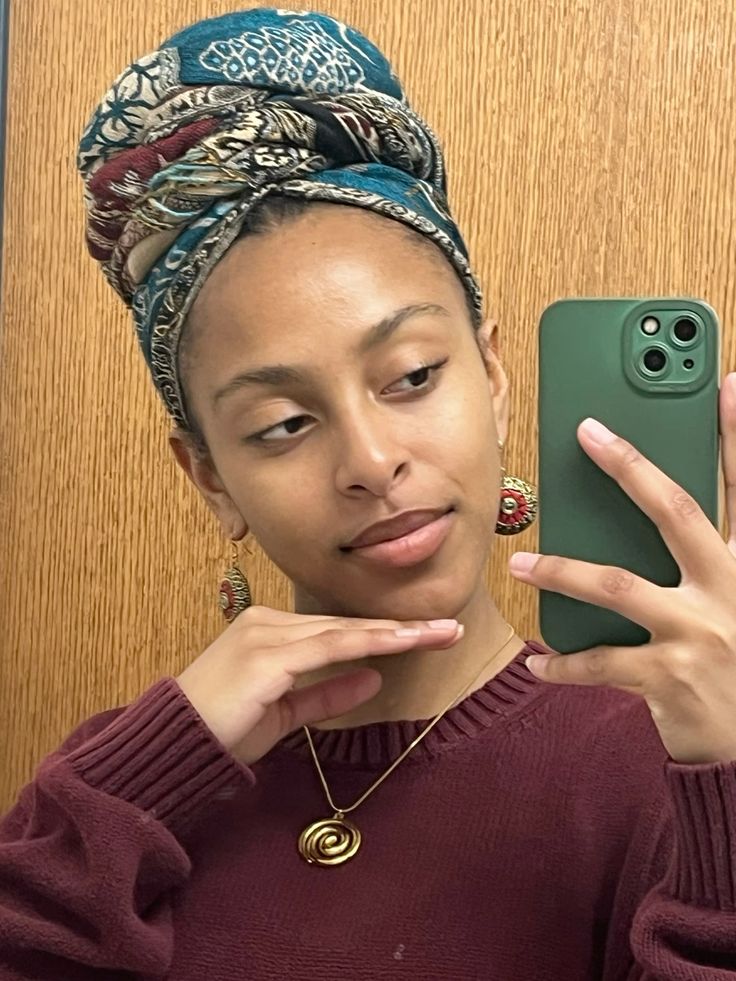
67. Full Head Wrap
A full head wrap keeps your hair completely covered when you want a break from styling.
There are countless ways to tie one, from simple knots to larger sculptural shapes. Choose a fabric that feels comfortable and does not pull around the edges.
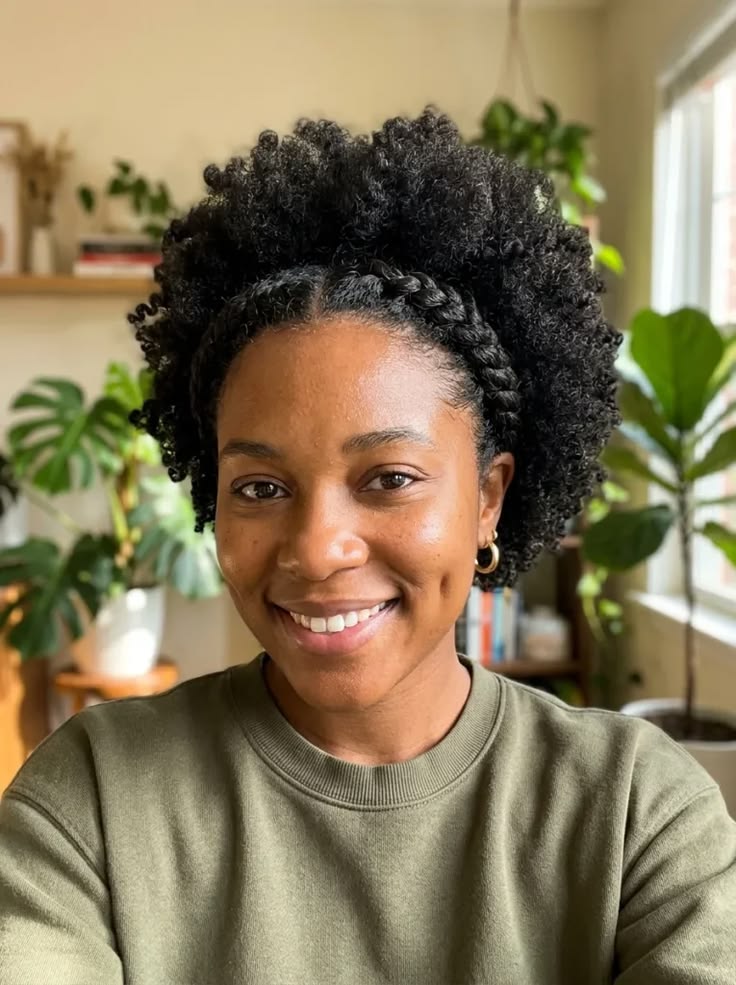
68. Braided Headband
Create a braided section across the front of your hair and keep the rest tucked or gathered.
The braid works like an accessory while helping control the front section.
69. Tucked Twist Updo
Create several twists and tuck the ends underneath to form an updo.
The style keeps the older parts of your hair secured while giving you enough room to shape the finished look.
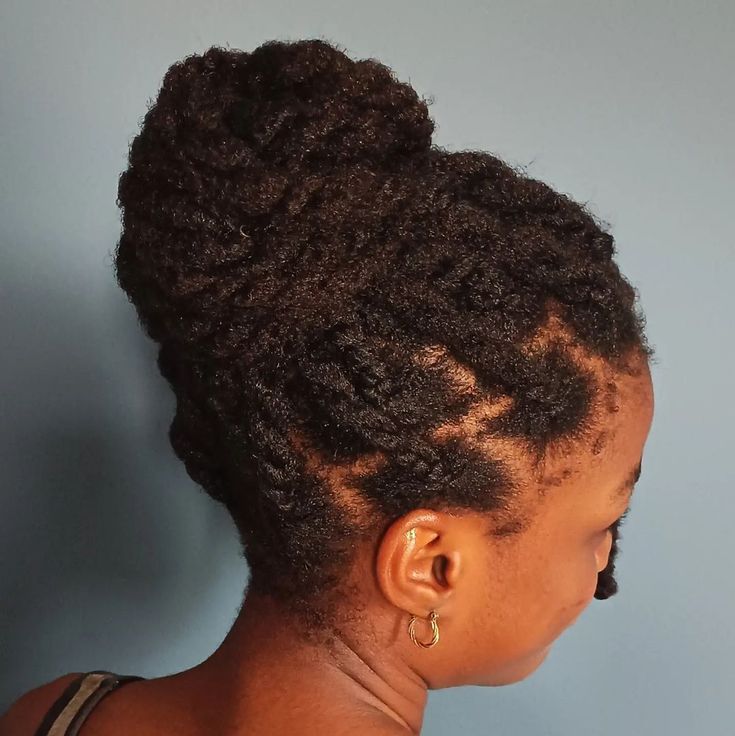
70. Protective Braid Set
Install braids and leave them in while your hair remains tucked away. When you eventually unravel them, you can enjoy a textured braid-out.
That gives you more than one hairstyle from the same installation.
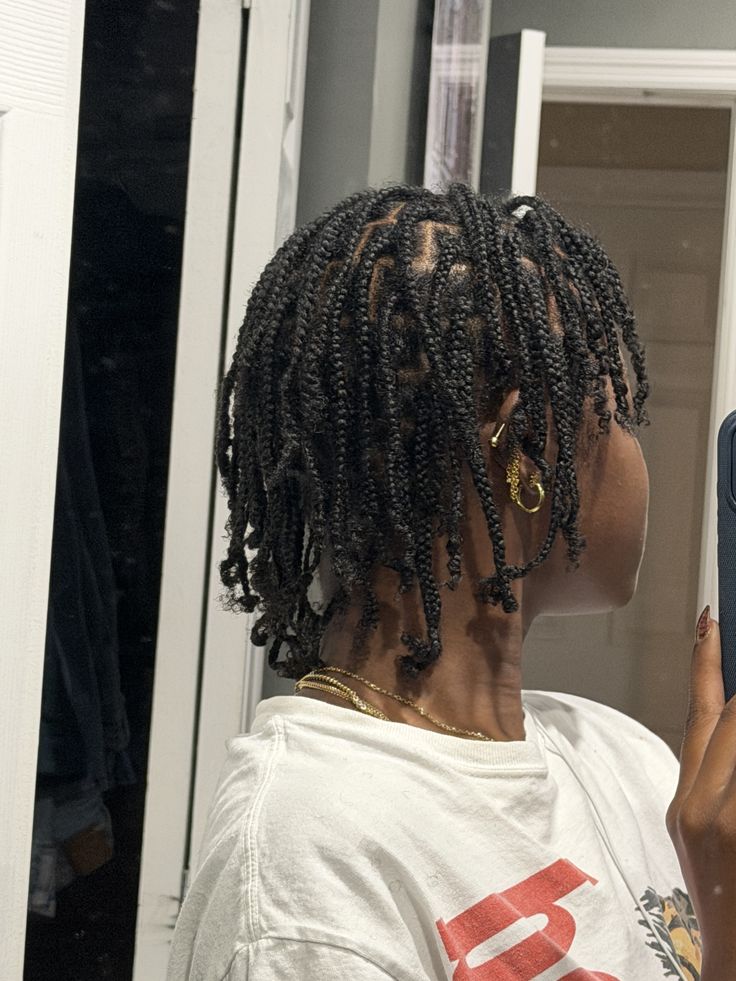
71. Protective Twist Set
A twist set can serve as both a protective arrangement and the foundation for your next style.
Leave the twists in while they suit your routine, then unravel them carefully when you want to reveal the resulting texture.
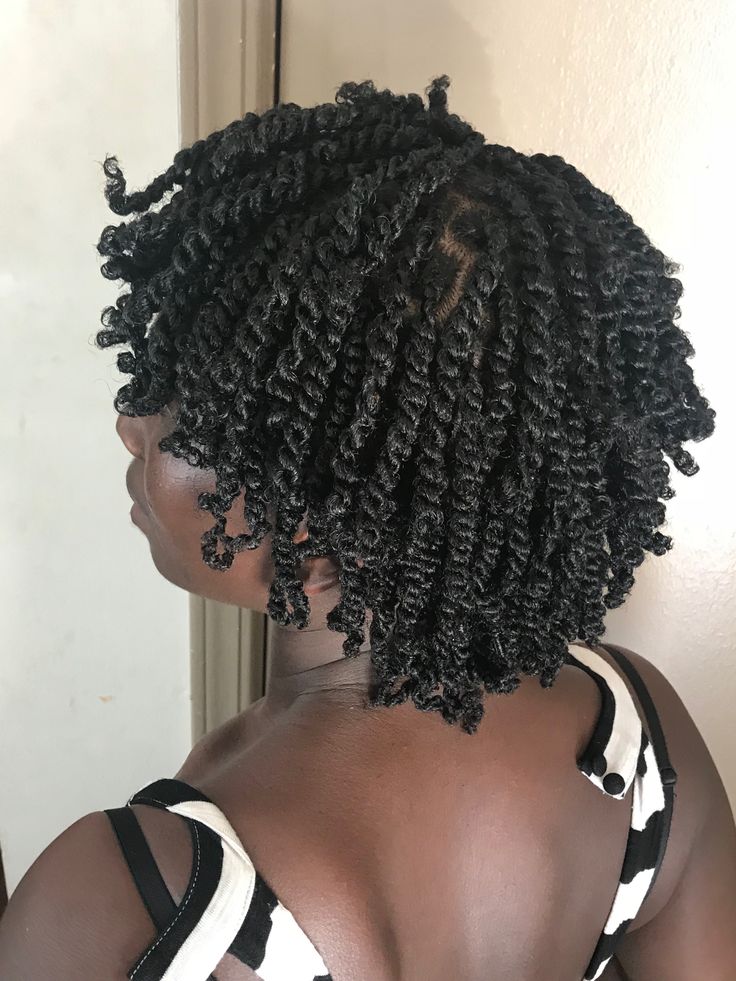
72. Braided Low Bun
Create several simple braids and gather them into a low bun.
The combination keeps your hair contained while giving the finished bun plenty of texture.
If you are dealing with hairline care concerns, keep the front sections loose enough to avoid unnecessary pulling.
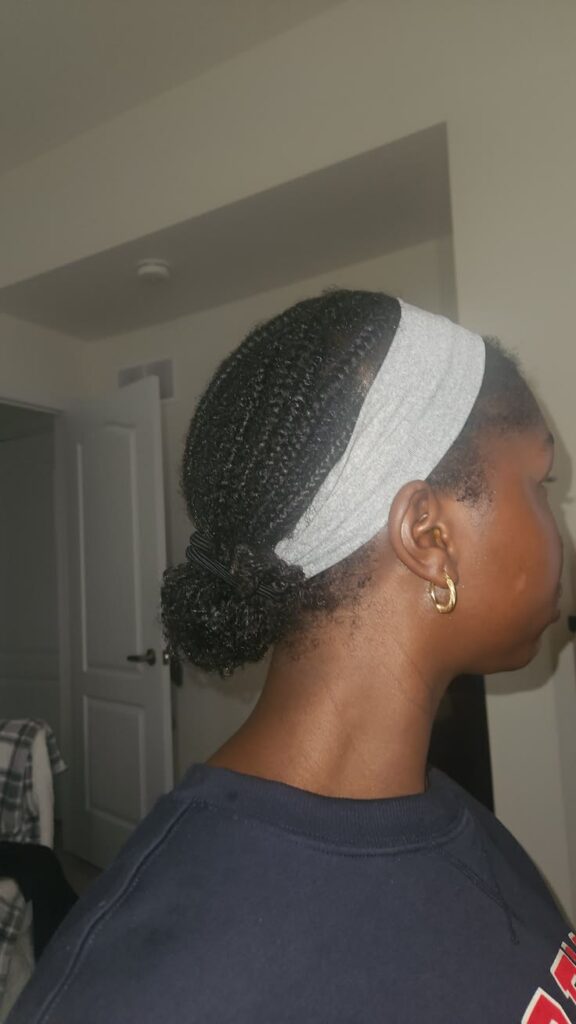
73. Simple Tucked Style
Sometimes you do not need a complicated hairstyle at all.
Gather your hair gently, tuck the ends underneath, and secure the shape with pins. You can add a scarf or headband when you want a little extra detail.
This kind of style can be particularly useful during periods when your hair needs less manipulation.
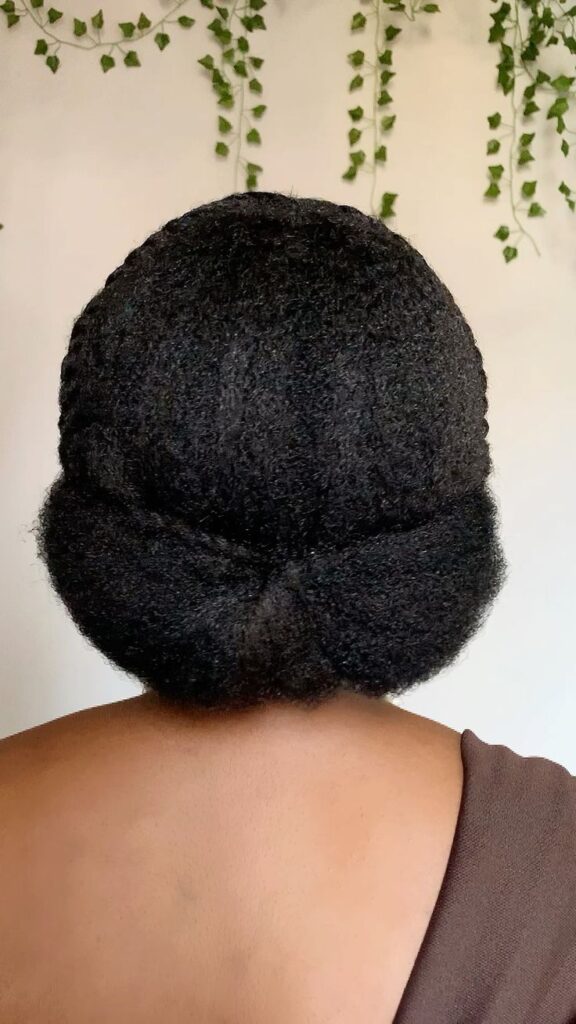
74. Twist-and-Tuck Updo
Combine two techniques by creating twists and then tucking them into an updo.
The twists give the hairstyle texture while the tucked ends keep your hair contained.
It is also a useful alternative when you want something more interesting than a plain bun but do not want to install extensions.
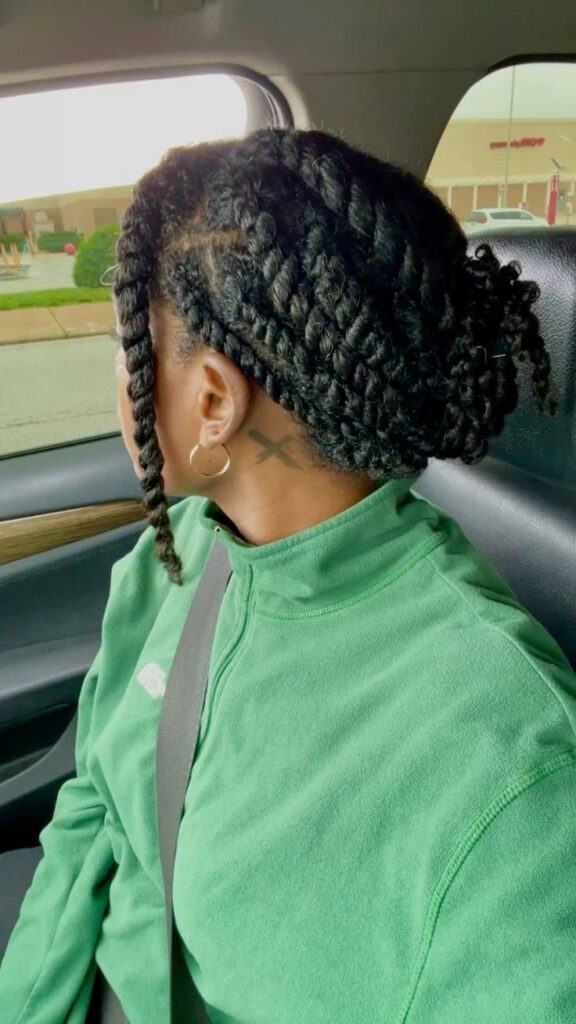
75. Simple Tucked-Up Protective Style
When you cannot decide what to do with your hair, simplicity can be the answer.
Gather the hair gently, tuck the ends underneath, and secure everything with a few pins. Add a scarf, clips, or a headband if you want to change the appearance.
The style may not look as elaborate as a full braid installation, but that does not make it less useful. Sometimes the best hairstyle is the one that allows you to stop touching your hair and get on with your day.
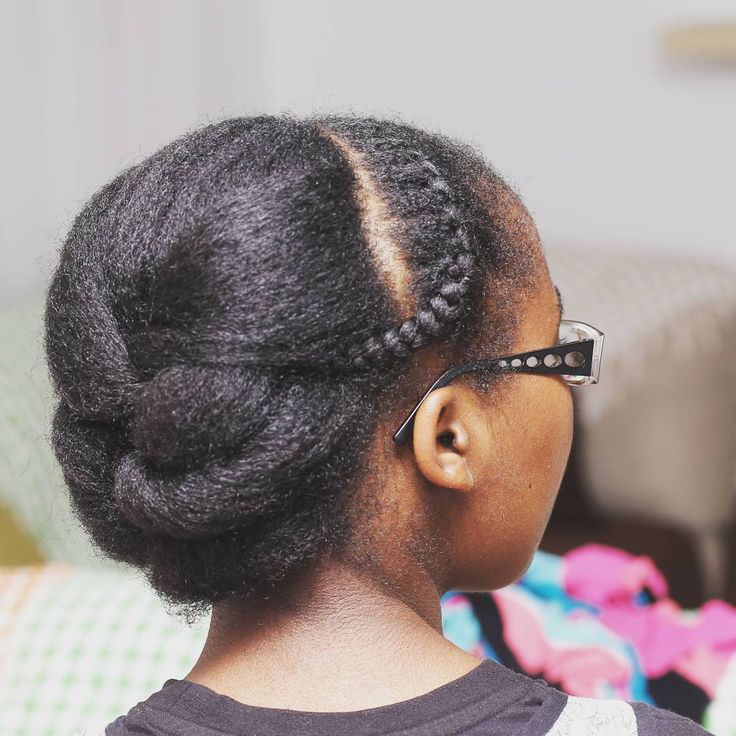
How to Choose Protective Hairstyles That Actually Work for Your Hair
Not every protective hairstyle will work equally well for every person.
Your hair density, length, strength, lifestyle, and previous styling habits all matter. A style that feels lightweight and comfortable on one person’s hair may feel completely different on someone else’s.
Pay particular attention to your edges. If a hairstyle creates constant pulling around the hairline, it may not be the right choice, even if the finished result looks beautiful.
The same goes for extensions. Long, heavy braids can create more tension than shorter, lighter versions. If your strands are already fragile, choosing a lighter style may make more sense.
Your hair care routine should also work alongside your protective style rather than disappearing completely once your hair is installed.
How Long Should You Keep Protective Hairstyles In?
There is no universal number of days that every person should follow.
Your scalp, hair condition, hairstyle, installation method, and maintenance routine all affect how long a style remains comfortable.
Pay attention to what your hair is telling you. Persistent itching, severe tangling, scalp discomfort, excessive dryness, or visible tension around the edges are all reasons to reconsider how long you keep a style installed.
Longer is not automatically better.
The purpose of protective styling is to reduce unnecessary manipulation while keeping your hair and scalp in good condition. If a style starts creating more problems than it solves, keeping it in longer defeats the purpose.
Protective Styling Mistakes to Avoid
Protective hairstyles are not automatically protective simply because your hair is tucked away.
One of the biggest mistakes is installing a style too tightly. Pain, headaches, scalp tenderness, or visible pulling around the edges should not be treated as normal parts of getting your hair done.
Another problem is forgetting about the hair underneath. Your natural hair still needs appropriate care while it is tucked away. Depending on the style, you may still need to pay attention to your scalp, moisture, and buildup.
Heavy extensions can create another problem. The longer and thicker the added hair becomes, the more weight your roots may have to support.
It is also easy to keep restyling the same protective style until it stops being protective. Constantly pulling a ponytail tighter, repeatedly slicking the edges, or changing the arrangement every day adds manipulation that you were probably trying to avoid in the first place.
If you are already experiencing frequent snapping, reviewing your breakage prevention habits may be more useful than immediately installing another style.
Give Your Hair a Break Between Styles
Protective styling does not mean your hair has to remain hidden all year.
Giving your hair a break between installations can make your overall routine much easier to manage. You can take down your braids or twists, gently cleanse your hair, condition it, detangle carefully, and spend some time with a simpler style before installing another one.
Your weekly hair routine can help you keep track of what your hair needs between longer installations.
You may also find that you do not need extensions every time. Two-strand twists, flat twists, buns, tucked styles, and simple puffs can all give you periods of lower manipulation without requiring a salon appointment.
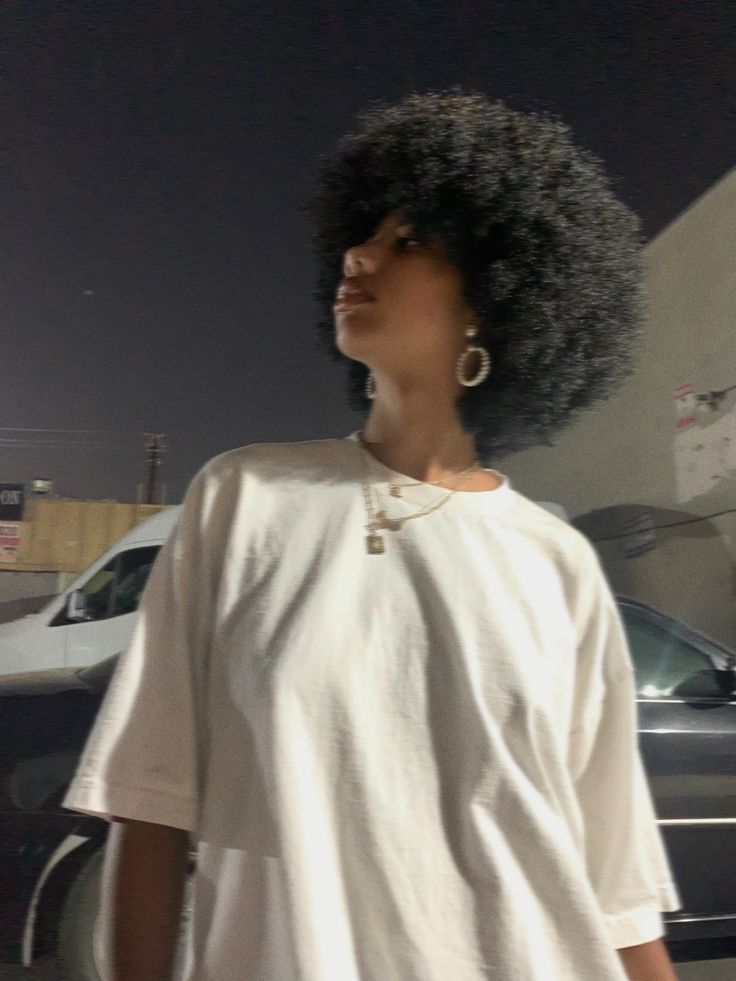
Final Thoughts
There is no single protective hairstyle that everyone has to wear.
Some people prefer long box braids, while others would rather spend an afternoon installing mini twists. Someone else may be perfectly happy with a low bun, flat twists, a scarf, or a simple tucked style.
The best choice is the one that fits your hair, your lifestyle, and your comfort level.
Keep the installation gentle, avoid unnecessary tension, pay attention to your edges, and do not ignore your natural hair underneath the style.
With 75 ideas to choose from, you have plenty of options to save for later, rotate throughout the year, and adapt whenever your hair needs a break from constant manipulation.
7 Comments