49 Easy School Hairstyles for Natural 4C Hair
Disclosure: Some of the links in this post are affiliate links. This means if you click on the link and purchase an item, I will receive an affiliate commission at no extra cost to you.
Finding a school hairstyle that looks neat, feels comfortable, and doesn’t take forever to create can be challenging, especially when you’re working with natural 4C hair. Between early mornings, school rules, uniforms, and the need to protect your hair from unnecessary breakage, having a few dependable styles can make your routine much easier.
The good thing is that school hairstyles for natural 4C hair don’t have to be complicated. You can work with your hair’s natural texture and still create styles that look polished, cute and appropriate for school.
Whether your hair is short, medium-length or long, there are plenty of options to rotate throughout the school week. Some take only a few minutes, while others can be prepared ahead of time and worn for several days.
The key is choosing styles that don’t require excessive pulling or manipulation. Starting with properly moisturised hair can also make styling easier. Your overall moisture routine matters just as much as the hairstyle itself.
Below are 49 easy school hairstyles for natural 4C hair, ranging from quick puffs and afros to twists, buns, cornrows, Bantu knots and creative half-up styles.
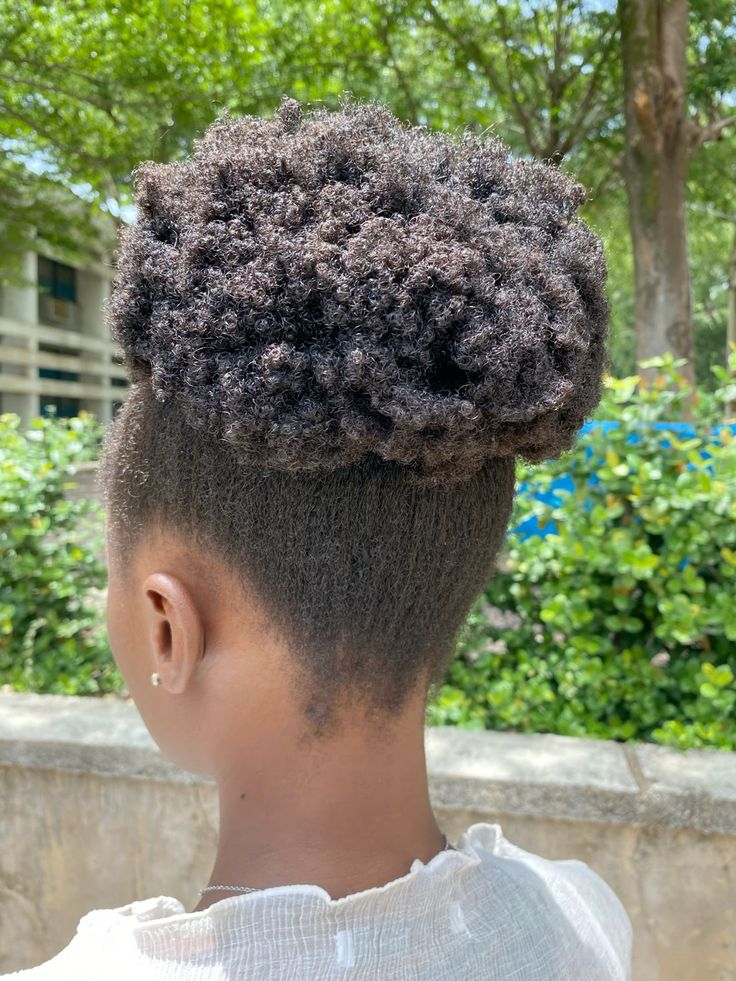
1. High Puff for Rushed Mornings
The high puff is one of the easiest ways to turn a simple natural hairstyle into a polished school look. Gather your hair toward the crown and secure it with a soft hair tie or puff band. Fluff the puff until you like its shape. It works particularly well when you need to get ready quickly without completely restyling your hair.
2. Low Puff for a Neat, Simple Look
A low puff gives you the same simplicity as a high puff but with less tension around the hairline. Gather your hair at the nape of your neck and secure it gently. You can leave the puff rounded and fluffy or smooth the front slightly for a cleaner finish.
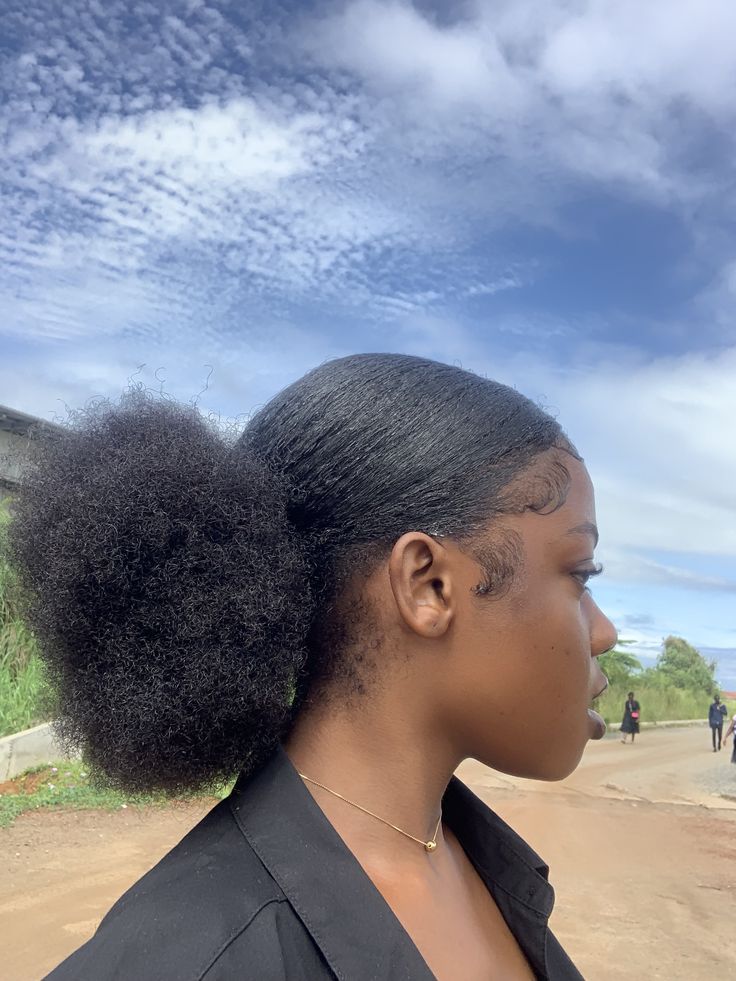
3. Two Puffs for a Cute School-Day Look
Divide your hair down the middle and create two puffs, one on either side of your head. This style is playful without requiring complicated braiding skills. It is especially cute on shorter or medium-length 4C hair and can easily be refreshed the following morning.
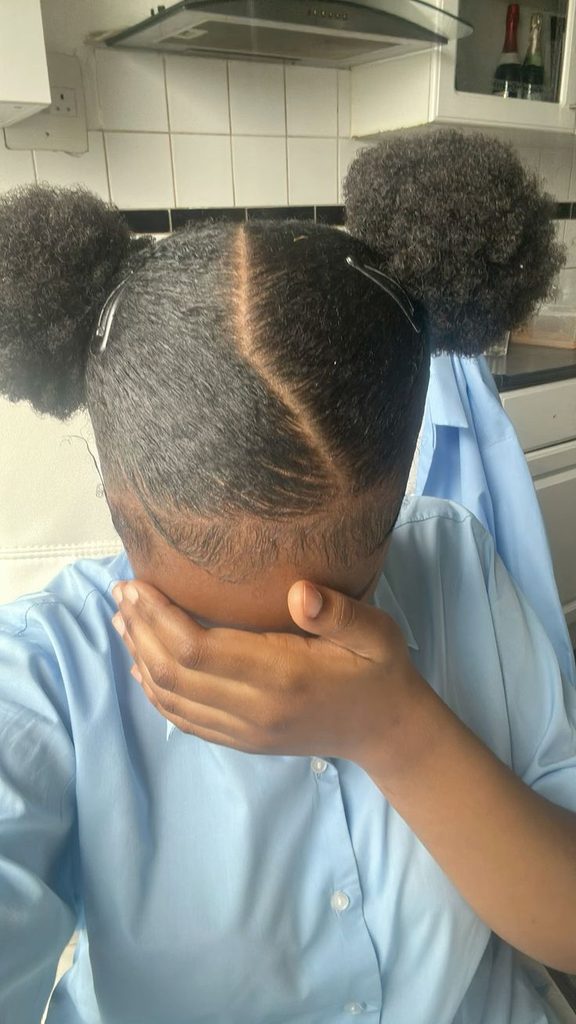
4. Side Puff for Something Different
Move your puff toward one side rather than placing it directly in the centre. The small change gives an otherwise basic style a completely different appearance. Add a simple school-approved headband if accessories are allowed.
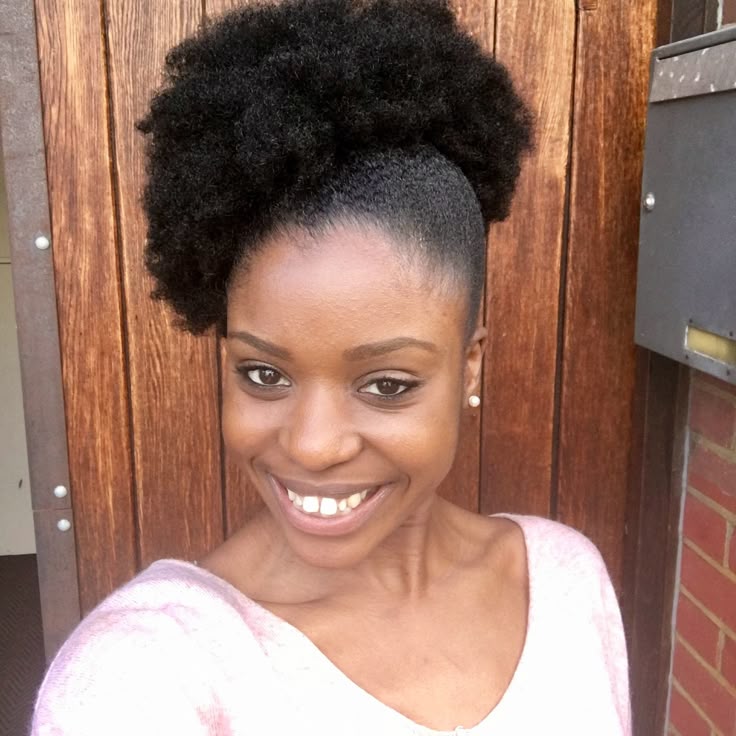
5. Double Puffs With a Middle Part
For a more defined version of the two-puff style, create a clean middle part before securing each side. The neat part gives the hairstyle structure while the puffs keep the overall look soft and natural.
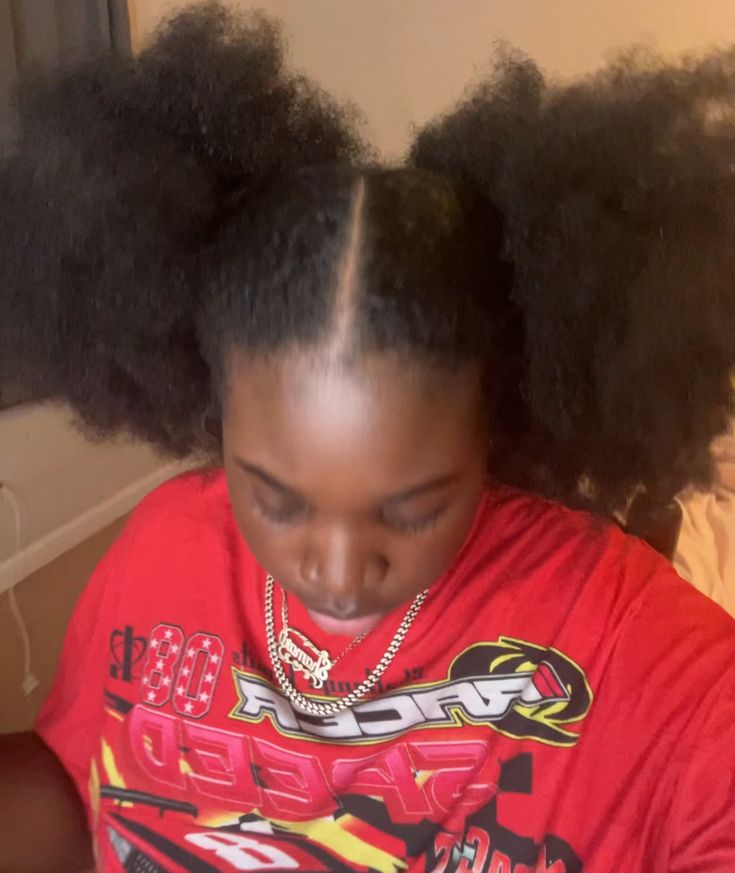
6. Puff With a Headband
A headband can completely change a basic puff. Choose a simple fabric headband in a colour that works with your uniform, then place it behind the hairline. It is a particularly useful option when you don’t have time to perfect your edges.
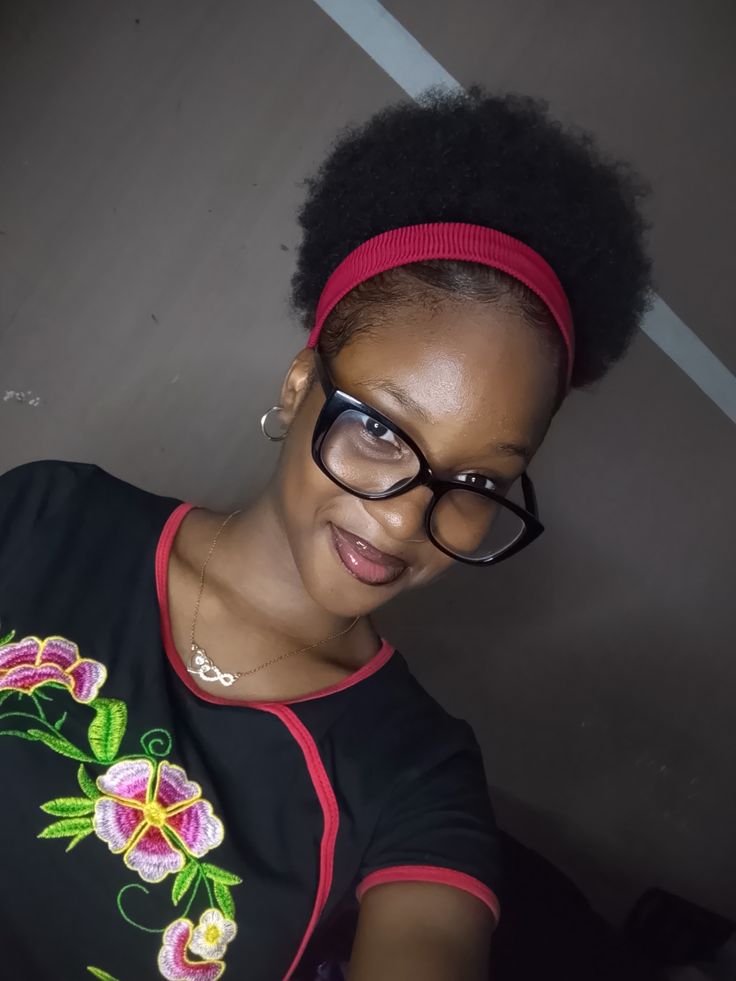
7. Shrunken Afro With a Headband
You don’t always need to stretch or manipulate your hair into a completely different shape. Let your natural shrinkage create the volume, then use a headband to keep the front controlled. It is simple, comfortable and lets your natural texture remain the focus.
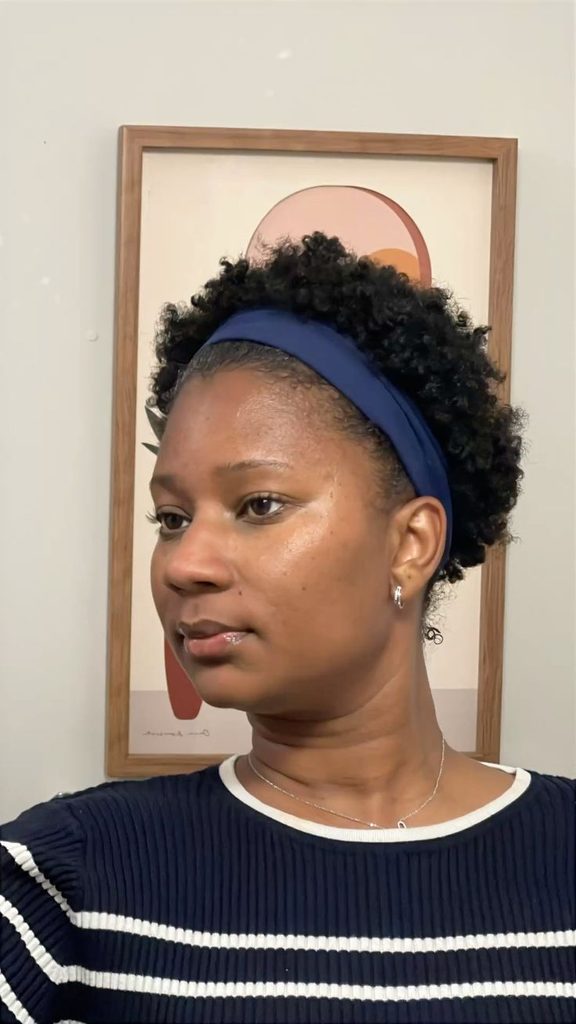
8. Stretched Afro
If you have more time before school, gently stretch your hair without heat and wear it as a rounded afro. The extra length can make the hair easier to shape while still maintaining its natural appearance.
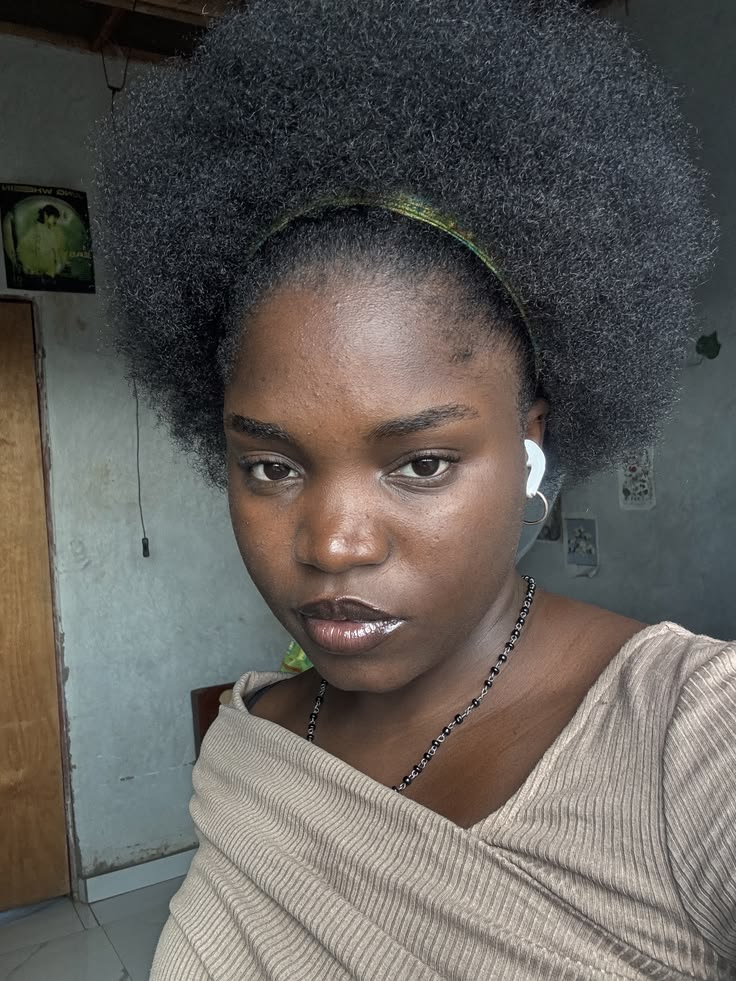
9. Side-Parted Afro
Create a side part and shape the rest of your hair into a soft, rounded afro. The part adds definition without requiring much styling. It is also a good option for students who prefer wearing their hair loose.
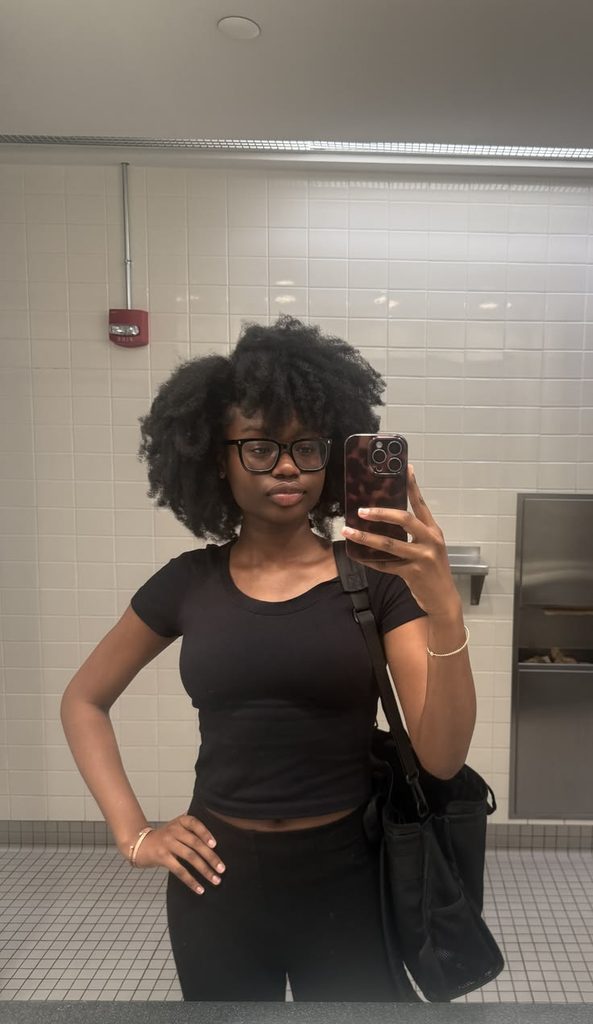
10. Headband Tuck
Smooth or gather the hair backward, then tuck the ends underneath a wide headband. This creates the appearance of a simple updo without requiring a complicated bun.
11. Two-Strand Twists
Two-strand twists are a classic choice for natural hair because they are simple, versatile and easy to change. Divide the hair into sections and twist two pieces around each other from root to tip. Wear the twists down, pull them into a ponytail or pin them up.
12. Chunky Twists
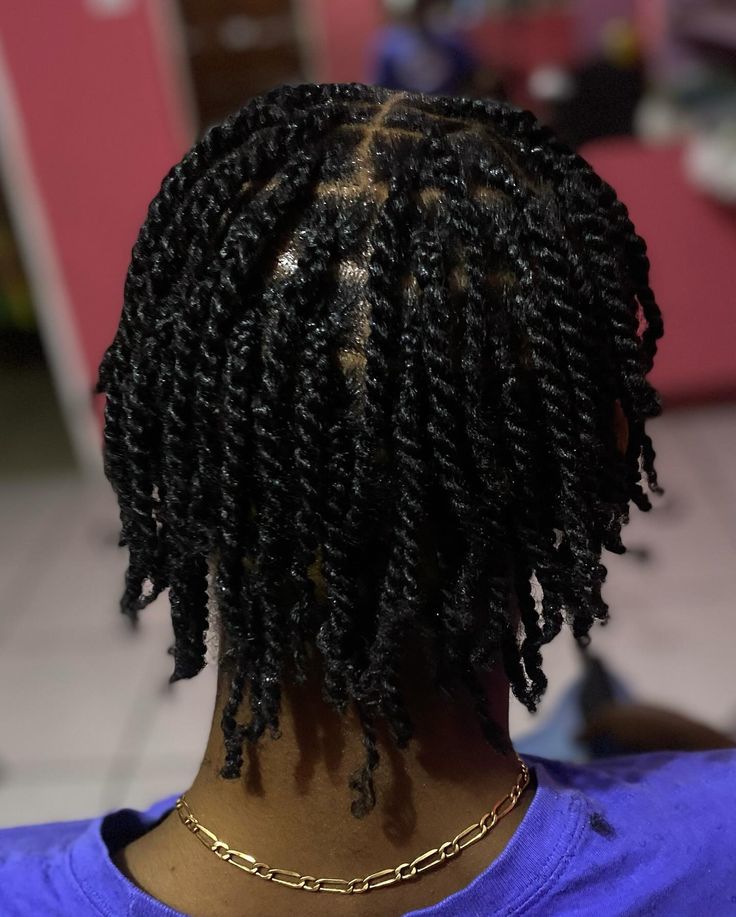
If you don’t have time for dozens of small twists, make fewer, larger sections. Chunky twists are faster to install and give you a fuller appearance. They can also be gathered into a bun or ponytail when you want to change the look.
13. Mini Twists
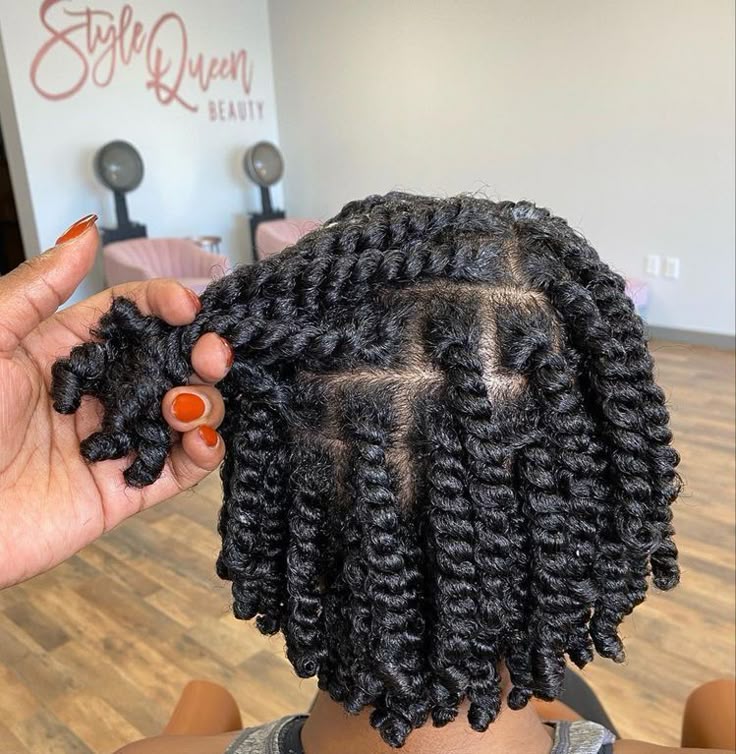
Mini twists take longer to install but can provide several days of styling flexibility. Once installed, you can wear them loose, pin them up or create a half-up style without completely redoing your hair.
14. Flat Twists to the Back
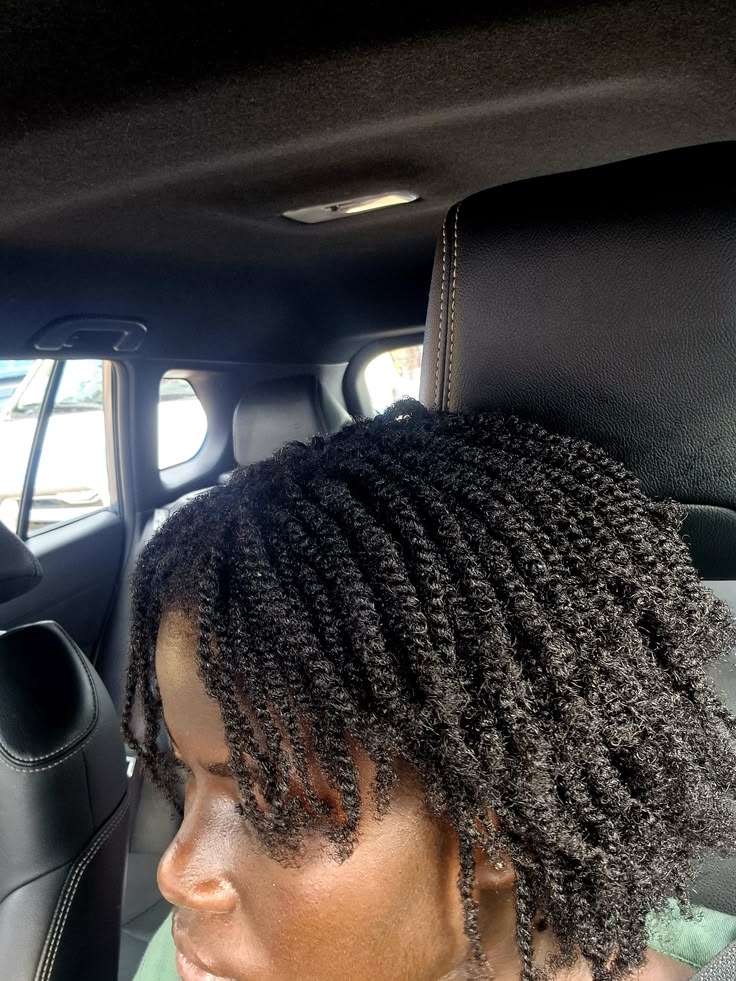
Flat twists sit close to the scalp and can create a neat, structured appearance. Part the hair into sections and twist each section backward. This style works especially well when you want your hair contained during a busy school day.
15. Side Flat Twists
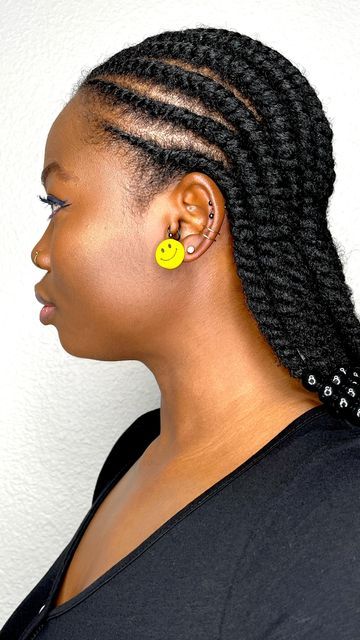
Instead of twisting everything straight backward, create flat twists that move from one side toward the back. The direction adds visual interest while keeping the hair controlled.
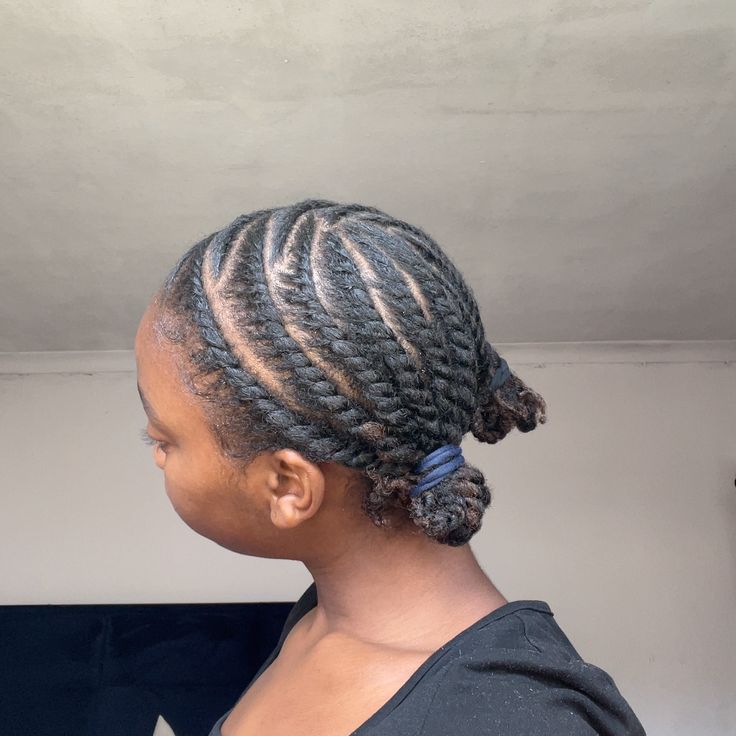
16. Flat-Twist Pigtails
Create two flat twists on either side of the head and gather the ends into two small puffs or ponytails. This combines the neatness of flat twists with the playful appearance of pigtails.
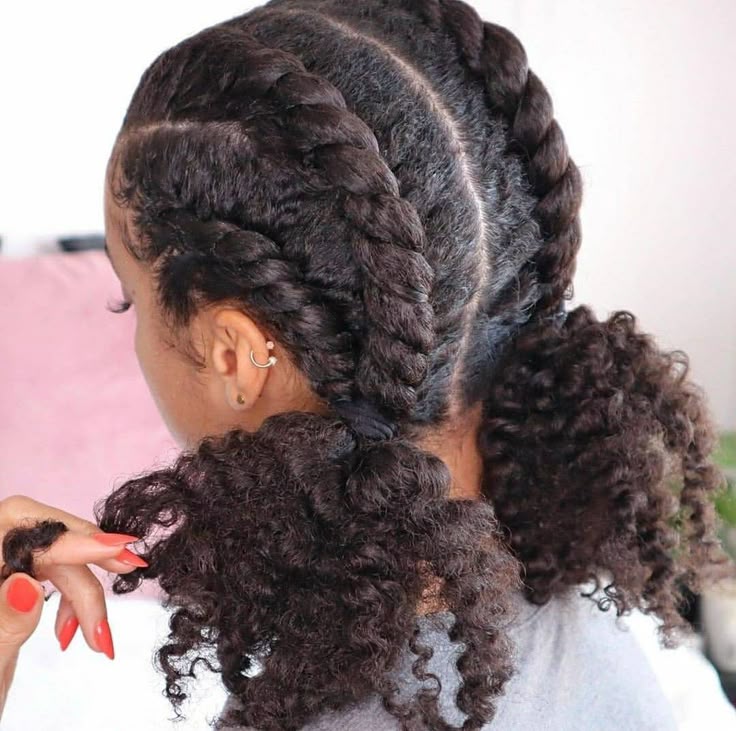
17. Flat-Twist Ponytail
Flat-twist the front or sides of your hair toward the back and gather the remaining hair into one ponytail. It looks more detailed than a regular ponytail but does not require an elaborate installation.
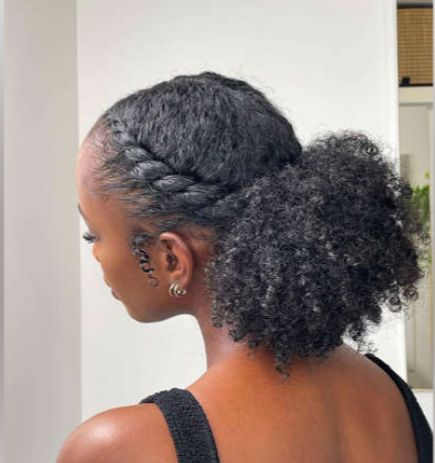
18. Twist-Out
A twist-out is ideal when you want your natural hair to have more definition and volume. Twist the hair beforehand, allow it to dry completely and carefully unravel the twists in the morning. Avoid excessive separating if you want the definition to last.
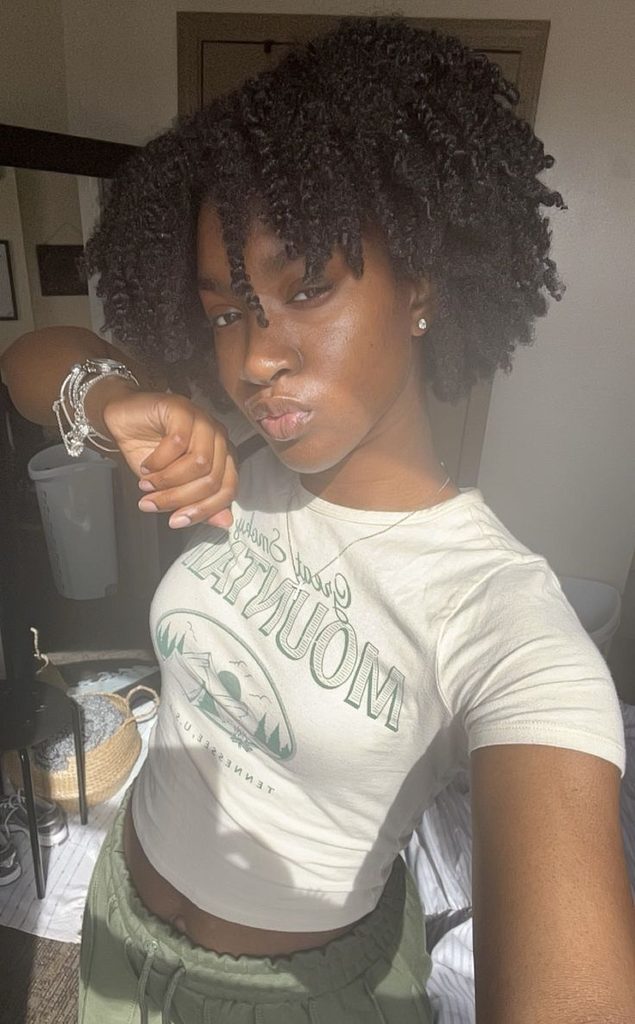
19. Mini Twist-Out
For a tighter, more defined result, use smaller twists before creating your twist-out. The finished style can have plenty of texture while still looking neat enough for school.
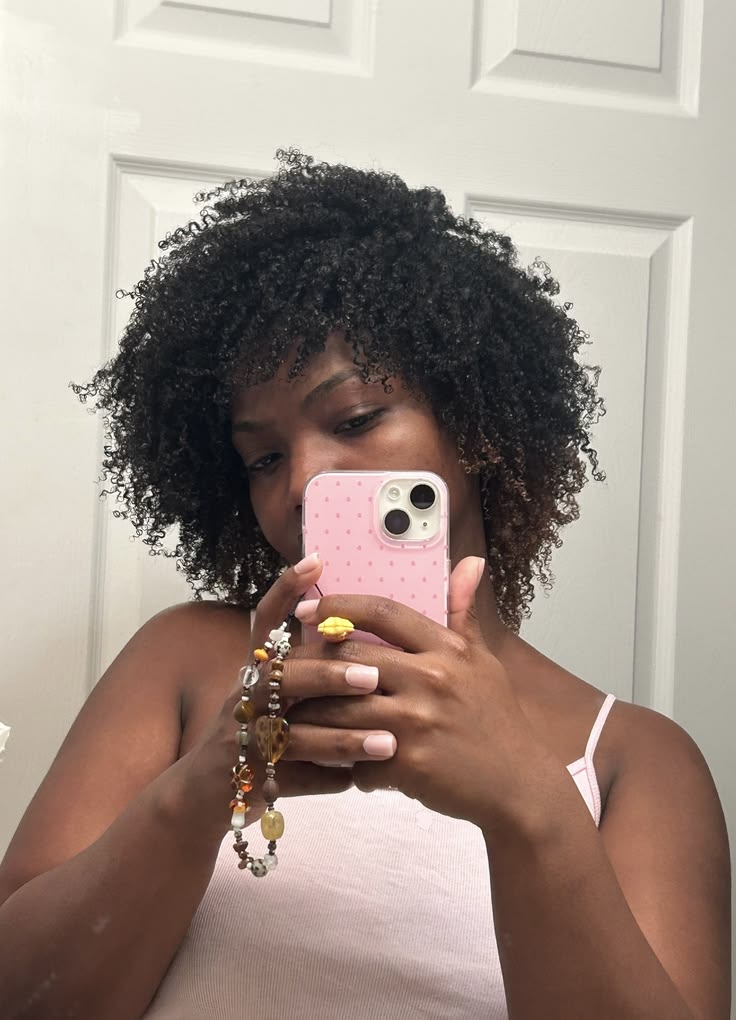
20. Twist-Out With a Headband
Take your twist-out and add a simple headband to keep the front away from your face. This is a good way to refresh a twist-out without completely restyling it.
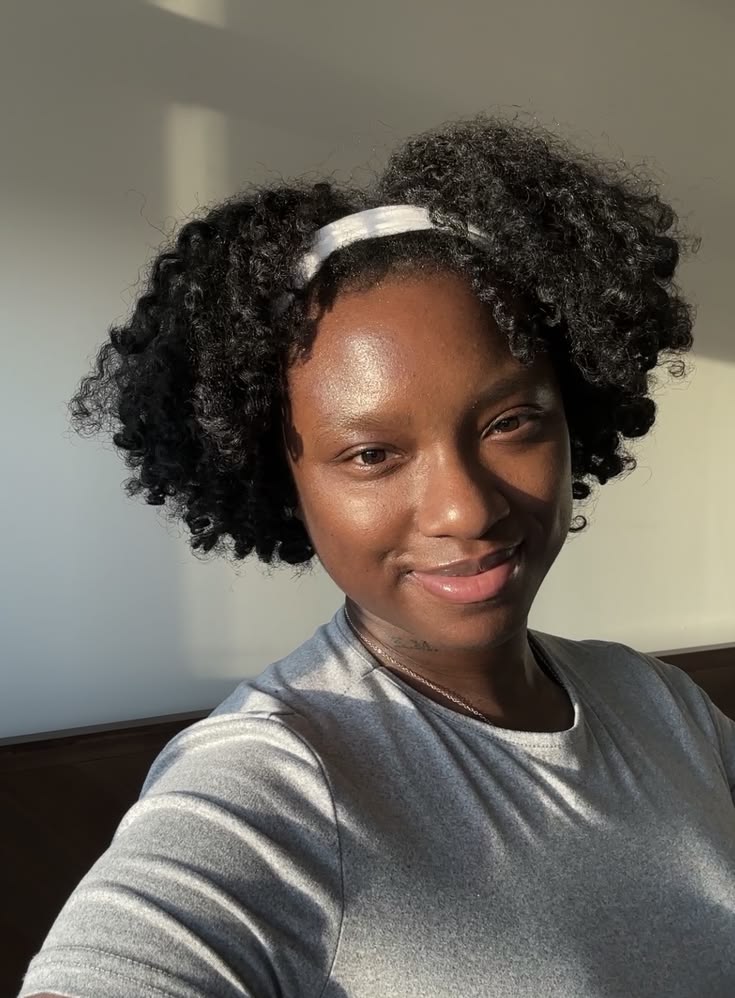
21. Low Bun
Gather your hair at the nape and wrap it into a simple bun. A low bun looks neat without needing to be extremely sleek. You can also tuck the ends underneath to keep them contained.
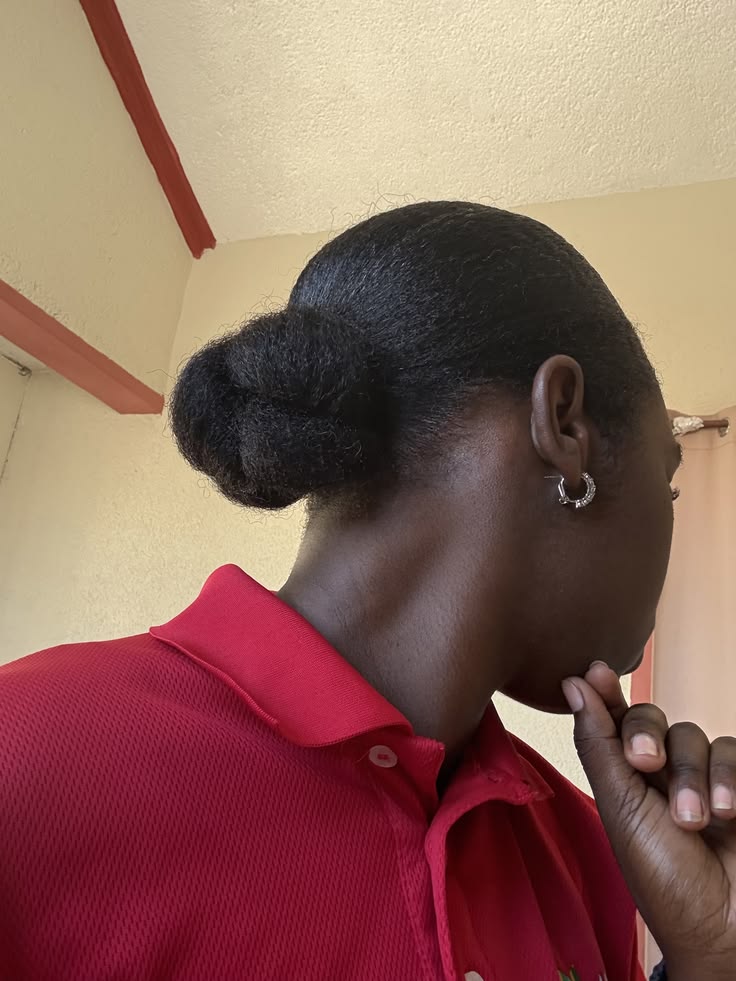
22. High Bun
Pull your hair upward and create a bun near the crown. This style works well with medium-to-long 4C hair and can make an ordinary school uniform look more polished.
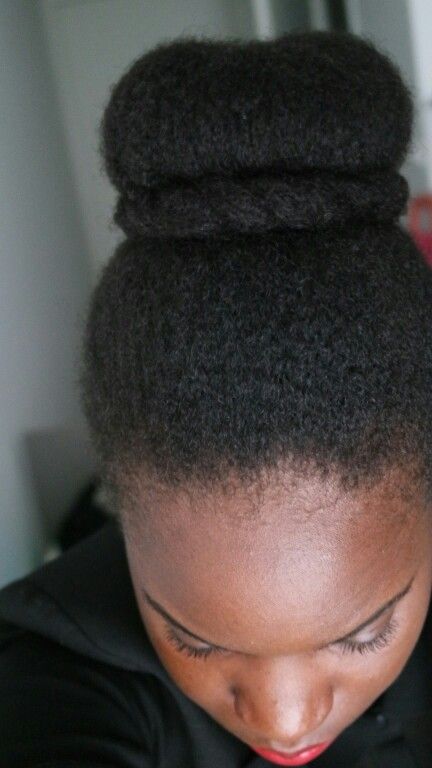
23. Side Bun
Gather the hair slightly to one side before creating your bun. The asymmetrical placement gives the hairstyle more personality while remaining simple enough for school.
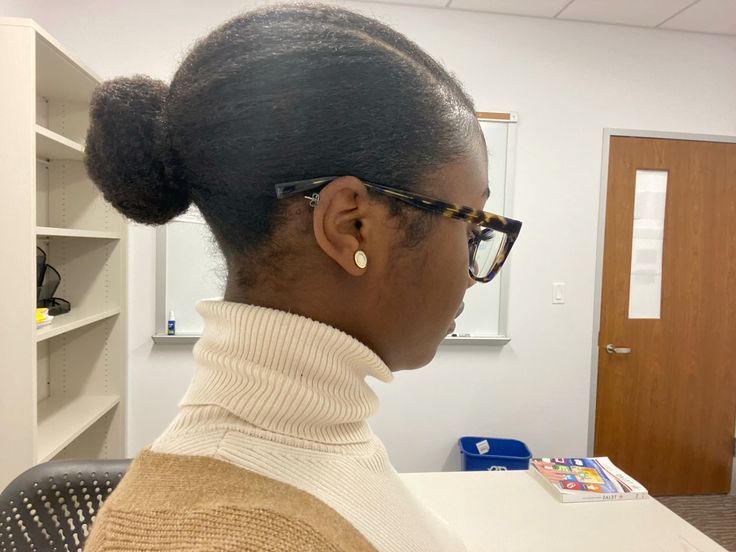
24. Braided Low Bun
Create a simple braid or several small braids from your ponytail, then wrap them into a low bun. This gives the basic bun more texture and detail.
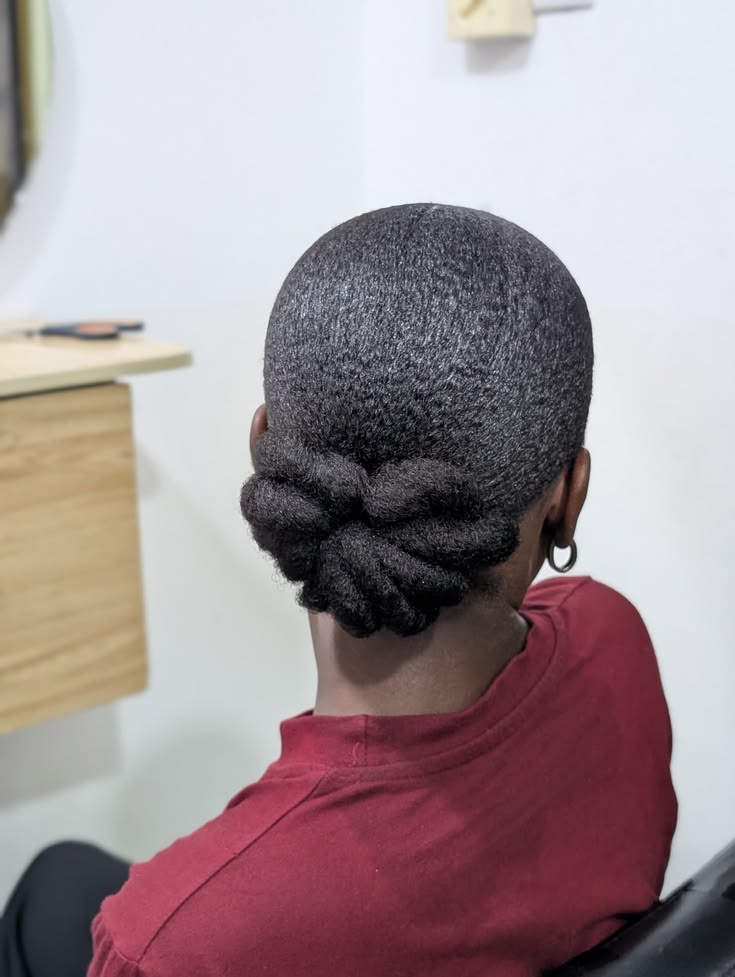
25. Half-Up Bun
Gather only the top section of your hair into a bun while leaving the rest loose. It gives you the convenience of having your hair away from your face while still showing off your natural texture.
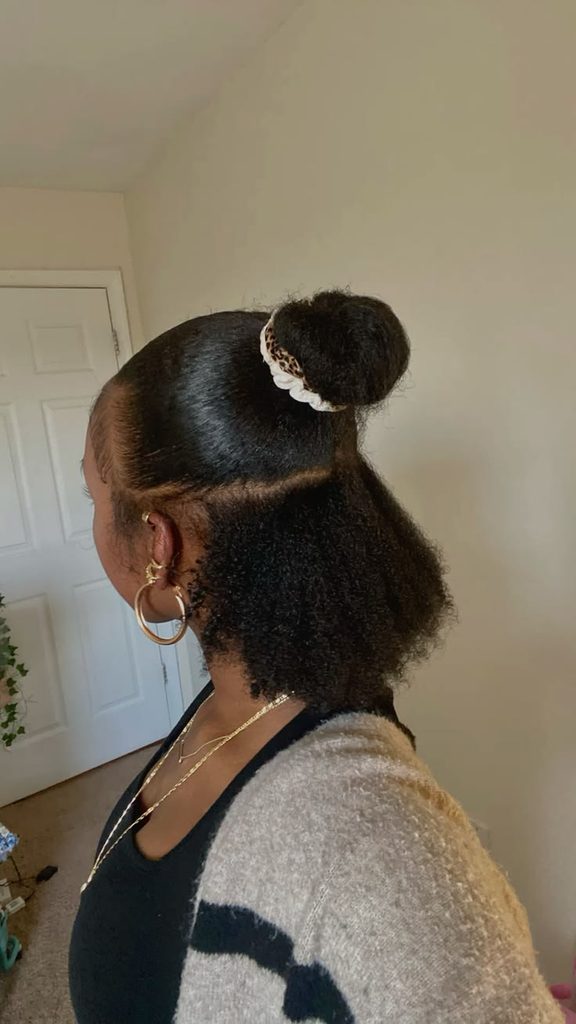
26. Half-Up Half-Down Twists
Install twist-ins and pack some of them up while leaving the rest of the twist strands for that easy but stylish school look
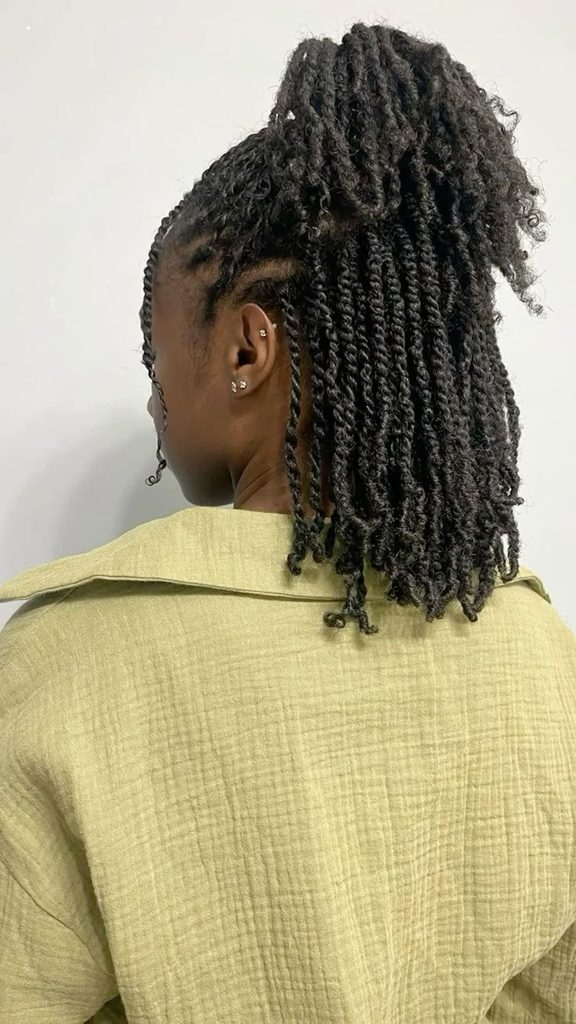
27. Pineapple Puff
Gather your hair loosely toward the top of your head so that the hair fans outward. This creates a fuller puff-like shape while keeping most of the hair away from your face.
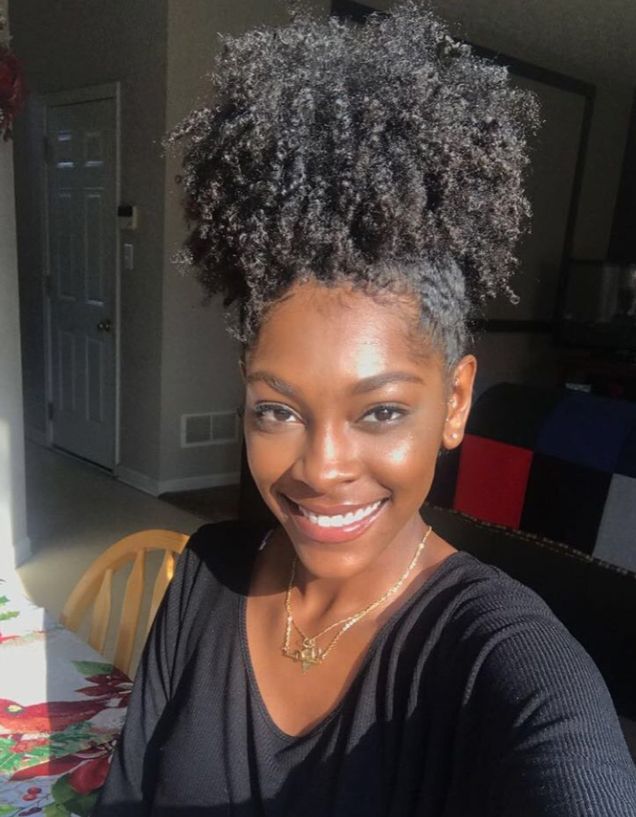
28. Bubble Ponytail
Secure a ponytail at several points along its length using small hair ties to create sections or “bubbles.” Keep the bands comfortable rather than pulling each section tightly.
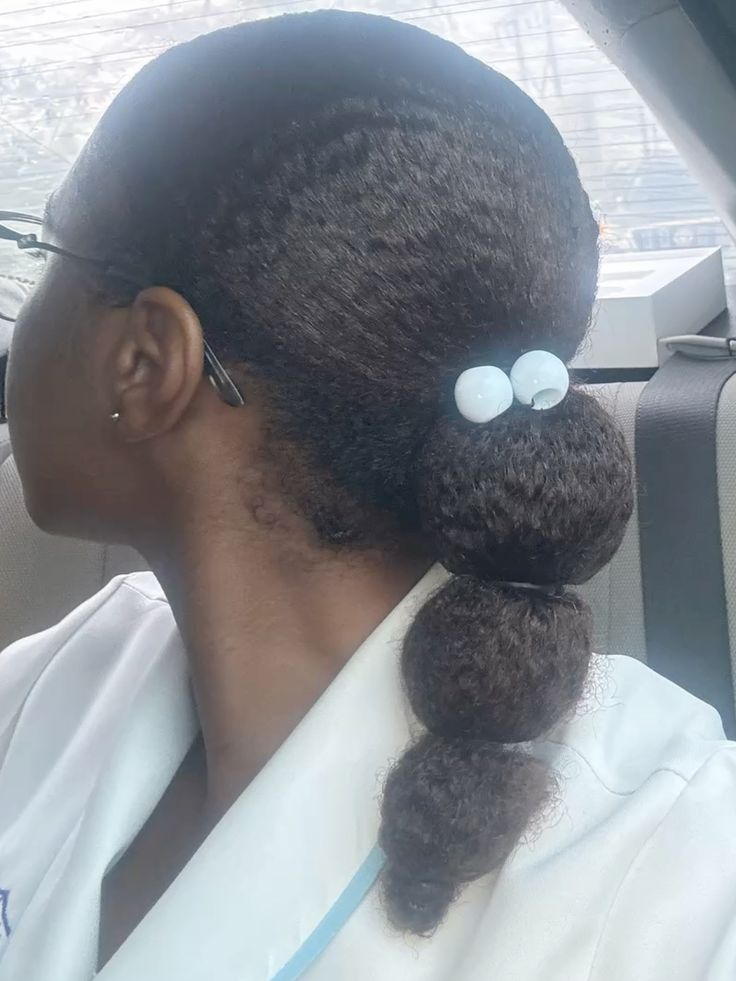
29. Two Straight-Back Cornrows
Part your hair into two sections and braid each one straight toward the back. It is simple, neat and easy to maintain. The style works particularly well when you want a traditional school look.
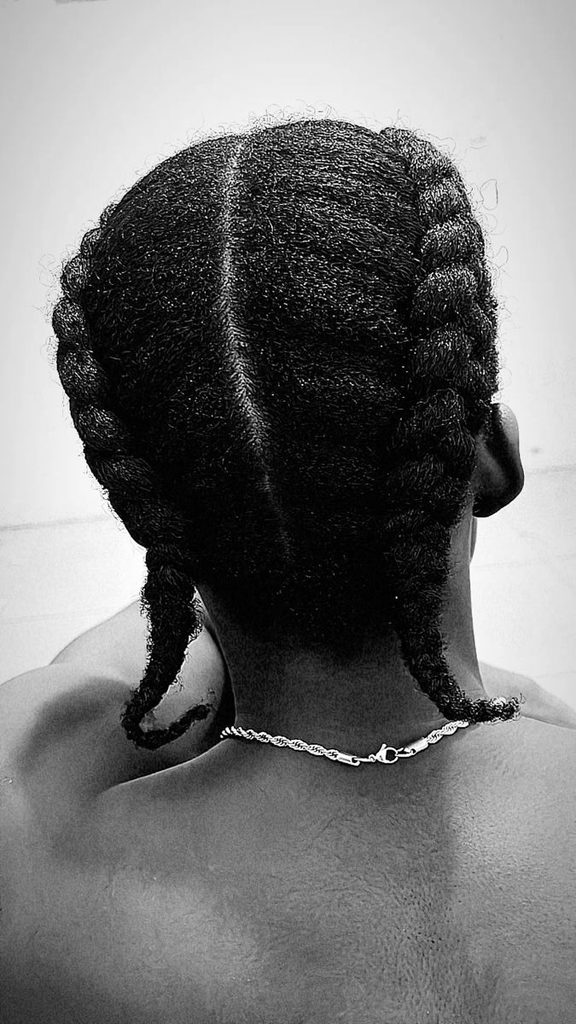
30. Three Straight-Back Cornrows
Three larger cornrows give you a slightly different pattern while keeping the hair neatly contained. The middle braid can create a strong central line, making the style look structured.
31. Four Straight-Back Cornrows
Four cornrows offer more definition without becoming overly complicated. They are a practical option for students who want their hair secured for several school days.
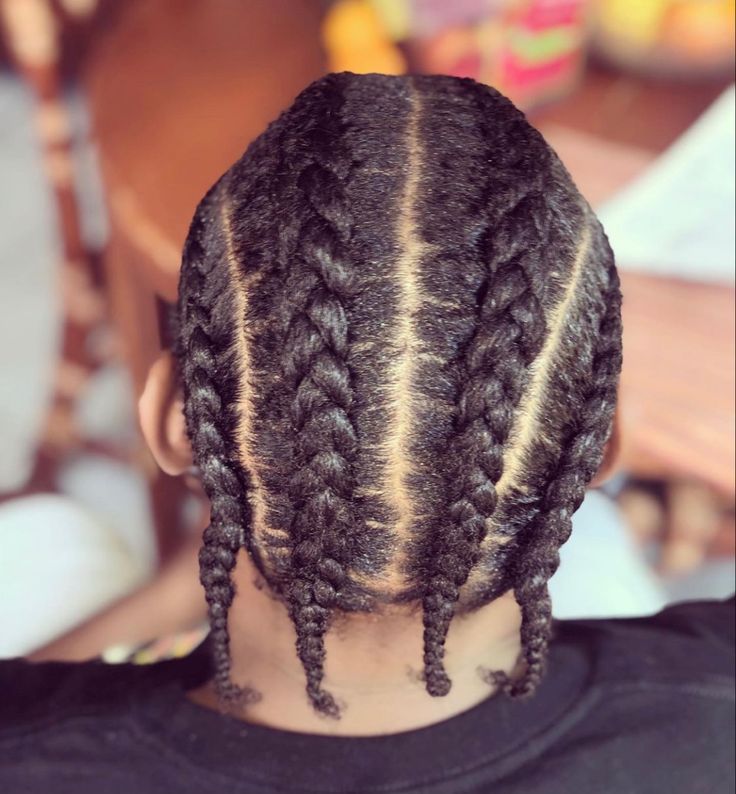
32. Side Cornrows
Create several cornrows toward one side of the head while leaving the remaining hair loose or gathered. The asymmetrical pattern gives the style a creative touch.
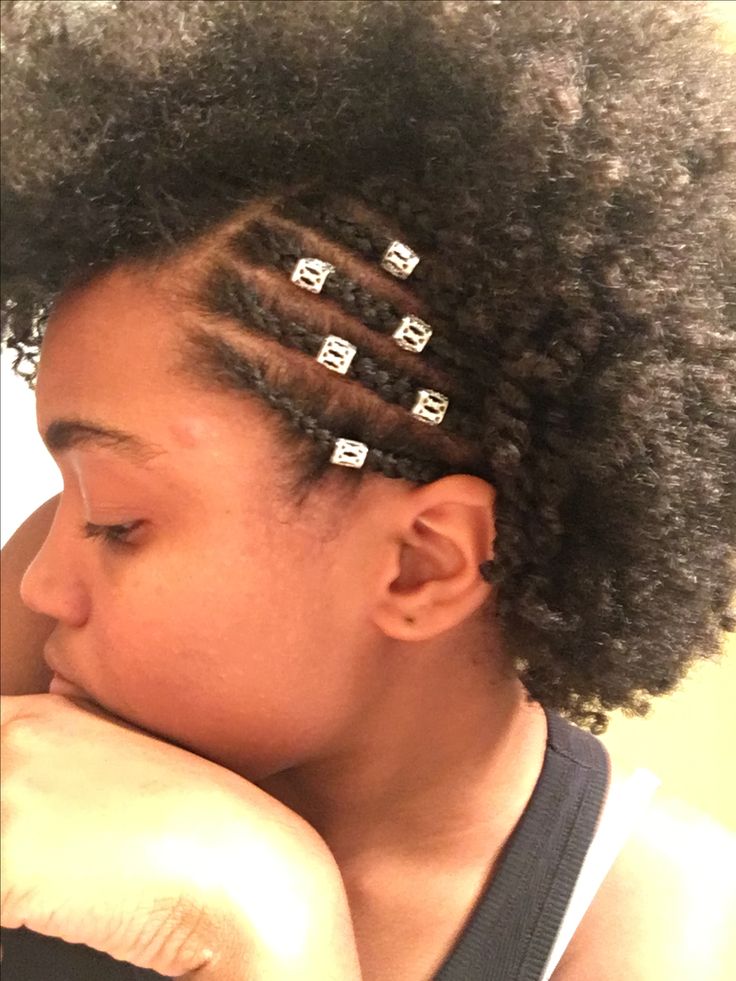
33. Cornrow Ponytail
Braid several sections toward the back and gather the ends into a ponytail. This combines the security of cornrows with the movement of a ponytail.
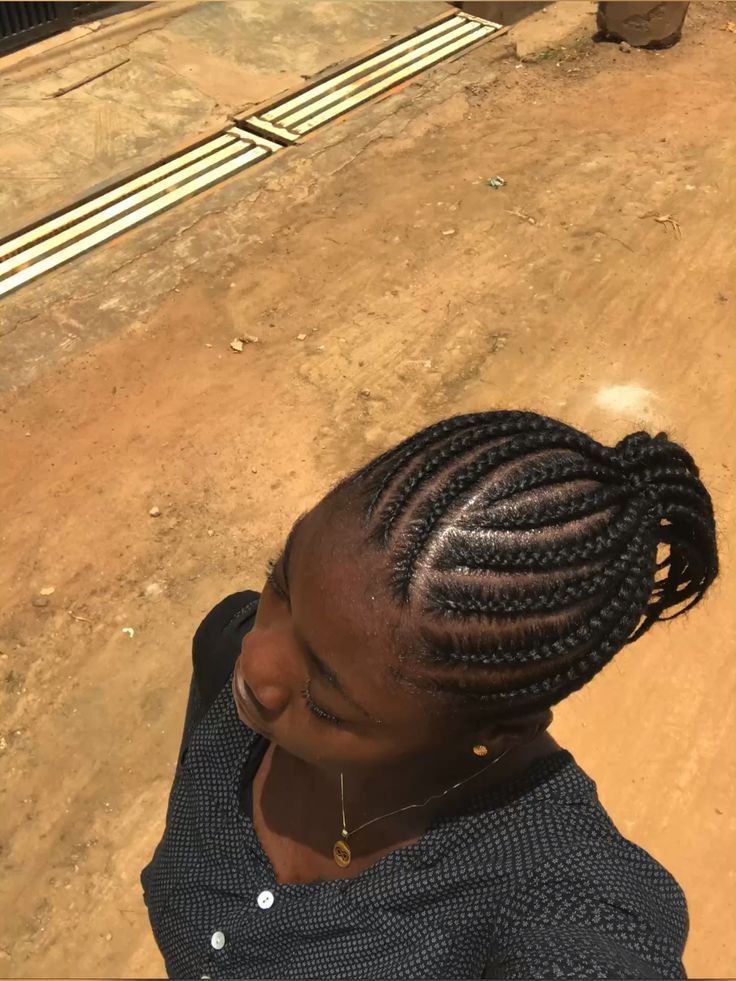
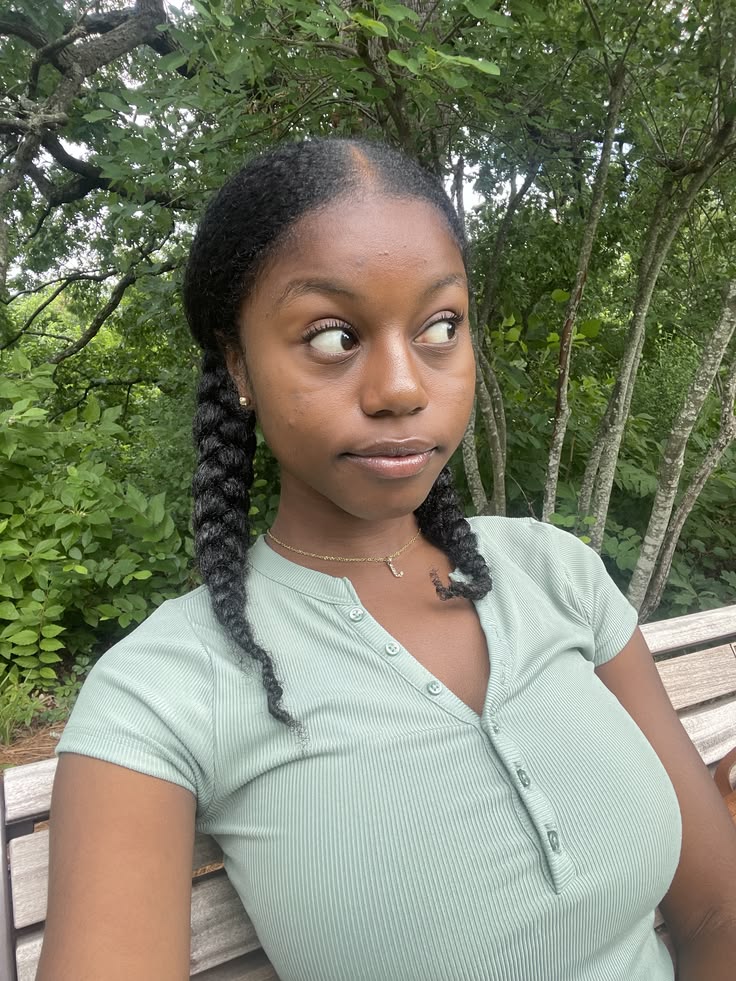
34. Two Braided Pigtails
Divide the hair into two sections and braid each side. Leave the braids hanging or secure them upward into small buns. This is a classic school-friendly option.
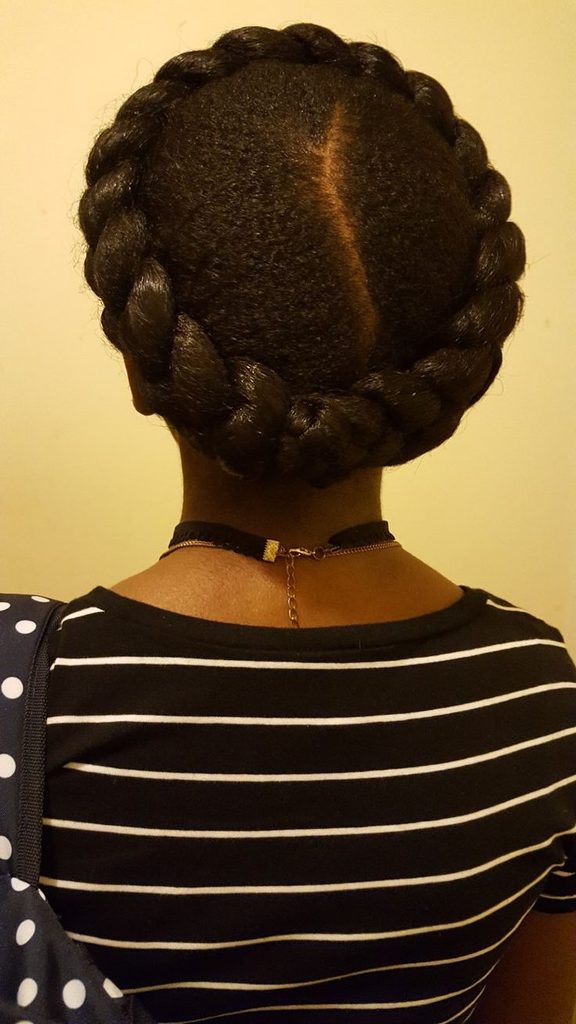
35. Braided Crown
Create braids that travel around the head like a crown. Tuck or pin the ends securely. The finished style looks more elaborate than the amount of daily maintenance it requires.
36. Side-Parted Cornrows With Loose Ends
Create a defined side part, then braid the hair toward the back while leaving the ends loose. The contrast between the structured roots and textured ends creates an interesting finish.
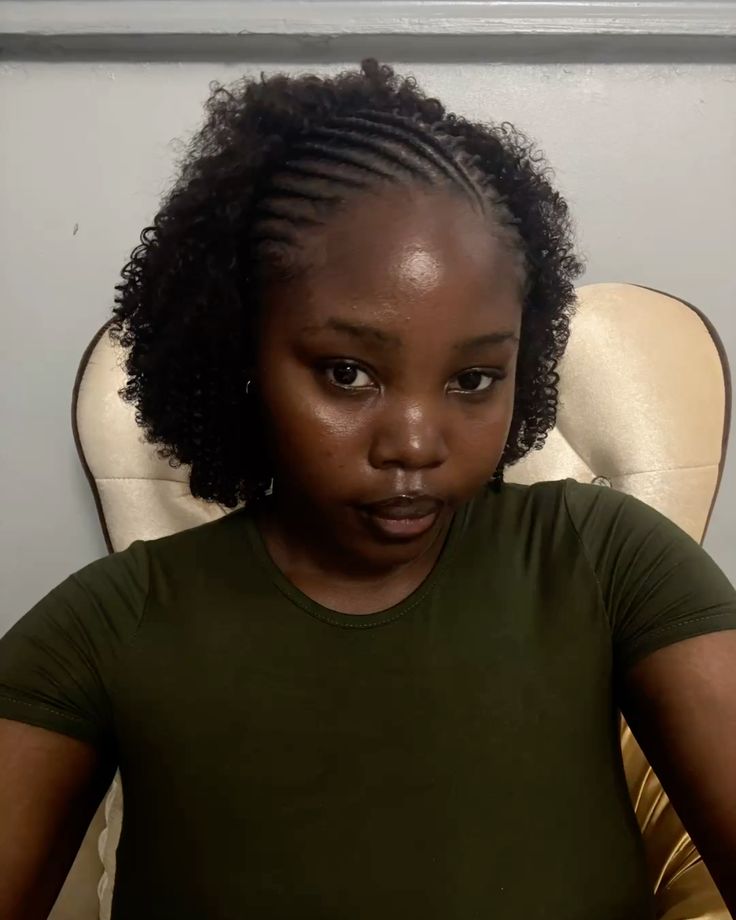
37. Twist and Cornrow Combination
Combine twists and cornrows in the same hairstyle. For example, you can cornrow the front and twist the back. This gives you a more creative style without relying on complicated accessories.
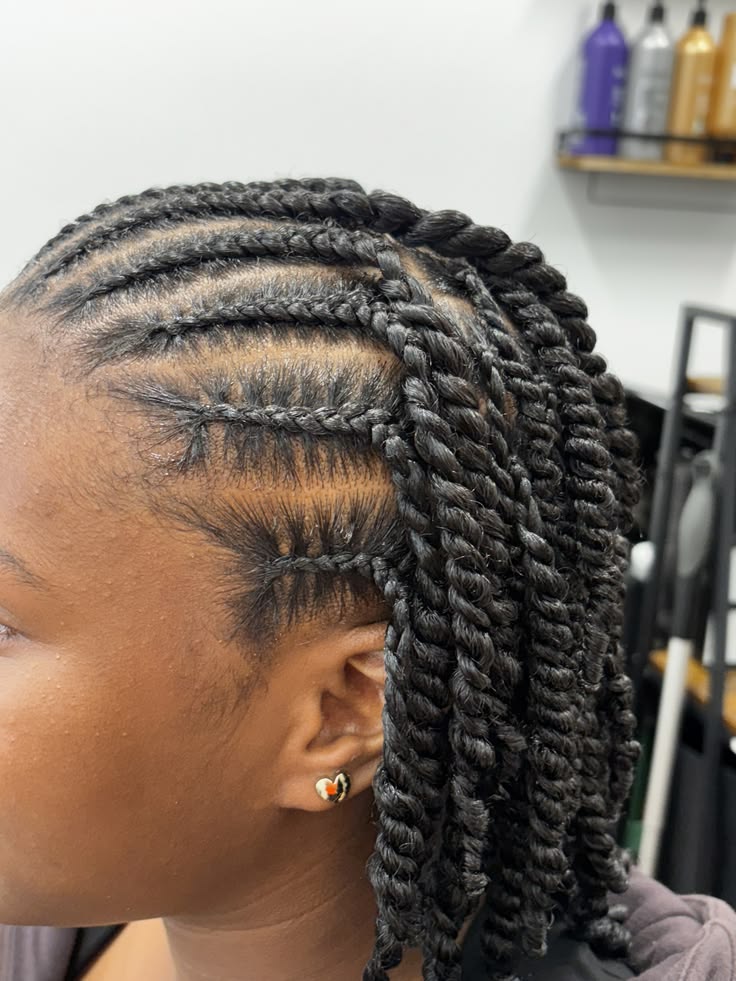
38. Bantu Knots
Divide the hair into sections, twist each section and wrap it around itself to form small knots. You can make them uniform for a neat appearance or vary the size for a more creative look.
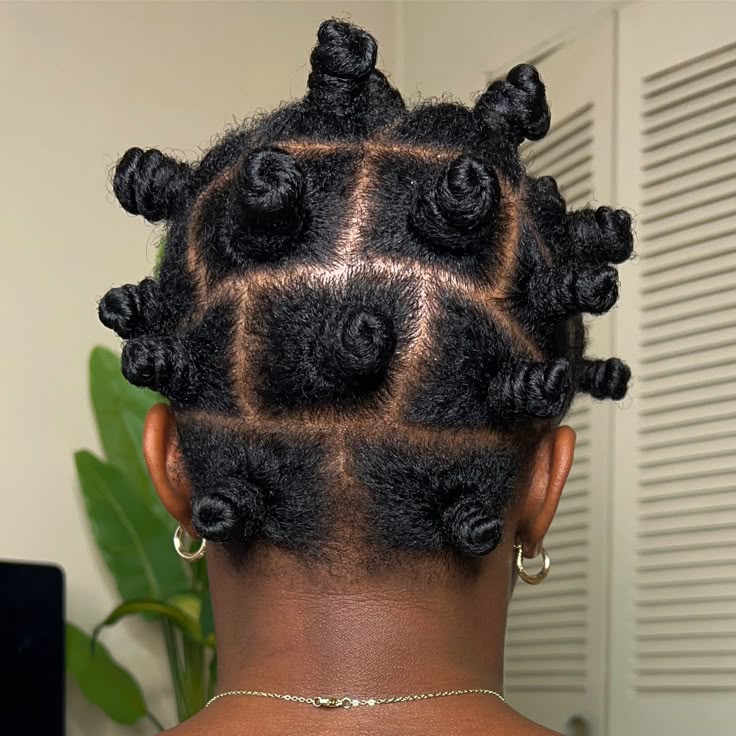
39. Bantu Knot-Out
Install Bantu knots, allow them to dry fully and unravel them carefully. The result is a textured, defined style with plenty of volume. Make sure the hair is completely dry before taking the knots down.
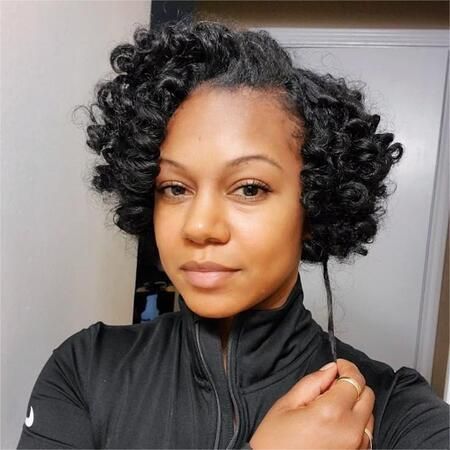
40. Side Bantu Knots
Instead of covering the entire head, place several Bantu knots along one side and leave the remaining hair loose or stretched. It is an easy way to make a simple style look more creative.
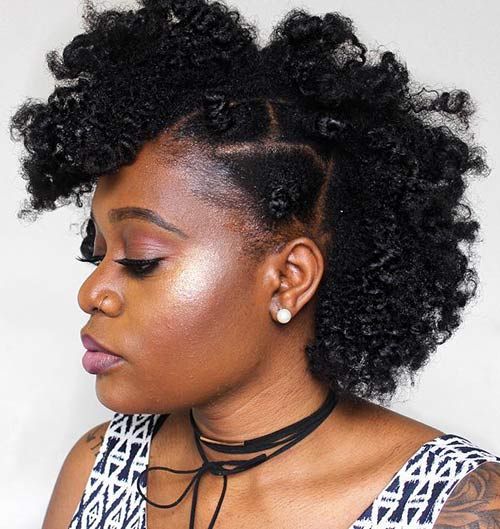
41. Bantu Knots With Flat Twists
Combine flat twists with Bantu knots for a more detailed hairstyle. The twists can frame the front while the knots add texture toward the back or sides.
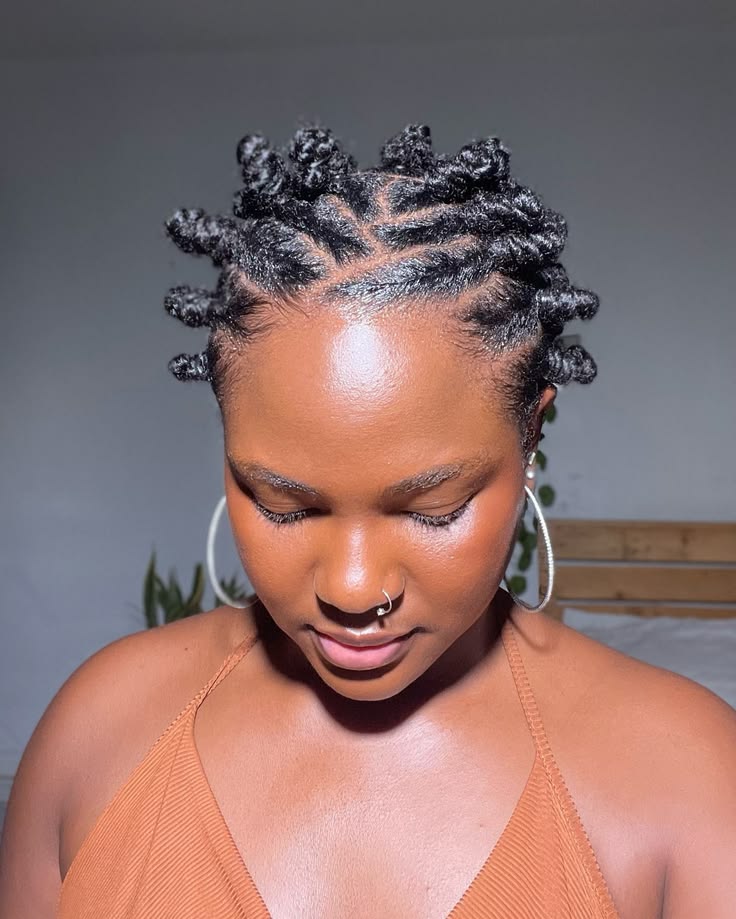
42. Sectioned Puffs
Divide the hair into several sections before creating small puffs. This gives you a neat, organised appearance while still allowing your natural texture to show.
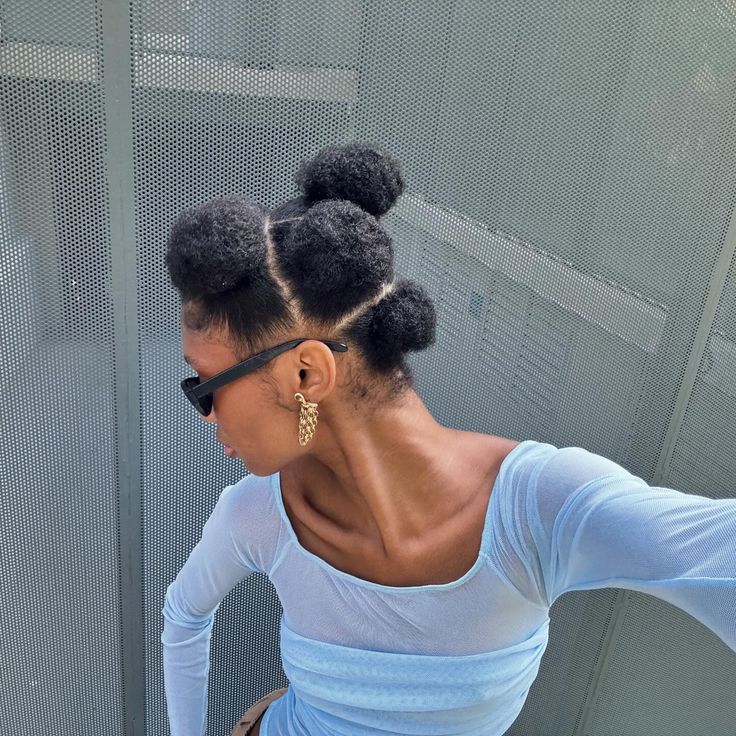
43. Rubber-Band Sectioned Style
Use small, gentle bands to divide the hair into geometric sections before gathering each section into a puff or twist. Avoid placing bands too tightly, and remove them carefully rather than pulling them through the hair.
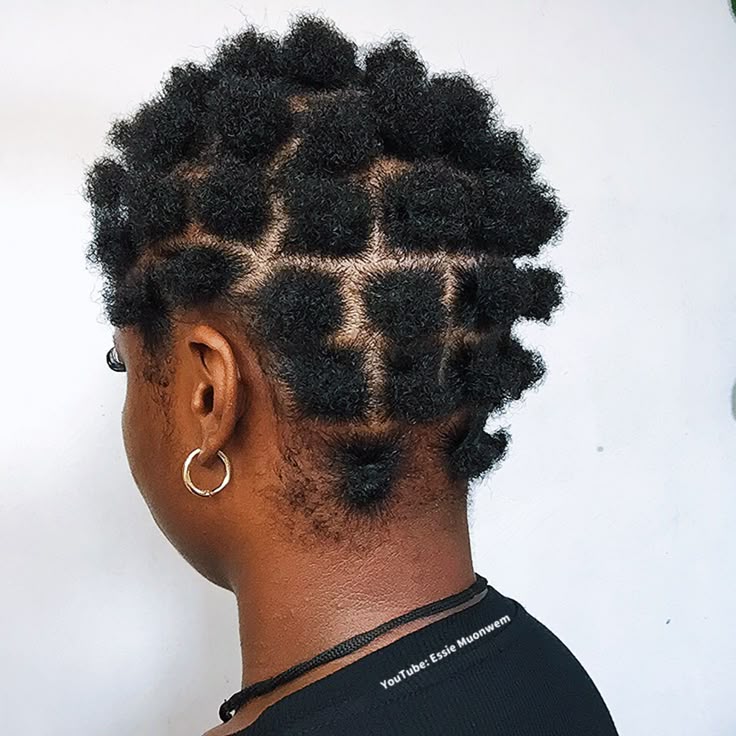
44. Half-Up Half-Down Puff
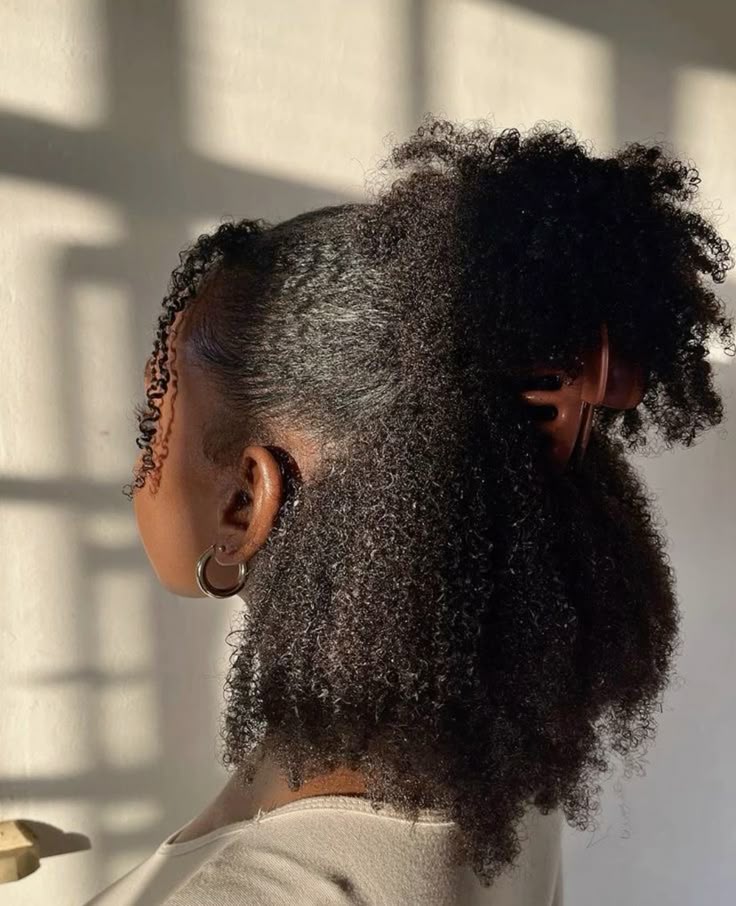
Gather the front or upper section of your hair into a puff while leaving the back loose. This is a simple way to keep hair away from your face without putting the entire head into an updo.
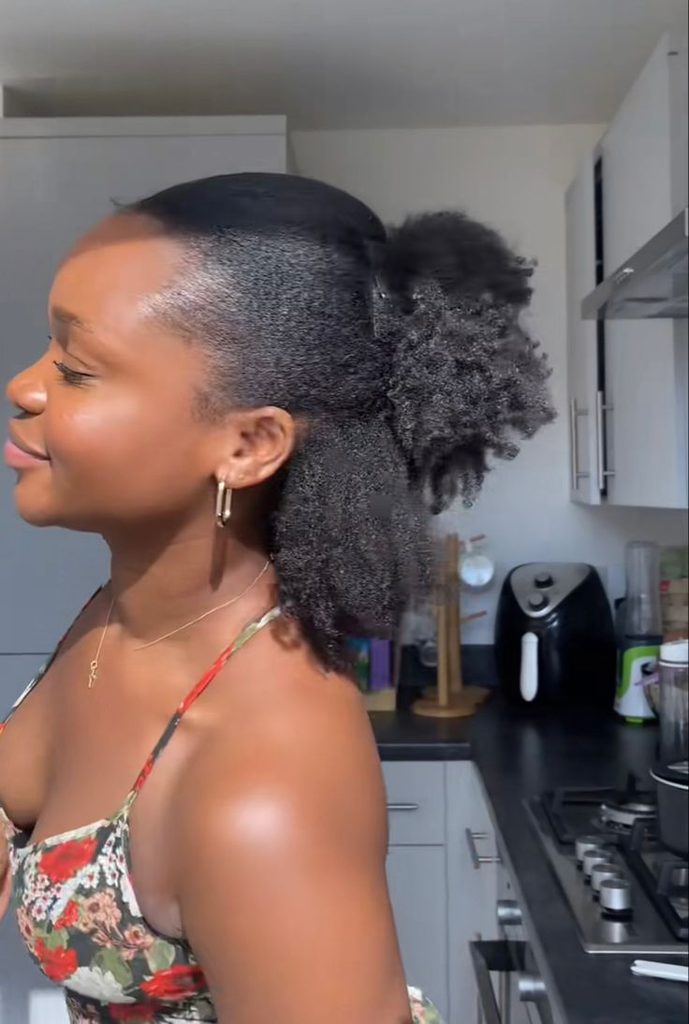
45. Half-Up Half-Down Afro
Create a small puff or secured section at the top while allowing the remaining hair to form a soft afro. It gives you volume in the back while keeping the front controlled.
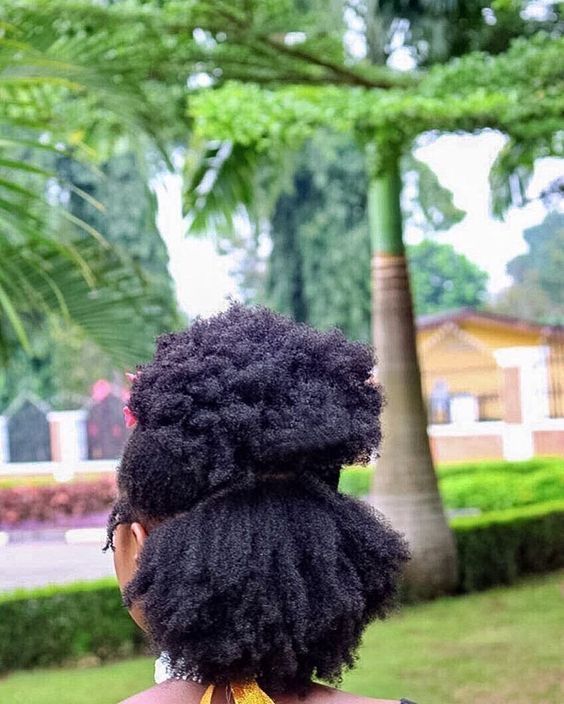
46. Front Puff With Loose Back
Gather only the front section into a small puff and leave the rest of the hair loose. This works particularly well when you want a quick style but don’t want to compress all your hair.
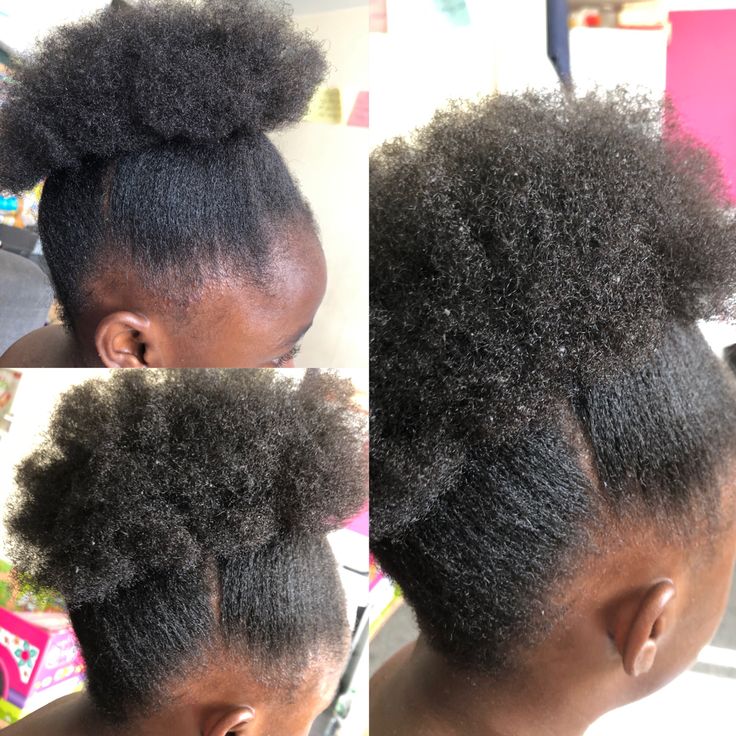
47. Frohawk With Flat Twists
Create flat twists along both sides of the head and leave the centre section raised and textured. The result resembles a frohawk while keeping the sides neat.
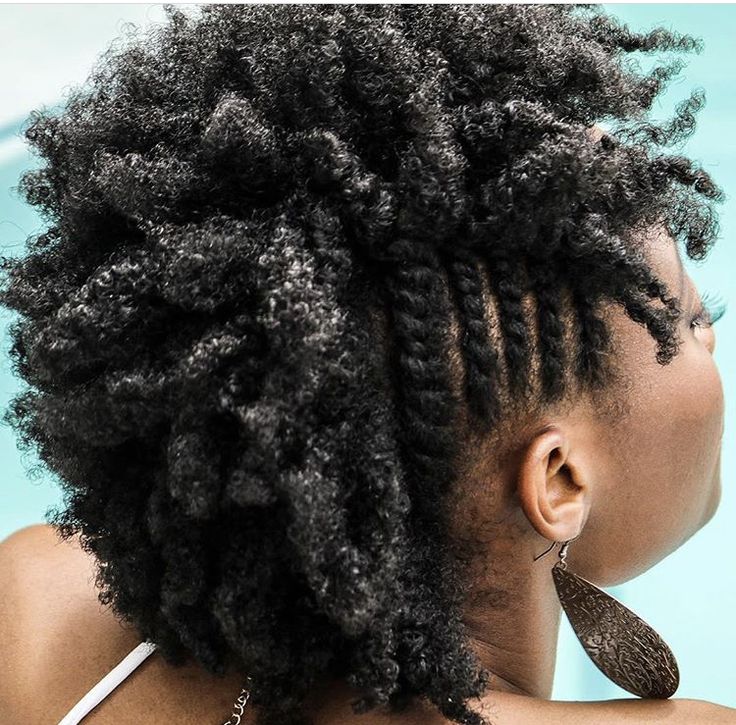
48. Pinned-Up Afro
Start with your natural afro, then use several bobby pins or hairpins to lift sections toward the top or back. You can create a loose updo without completely flattening your texture.
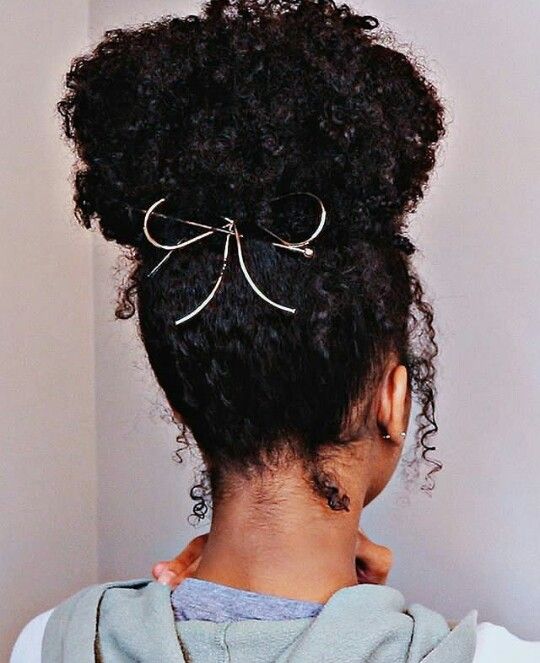
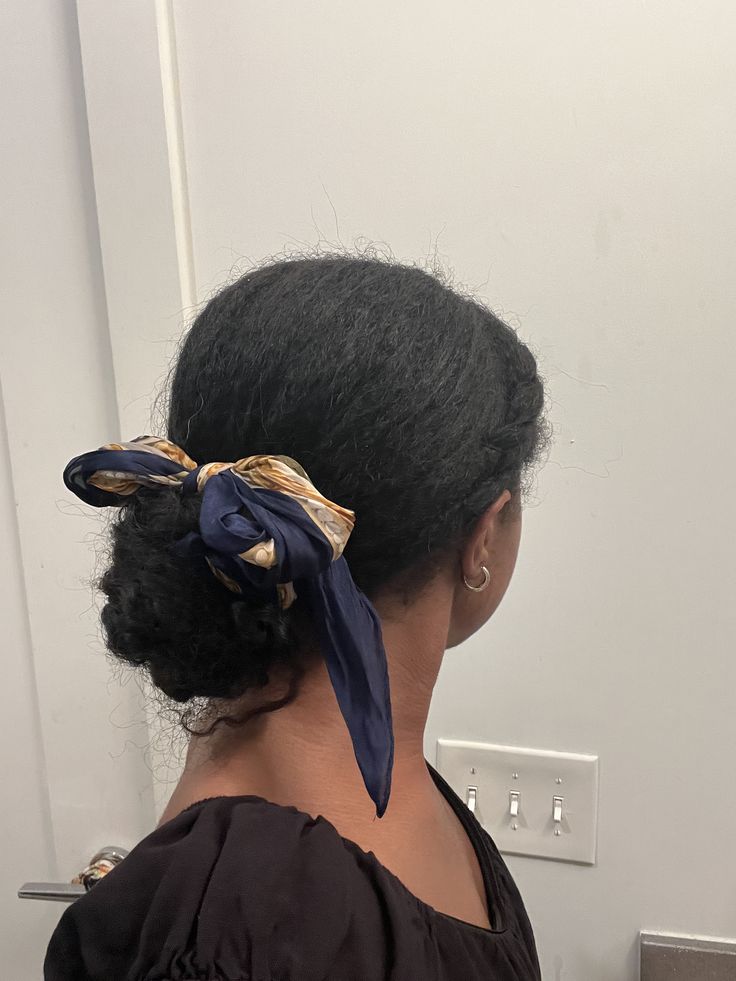
49. Scarf-Wrapped Low Bun
Create a simple low bun and wrap a school-appropriate scarf around the base. This can make an ordinary bun look more intentional while helping keep loose hairs controlled.
How to Make Your School Hairstyles Last
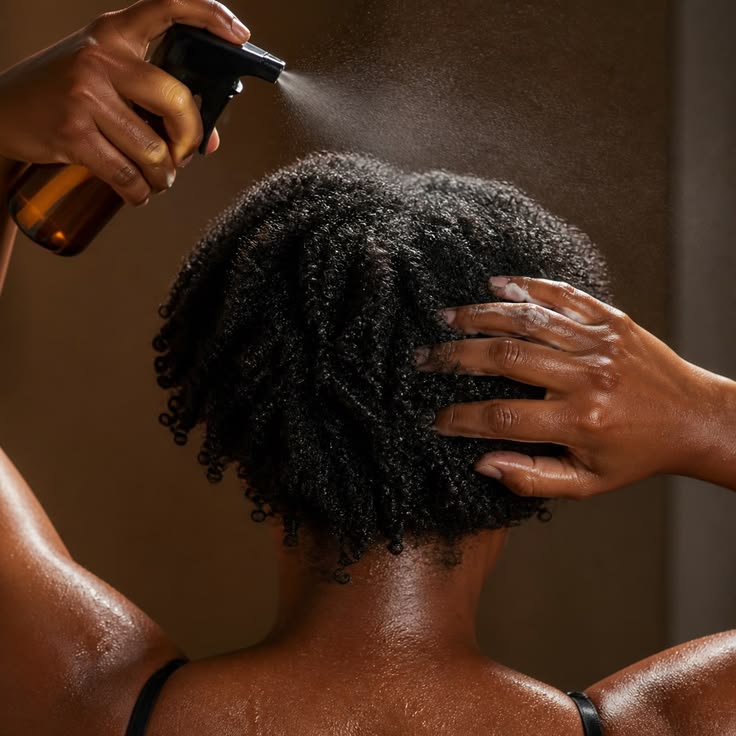
Start With Moisturised Hair
Dry hair can be harder to manipulate and may become more prone to tangling. Before styling, make sure your hair has enough moisture for the style you’re creating.
Your hair oils can be incorporated into your routine if they work well for your hair, but avoid assuming that adding more oil automatically means adding more moisture.
For extra softness, you can also experiment with aloe vera treatments as part of your broader hair-care routine.
Do Not Overwork Your Edges
Your hairstyle does not need extremely slick edges to look neat. Repeatedly brushing, pulling and applying strong-hold products to the same area can place unnecessary stress on the hairline.
A soft, natural hairline can still look polished.
Protect Your Hair at Night
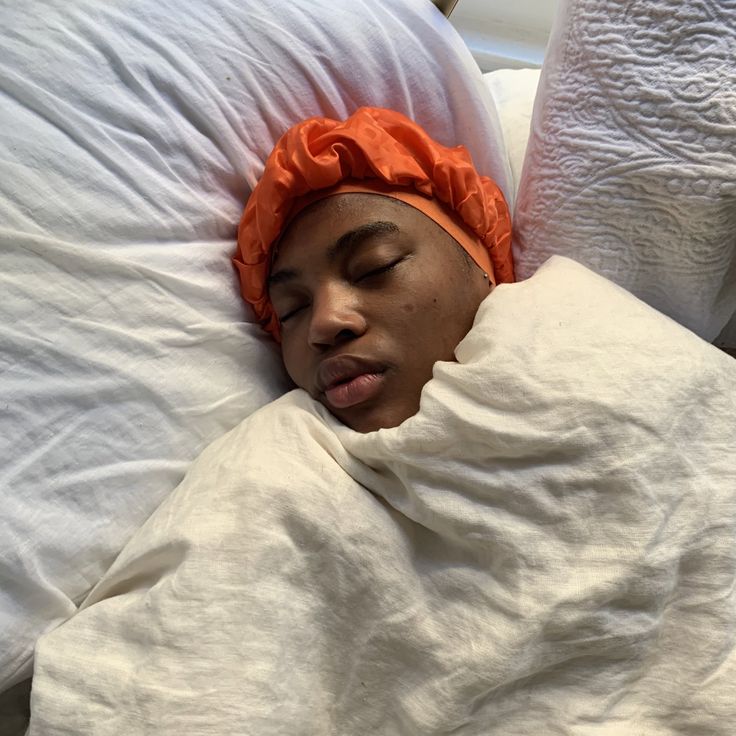
A satin or silk bonnet, scarf or pillowcase can help reduce friction while you sleep. Before bed, loosely secure your hair if necessary rather than sleeping directly on a freshly styled puff or loose afro.
Rotate Your Styles
Wearing the same tightly pulled style repeatedly is not necessary. Switch between puffs, twists, buns and looser styles so that you are not constantly stressing the same sections of your hair.
If you notice persistent flakes, irritation or other changes around the scalp, don’t simply cover the problem with another hairstyle. Your scalp care deserves attention too.
Keep Your Styling Tools Gentle
Wide-tooth combs, your fingers and soft brushes can all have a place in a 4C hair routine. Work slowly when detangling rather than forcing a comb through a stubborn section.
Your goal is not to make every strand perfectly smooth. Your goal is to create a hairstyle while treating your natural hair gently.
How to Choose the Right Style for Your Hair Length
Short 4C Hair
Short hair can work beautifully with mini puffs, Bantu knots, flat twists, small cornrows, headbands and sectioned styles. Don’t feel pressured to create a large puff if your hair is not long enough yet.
Medium-Length 4C Hair
Medium-length hair gives you plenty of flexibility. You can experiment with two-strand twists, larger puffs, buns, ponytails, twist-outs, flat twists, and half-up styles.
If your hair is frequently difficult to manage, look at your overall 4C hair routine rather than blaming the hairstyle itself.
Long 4C Hair
Longer hair gives you even more options, including large buns, braided ponytails, cornrows, crown styles and elaborate twist combinations. However, longer hair can also become heavier, so make sure your styles remain comfortable.
Keeping School Hairstyles Healthy
A cute hairstyle is great, but healthy hair should remain the priority. Don’t keep a style installed simply because it still looks presentable if your scalp or hair is uncomfortable.
Pay attention to dryness, excessive tangling, tenderness and increased shedding. If your hair needs additional conditioning, rotate in hair masks rather than continually adding styling products.
You can also use rice water as an occasional treatment if it suits your hair, but it should not replace the basic habits that keep natural hair healthy: gentle handling, cleansing, conditioning and appropriate moisture.
And if your hair frequently feels coated or difficult to moisturise, occasional attention to buildup may be useful. Product buildup can make styling feel harder because products are sitting on the hair instead of allowing your normal routine to work effectively.
For cleansing, choosing sulfate-free products is one option some people prefer, particularly when they find stronger cleansers too drying. The important thing is how your own hair responds rather than choosing a product simply because its label sounds better.
Final Thoughts
There is no single “best” school hairstyle for natural 4C hair. The best option depends on your hair length, how much time you have in the morning, your school’s rules and how much manipulation your hair can comfortably handle.
Some days, a high puff is all you need. Other days, two-strand twists, cornrows or a low bun may make more sense. Having several reliable styles in rotation means you don’t have to reinvent your hair every morning.
The goal is to find school hairstyles for natural 4C hair that make your routine easier while allowing you to enjoy your natural texture. Start with the styles that are easiest for you, pay attention to what your hair responds well to and gradually experiment with the others.