75 Twist-Out Ideas You’ll Want to Copy
Disclosure: Some of the links in this post are affiliate links. This means if you click on the link and purchase an item, I will receive an affiliate commission at no extra cost to you.
Twist-outs are one of the most flexible ways to style natural hair. They can create soft waves, defined curls, fluffy volume, stretched texture, or a full statement look without using heat. The final result depends on your twist size, products, drying time, and how you separate the twists.
For anyone searching for twist-out ideas for 4C hair, the best style is not always the one with the smallest curls. Sometimes, a large fluffy twist-out gives the most beautiful result. Other times, smaller twists create the definition you want. You can also combine twist-outs with puffs, accessories, side parts, pinned sections, and simple updos.
Before styling, start with clean, detangled hair and a good conditioner. Your 4C hair basics can help you choose a routine that supports softness and easier manipulation. If your hair feels rough, dry, or difficult to separate, consider adjusting your daily care habits before creating your twist-out.
Below are 75 twist-out styles to save for your next wash day.
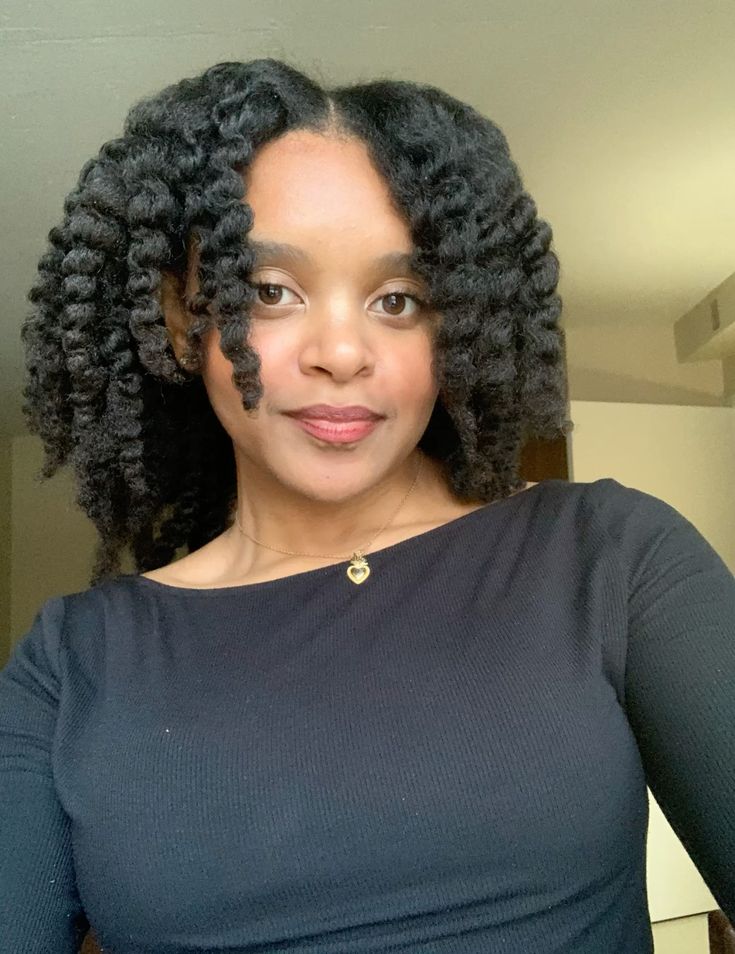
1. Classic Defined Twist-Out
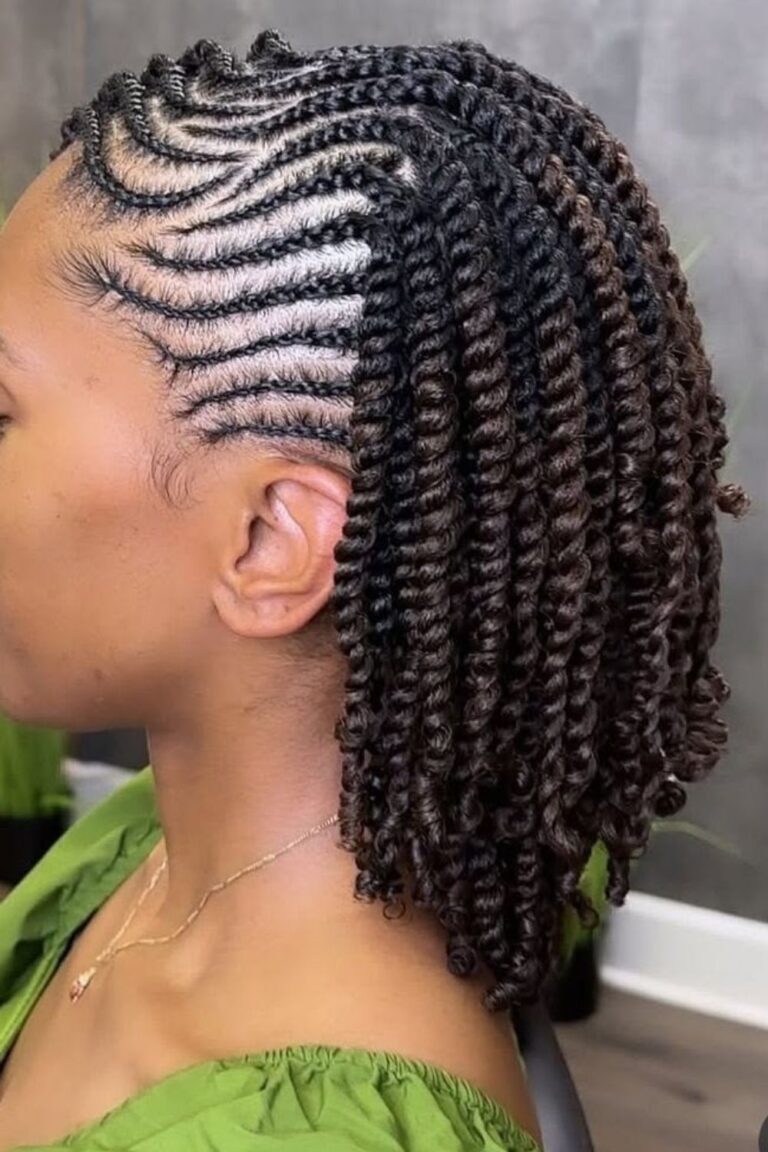
The classic defined twist-out is a reliable choice when you want neat, visible curls throughout your hair. Create medium-sized two-strand twists, allow them to dry completely, and unravel carefully.
Use a light styling cream or gel for extra definition. Separate each twist gently to avoid turning the curls into frizz.
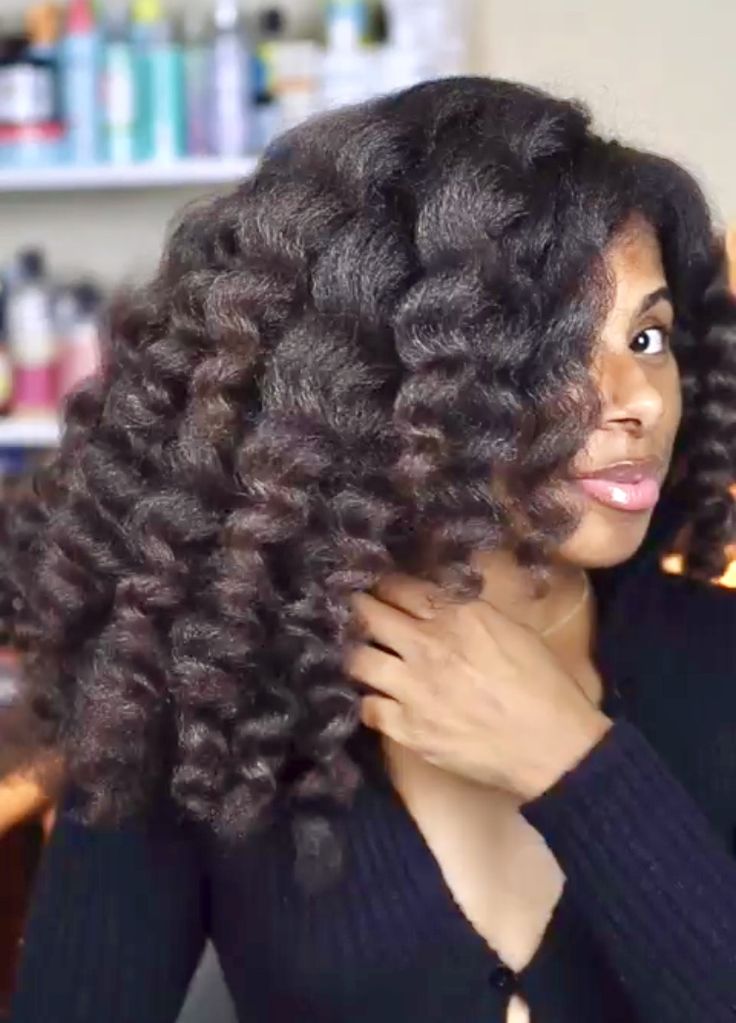
2. Fluffy Stretched Twist-Out
This style combines curl definition with a fuller appearance. Stretch the twists lightly before unraveling, or use larger twists to create soft volume.
It is perfect when you want your hair to look thick, airy, and less tightly coiled.
3. Small Defined Twist-Out
Small twists create tighter curls and more visible definition. This option takes longer to install, but the result can last several days with proper nighttime protection.
Apply product in small sections and make sure each twist dries completely.
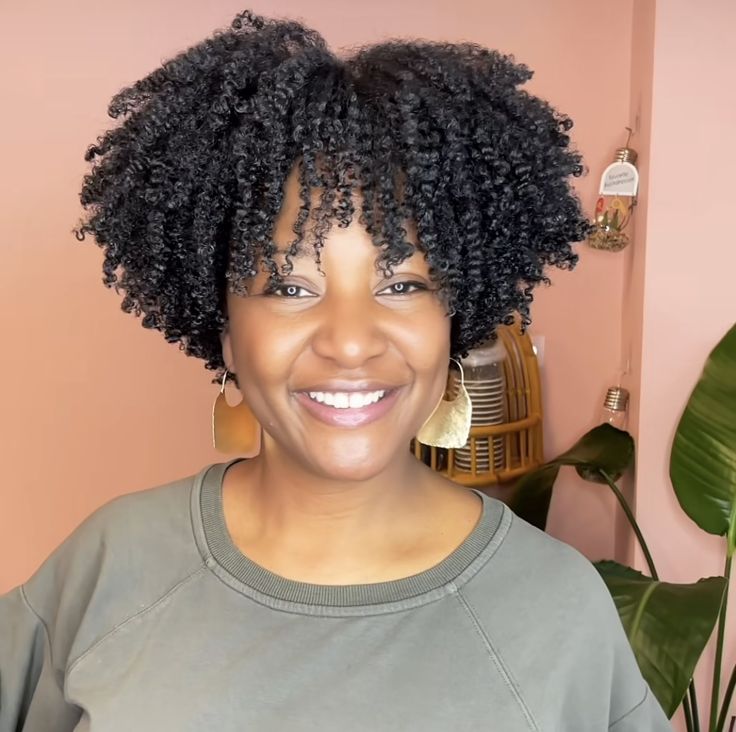
4. Large Soft Twist-Out
Large twists produce a soft, loose texture with less separation between individual curls. They are a good option when you want a quick styling session.
This is one of the easiest twist-out ideas for 4C hair because the installation process is simple and the finished look is naturally full.
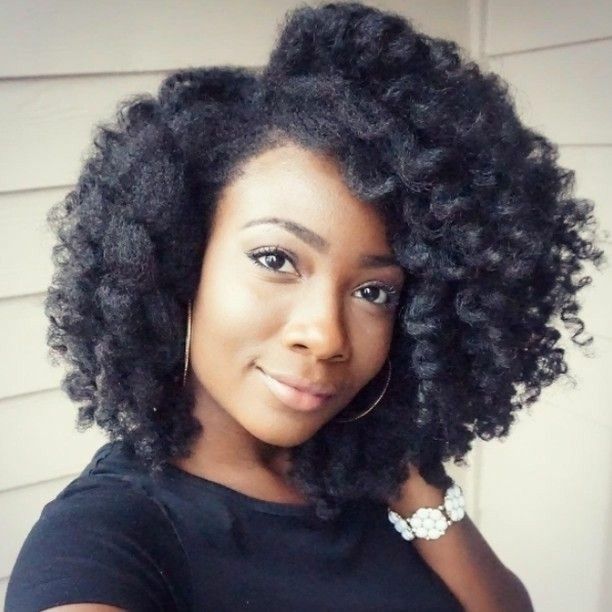
5. Side-Parted Twist-Out
Create your twist-out as usual, then use a rat-tail comb to form a deep side part. Gently arrange the hair toward one side for a more polished finish.
This look works well for casual outings, events, and days when you want your hair to frame your face.
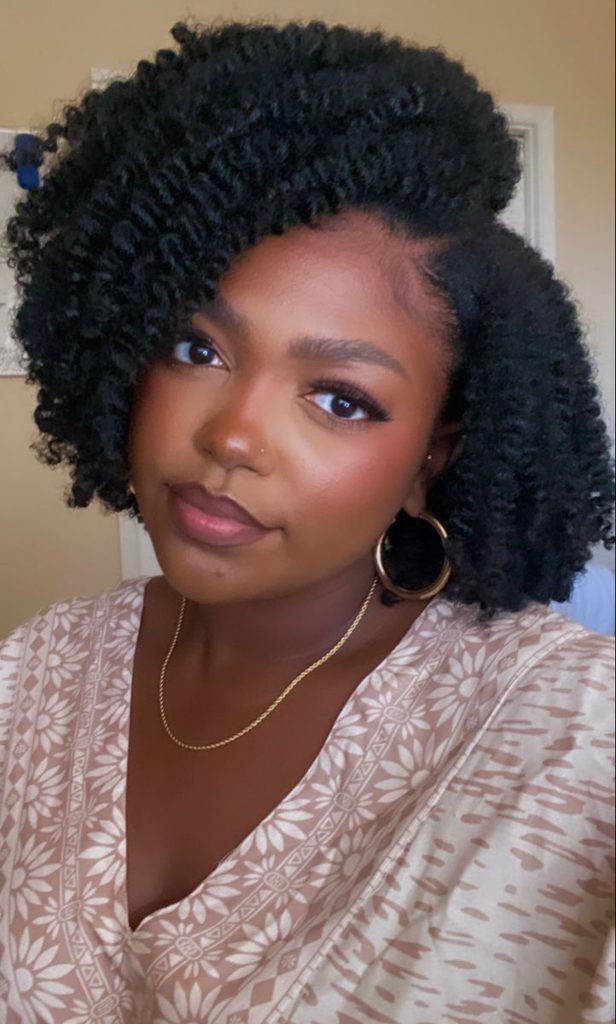
6. Middle-Part Twist-Out
A middle part gives the twist-out a balanced and symmetrical appearance. It works especially well when the curls are soft and evenly distributed.
Keep the roots slightly lifted for volume, or smooth them down for a cleaner shape.

7. Twist-Out With Defined Ends
For this look, pay special attention to the ends of each twist. Curl the ends around your finger or secure them neatly before allowing the twists to dry.
The result is a style with a more finished appearance and clearly shaped tips.

8. Twist-Out With Fluffy Roots
This style keeps the curls visible while allowing the roots to remain soft and voluminous. Avoid separating the twists too much at the roots.
Use your fingers to lift the base gently without disturbing the curl pattern.
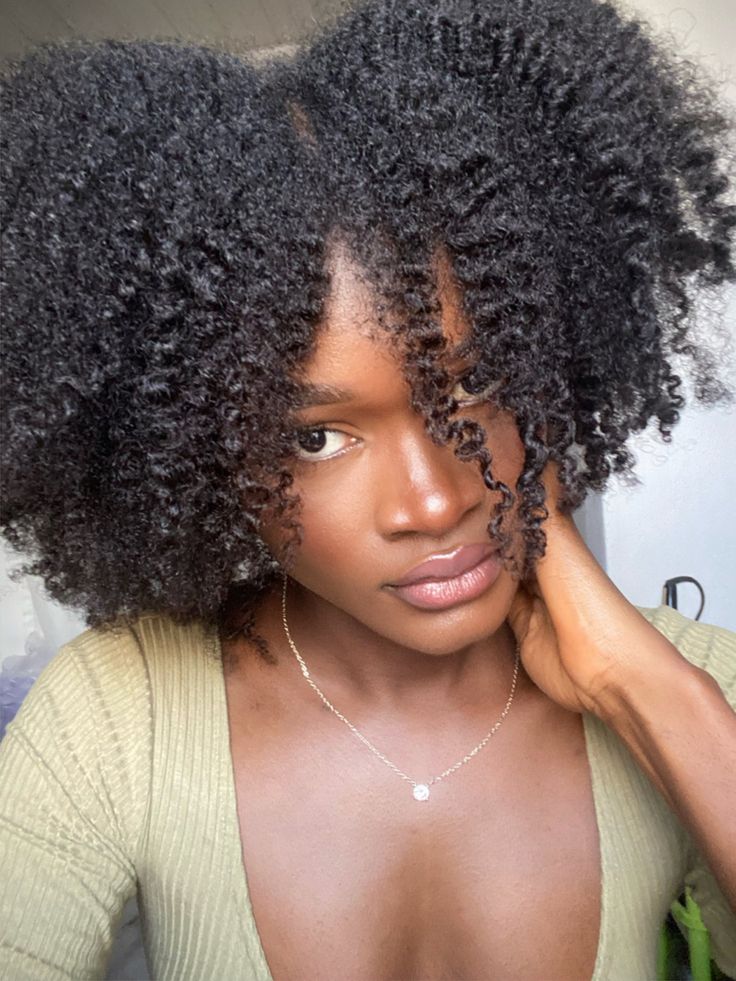
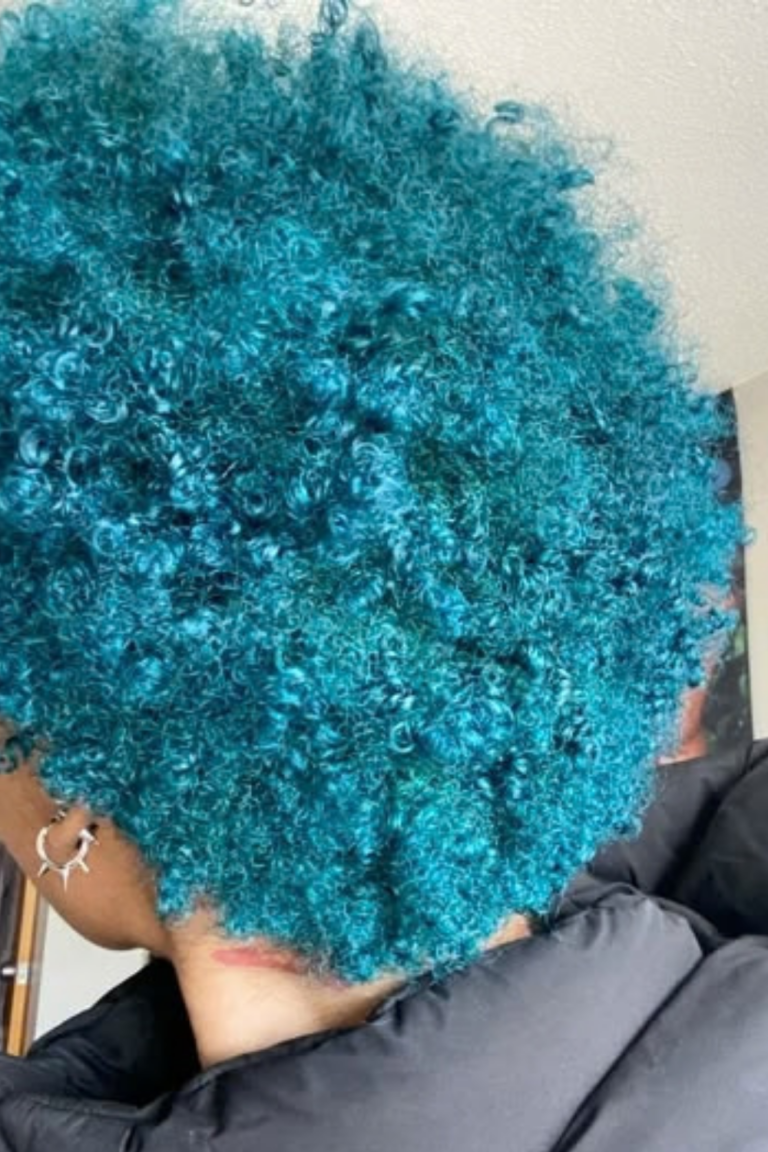
9. Rounded Afro Twist-Out
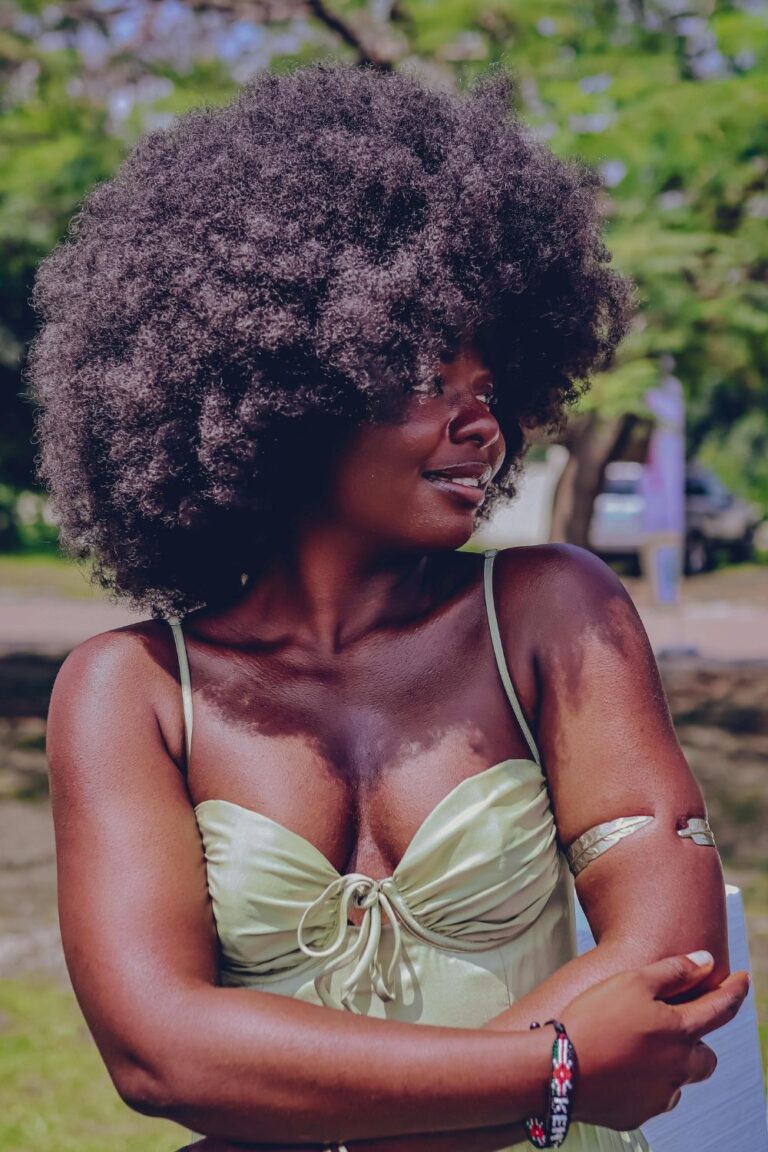
Shape the finished twist-out into a rounded silhouette. Use your fingers or a wide-tooth pick to lift the roots carefully.
This is a beautiful choice for anyone who loves a bold, full natural hairstyle.
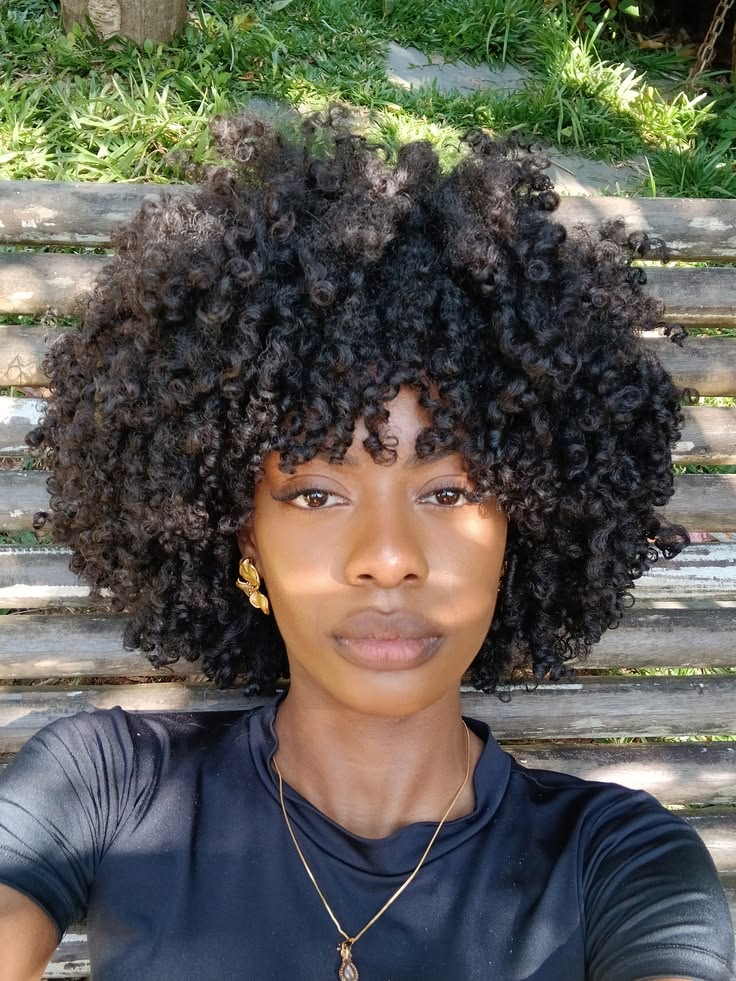
10. Soft Romantic Twist-Out
Use medium twists and a moisturizing styling cream to create soft, touchable curls. Keep the finish light instead of applying too much gel.
A few curls can be pinned away from the face for a gentle, romantic appearance.
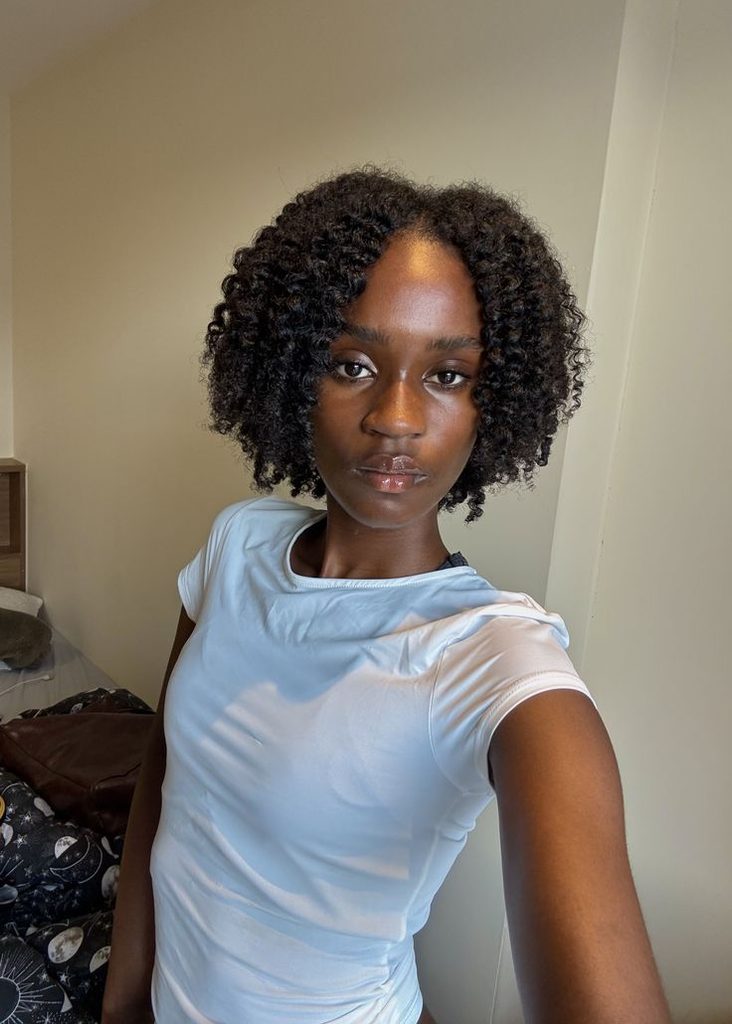
11. Twist-Out With a Deep Side Sweep
After unraveling, sweep most of the hair toward one side. Secure the smaller side with a discreet pin if necessary.
The side sweep gives a simple twist-out a more styled and intentional finish.
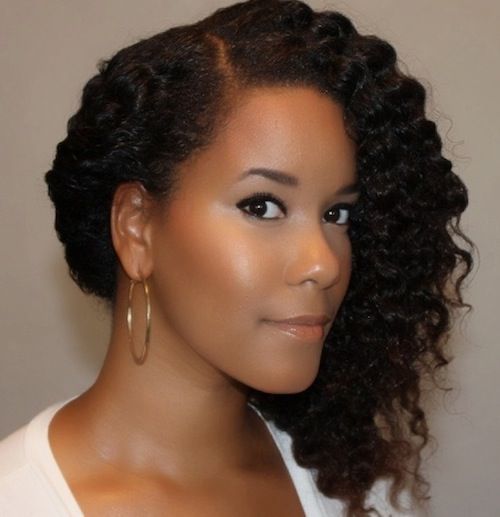
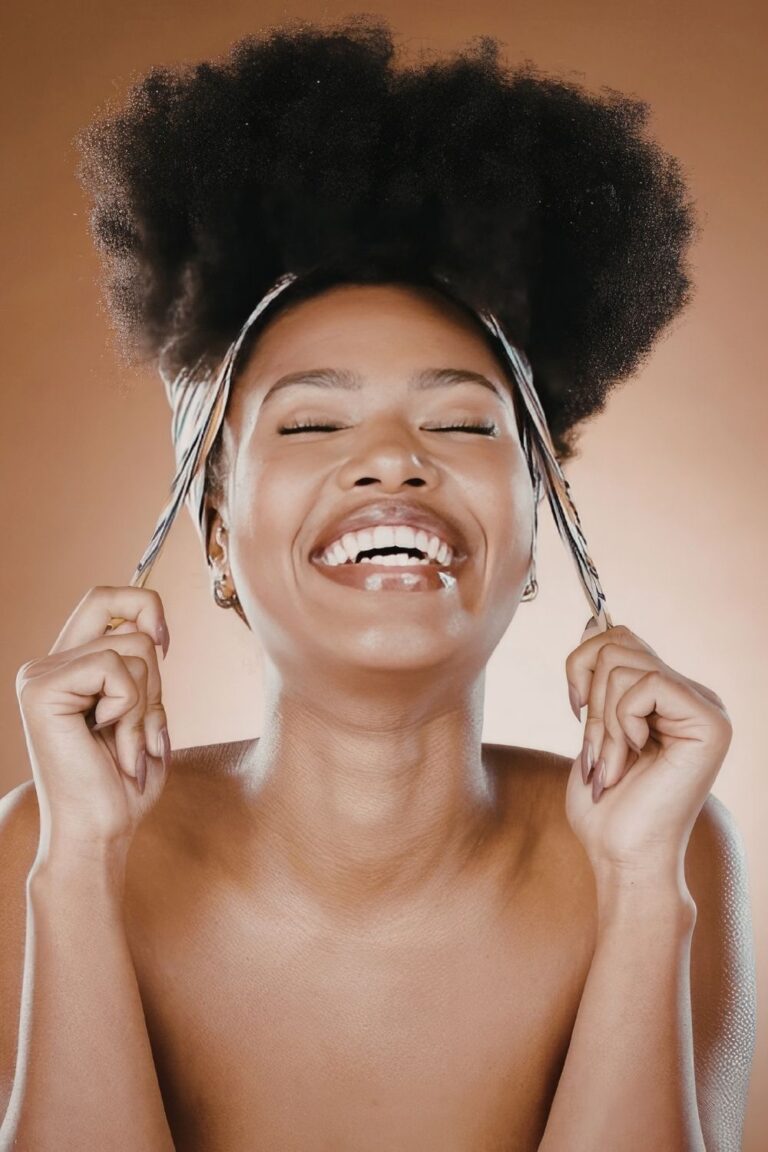
12. Twist-Out With a Headband
Add a fabric headband around the front of the hair while leaving the curls loose at the back. Choose a wide band for a bold look or a thin band for a subtle finish.
This style is useful when you want to control the front without flattening the entire twist-out.
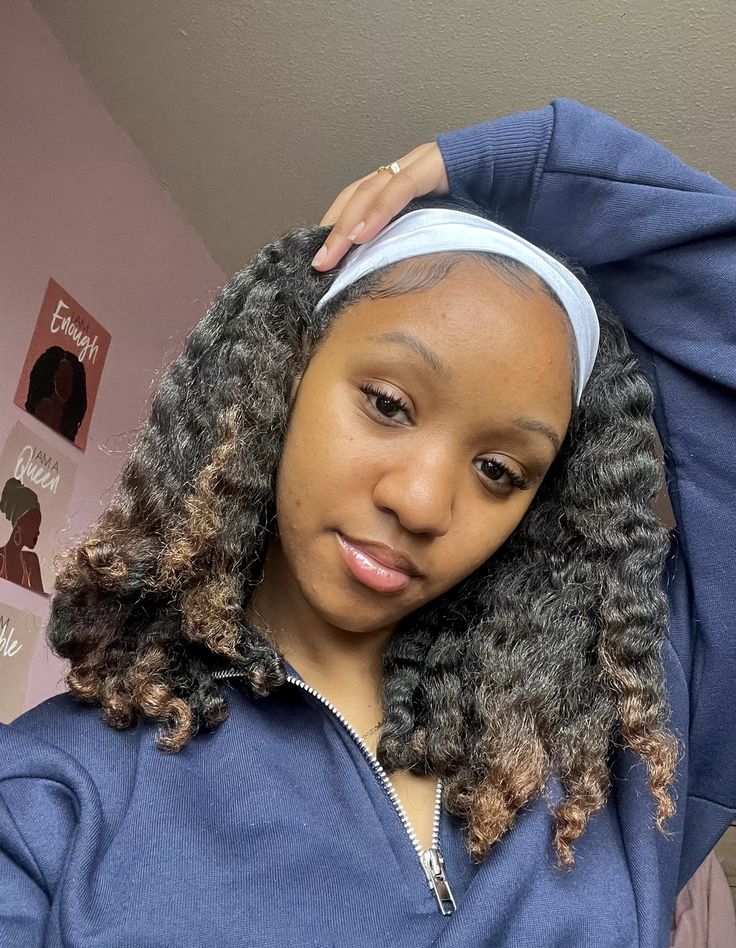
13. Half-Up Twist-Out
Gather the upper half of the twist-out and secure it with a soft hair tie. Leave the lower section loose for volume.
Avoid pulling the hair tightly, especially around the edges.
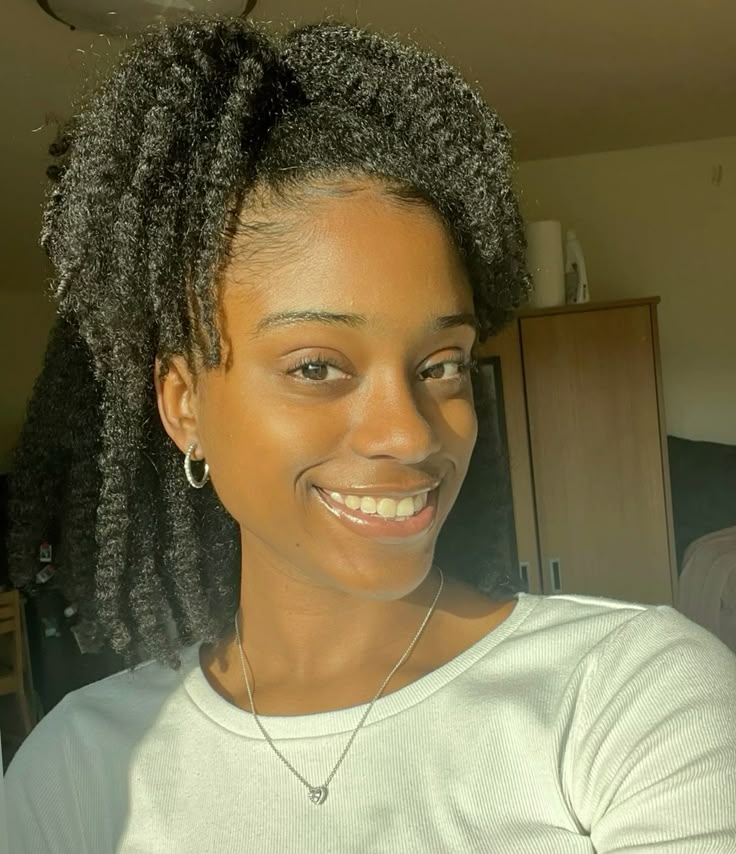
14. Half-Up Puff Twist-Out
Instead of gathering the upper section into a smooth ponytail, shape it into a small puff. Allow the remaining curls to fall around the shoulders.
This creates contrast between the rounded puff and the loose twist-out texture.
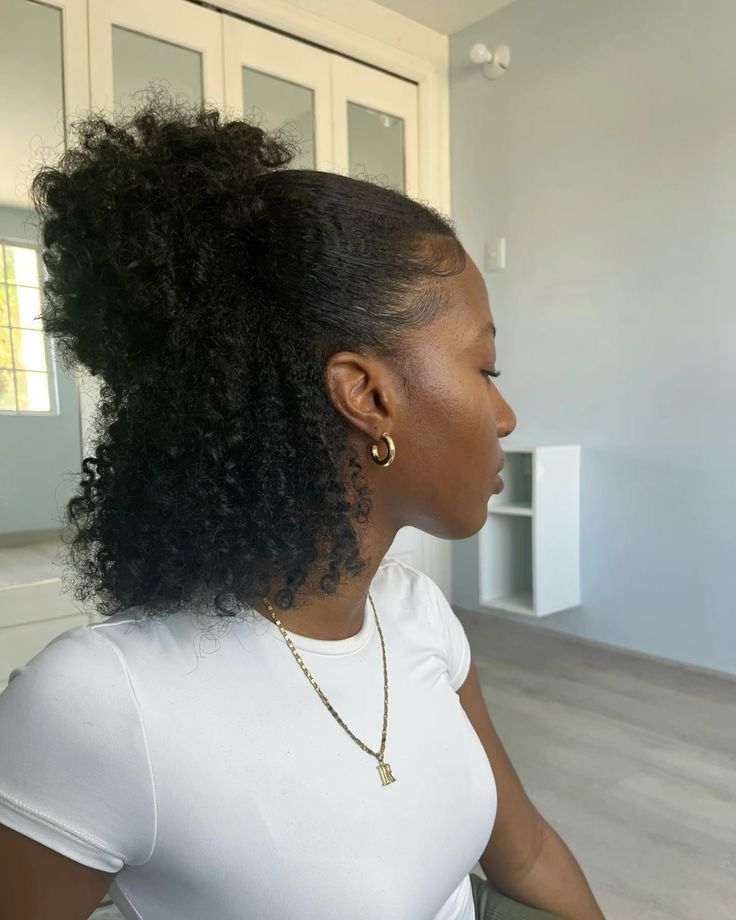
15. Low Puff Twist-Out
Gather the twist-out into a low puff at the back of the head. Keep the front slightly loose for a relaxed appearance.
Use a satin scrunchie or soft band instead of a tight elastic.
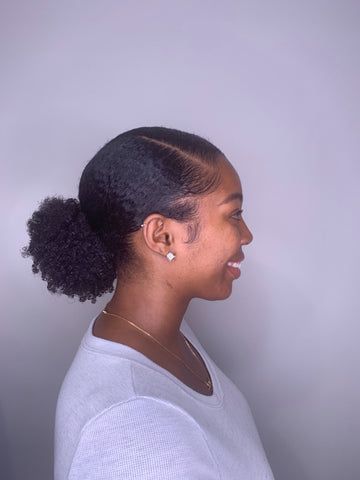
16. High Puff Twist-Out
Pull the hair gently toward the crown and create a high puff. This style works best when the twist-out has plenty of volume.
Use a little edge control only if you want a smoother front.
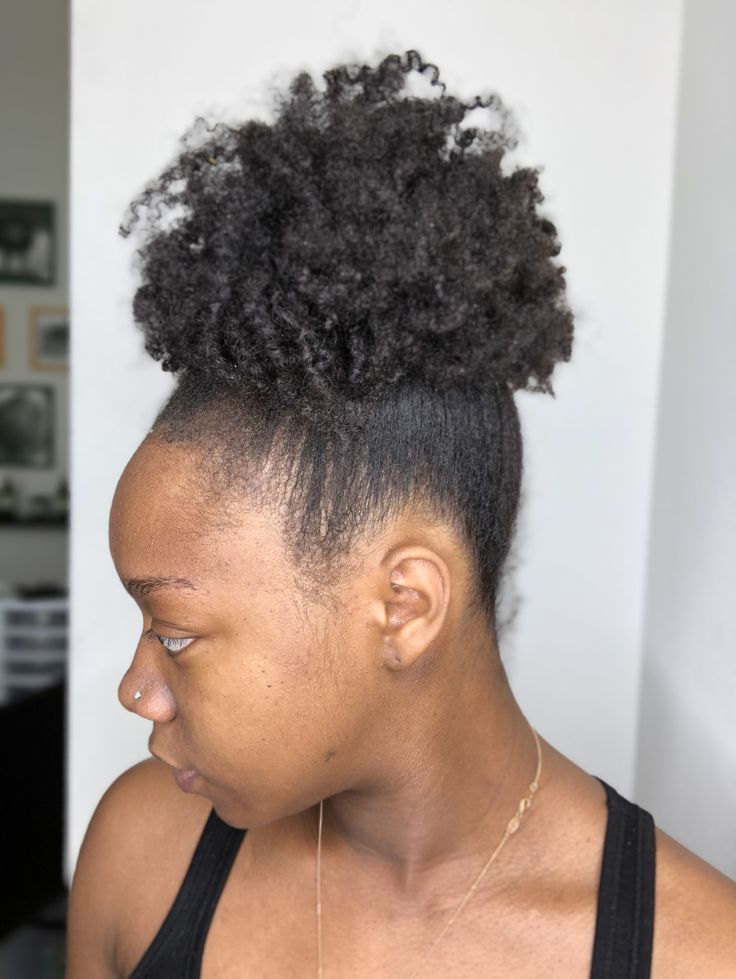
17. Twist-Out With Flat-Twisted Front
Flat-twist the front section backward before creating loose twists at the back. This gives the style a structured front and fuller ends.
It is a good choice when you want your twist-out to look more detailed.
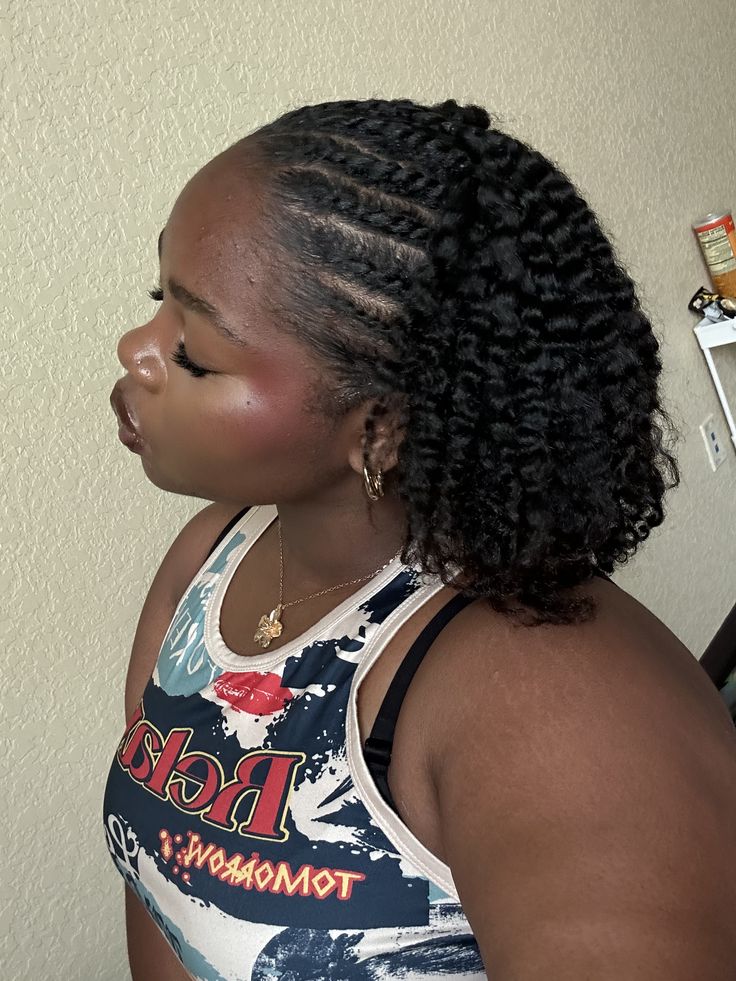
18. Twist-Out With Two Front Twists
Leave two small sections at the front, twist them backward, and allow the rest of the hair to remain loose.
This simple detail adds shape without requiring a complicated installation.
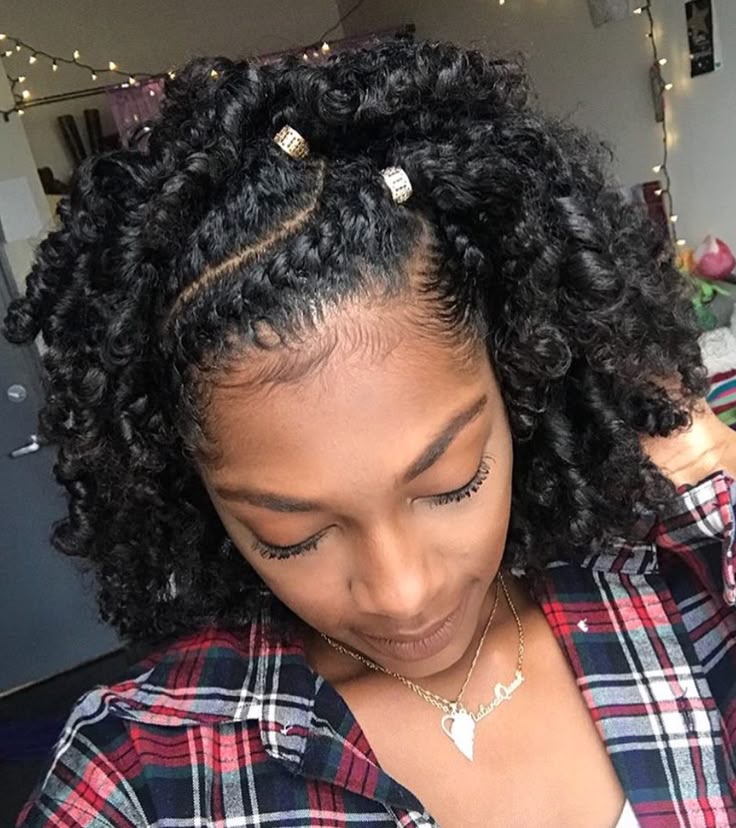
19. Twist-Out With Pinned Front
Create your twist-out and pin one side of the front section backward. Leave the rest of the hair loose and fluffy.
Use decorative pins for a special occasion or plain pins for everyday styling.
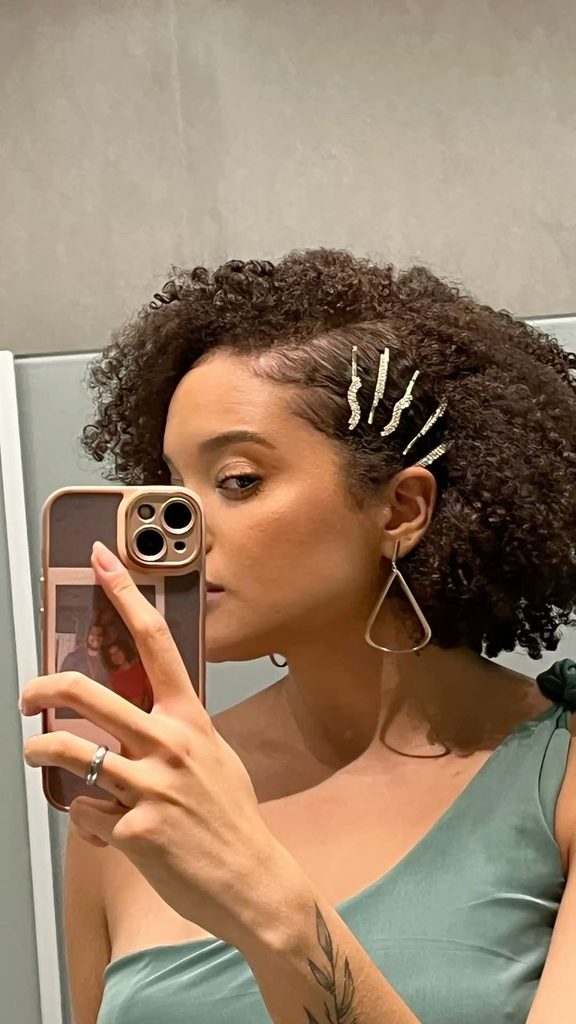
20. Twist-Out With a Scarf
Wrap a colorful scarf around the front or crown while keeping the twist-out visible. This is a simple way to change the appearance of the same hairstyle.
Choose satin-lined accessories when possible to reduce friction.
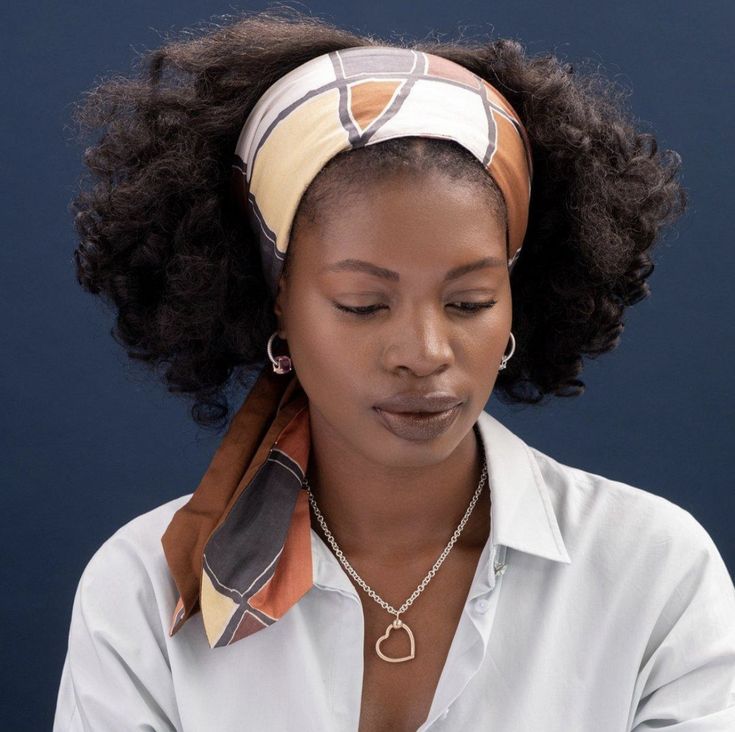
21. Twist-Out With Gold Cuffs
Add a few gold cuffs to selected twists before unraveling, or place them on small twists around the front.
Keep the accessories light so they do not pull on individual strands.
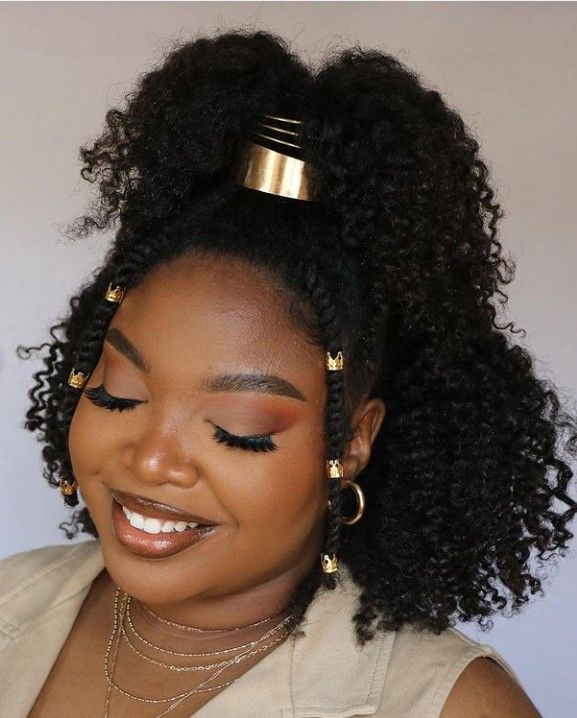
22. Twist-Out With Beads
Beads can be added to a few front twists or placed at the ends before the twist-out is released. Use lightweight beads that do not tug at the hair.
This creates a playful, creative finish.
23. Twist-Out With a Bow
Add a bow near the side part or at the back of a half-up twist-out. Choose a small bow for a subtle look or a larger one for a statement.
Avoid placing heavy accessories on fragile edges.
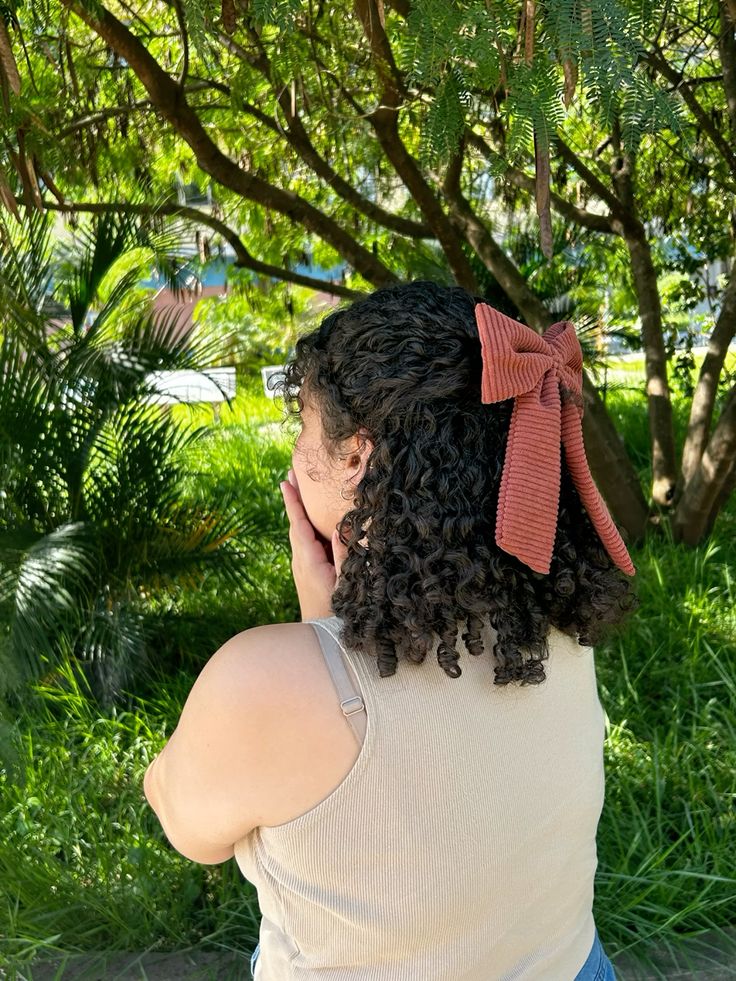
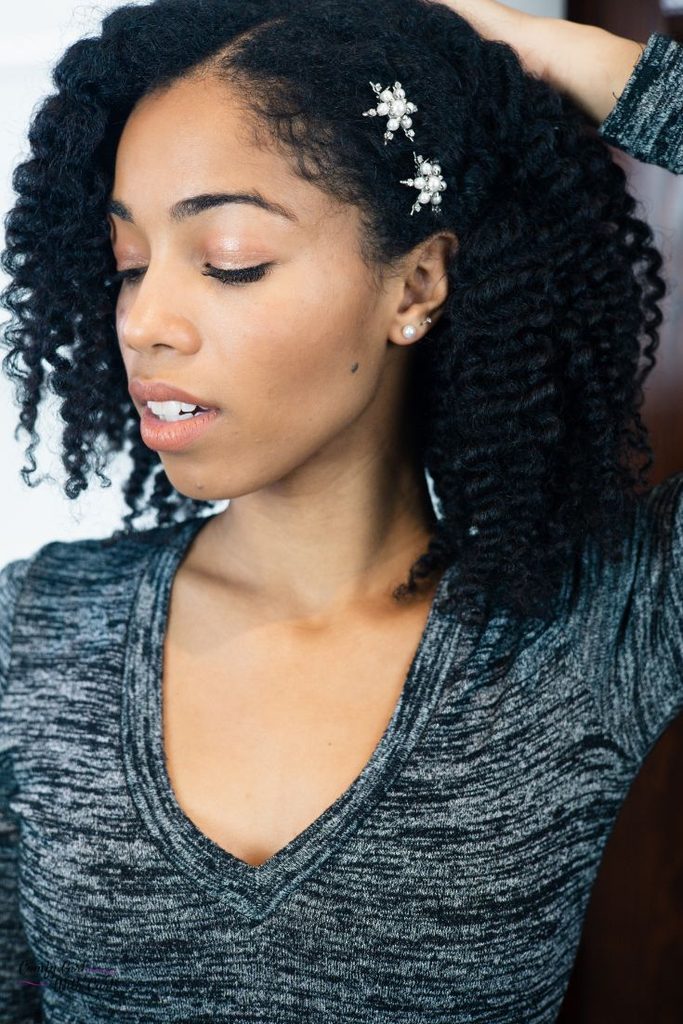
24. Twist-Out With a Hair Clip
A stylish clip can hold one side of the hair away from the face. This is especially useful when your twist-out is large and fluffy.
Choose clips with smooth edges that will not snag the curls.
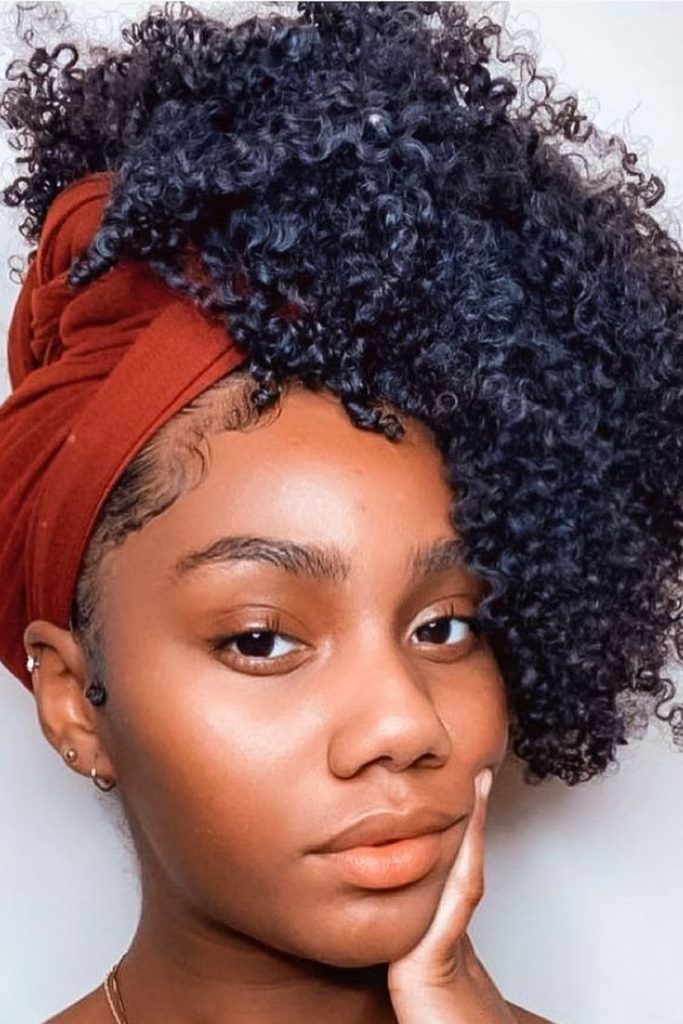
25. Twist-Out With a Headwrap
Use a headwrap to cover the front half of the hair while leaving the twist-out ends exposed. This gives the style a creative layered appearance.
It is also useful when the front needs extra protection or shaping.
26. Twist-Out Bob
Shape the twist-out into a short, rounded bob by tucking or pinning the ends underneath. This works best on medium-length natural hair.
The result is neat, soft, and easy to accessorize.
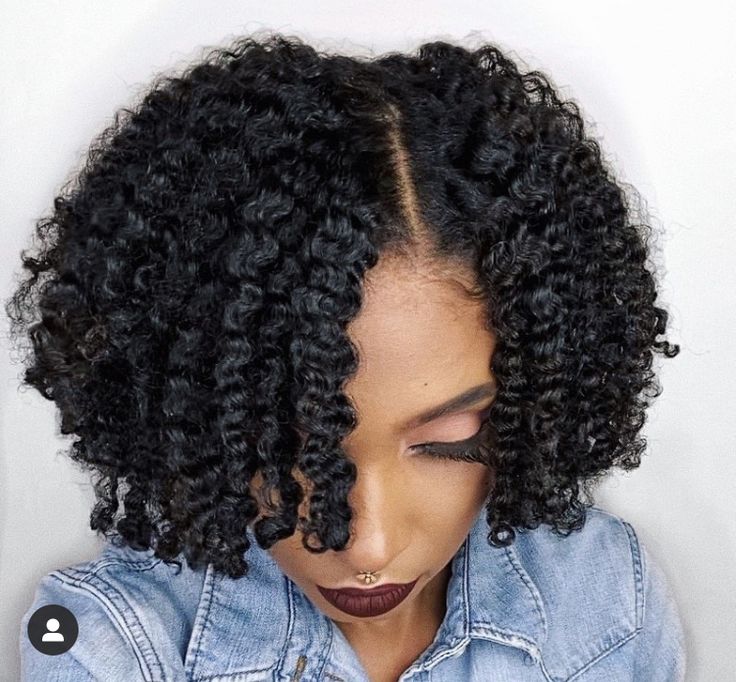
27. Layered Twist-Out
Create layers by shaping the front, sides, and back at different lengths. The uneven shape adds movement and prevents the hair from looking flat.
A layered twist-out looks especially full when the roots are gently lifted.
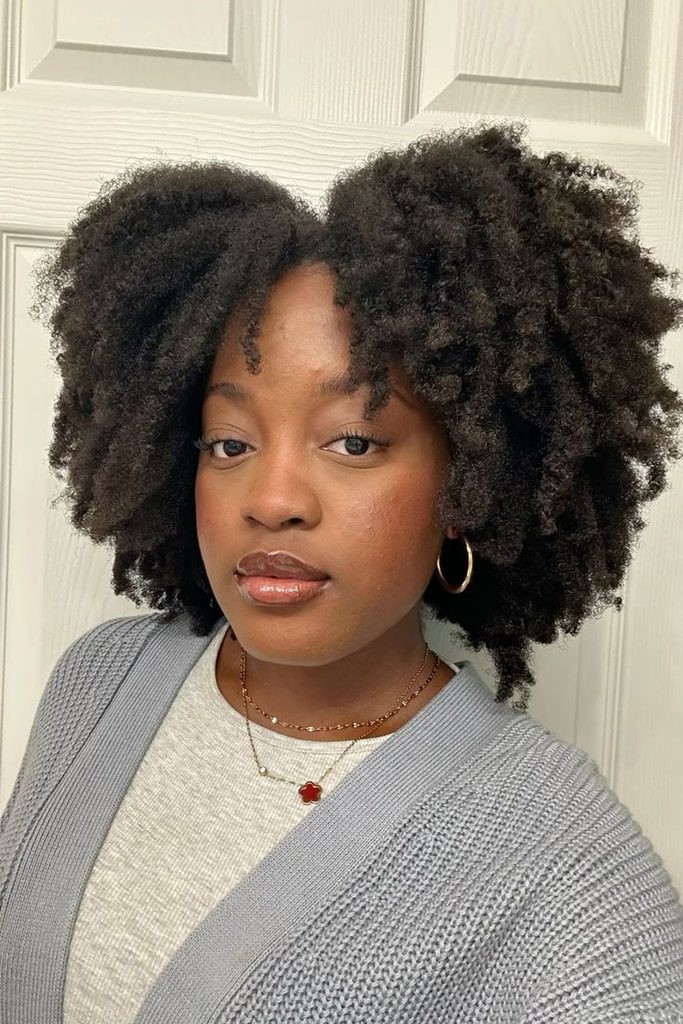
28. Short Tapered Twist-Out
If your hair is tapered at the sides or back, use small twists on the longer top section. Allow the short sides to frame the defined curls.
This creates a modern shape with plenty of texture.
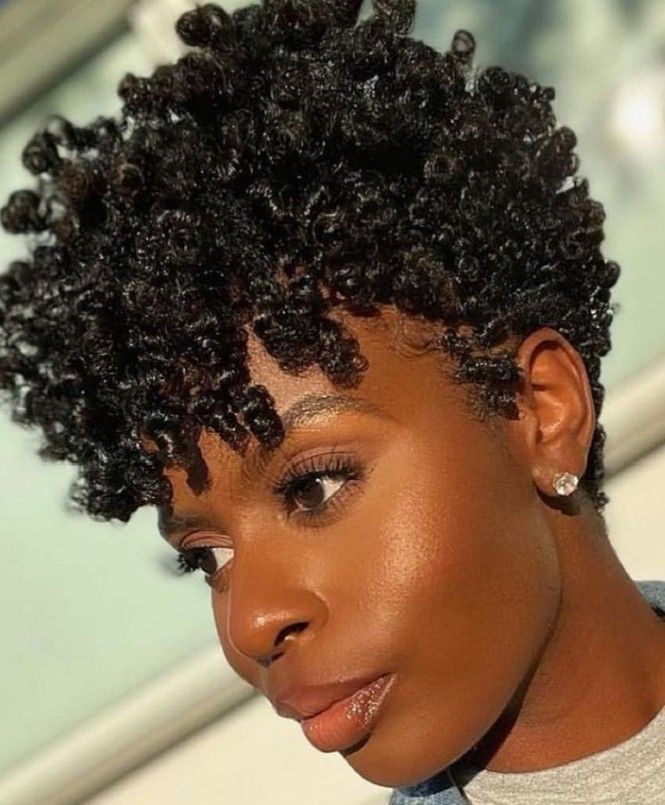
29. Long Twist-Out
Longer hair gives the twist-out a beautiful cascading effect. Use medium or large twists depending on whether you prefer definition or volume.
Separate carefully so the length does not become tangled during takedown.
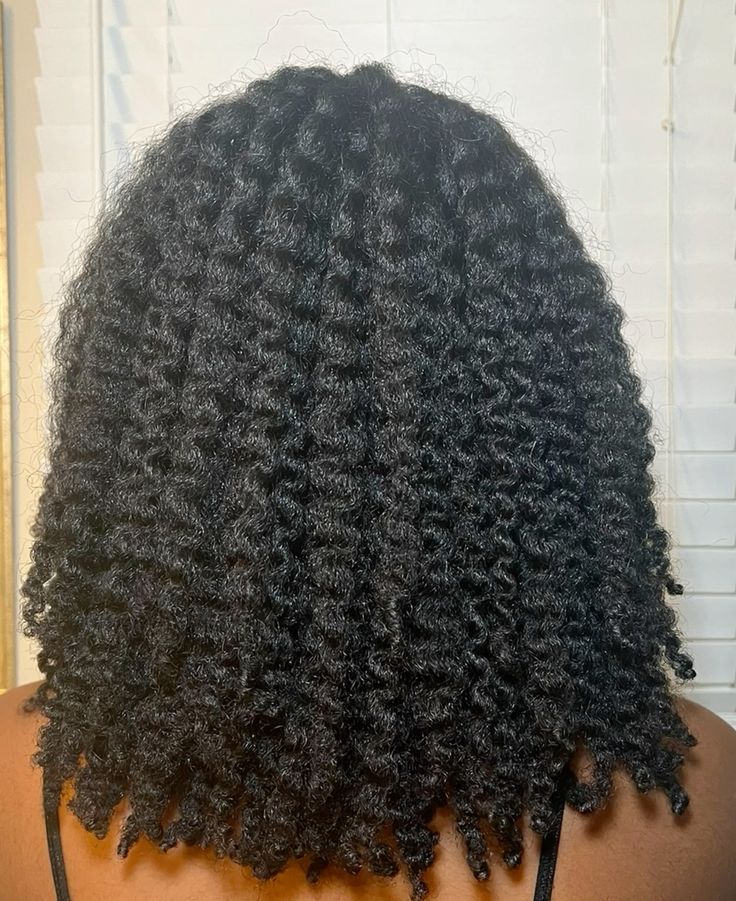
30. Shoulder-Length Twist-Out
A shoulder-length twist-out creates a balanced shape that is easy to wear loose. Add a side part or pin one side back for variety.
This length works well for both casual and formal outfits.

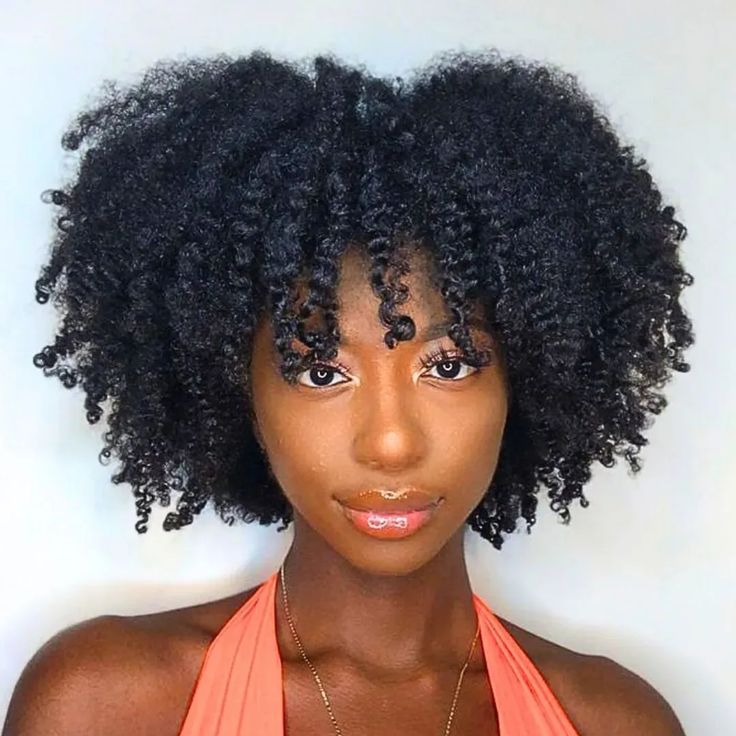
31. Twist-Out With a Rounded Bang
Arrange the front curls forward to create a soft bang. Keep the remaining hair rounded at the sides and back.
Use your fingers to separate the bang without making it too frizzy.
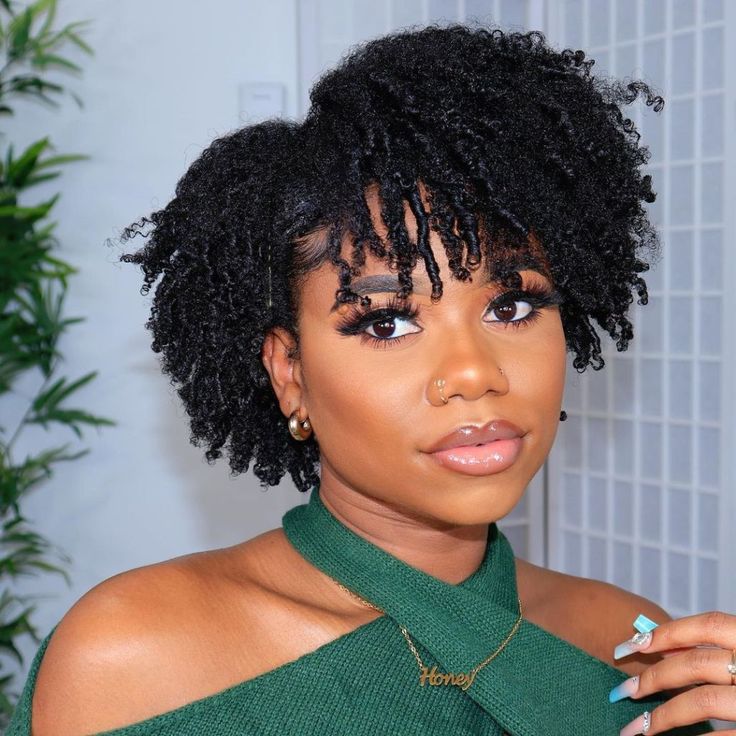
32. Side Bang Twist-Out
Sweep the front curls diagonally across the forehead. Pin the side lightly if the curls do not stay in place.
This gives the hairstyle a soft, face-framing finish.
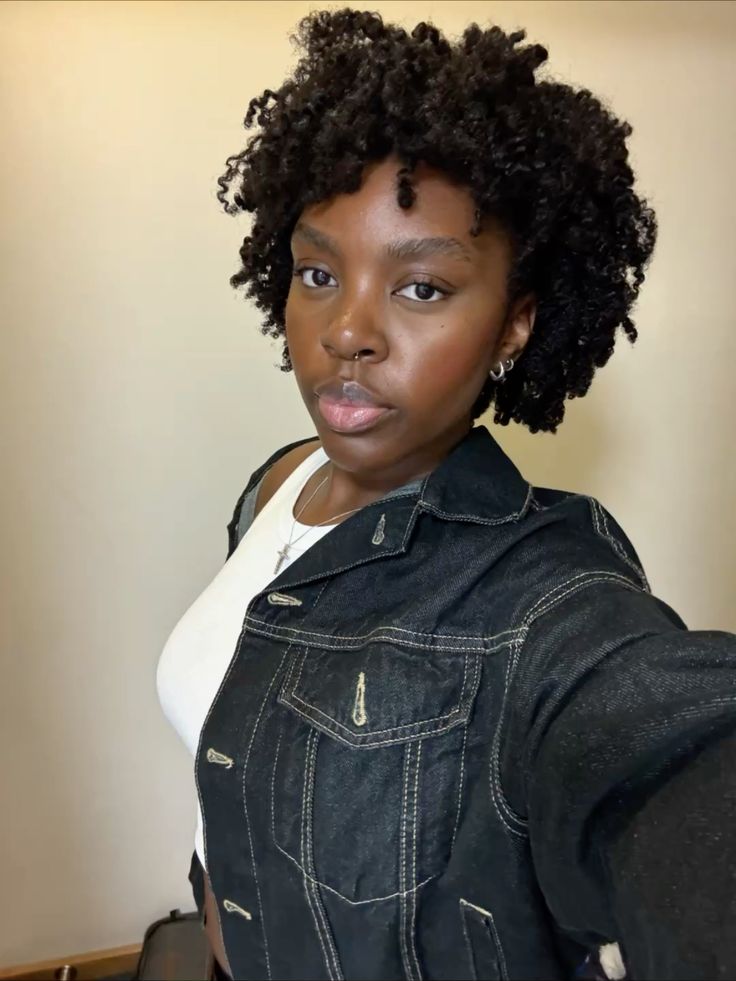
33. Twist-Out With a Crown Shape
Lift the roots around the crown and arrange the curls so the highest point sits near the top of the head.
This creates a regal shape without needing an elaborate updo.
34. Twist-Out With a Zigzag Part
Create a zigzag part before twisting the hair. After unraveling, the part adds a playful detail to the roots.
Use a gentle comb and avoid repeatedly scratching or dragging the scalp.
35. Twist-Out With a Clean Side Part
For a more polished finish, create a clean side part before installing the twists. Keep the part visible after takedown.
This look pairs well with simple earrings and a neat outfit.
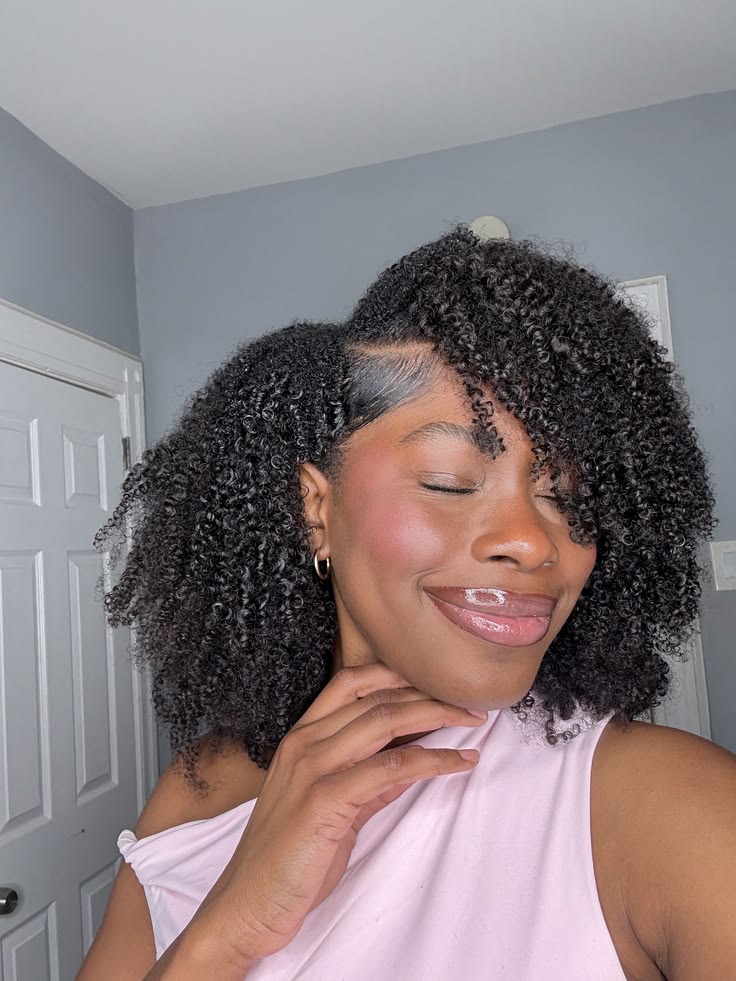
36. Wet-Look Twist-Out
Use a small amount of styling gel to create a more defined, slightly glossy finish. Do not apply so much product that the hair becomes stiff or flaky.
This style looks best when the curls are separated minimally.
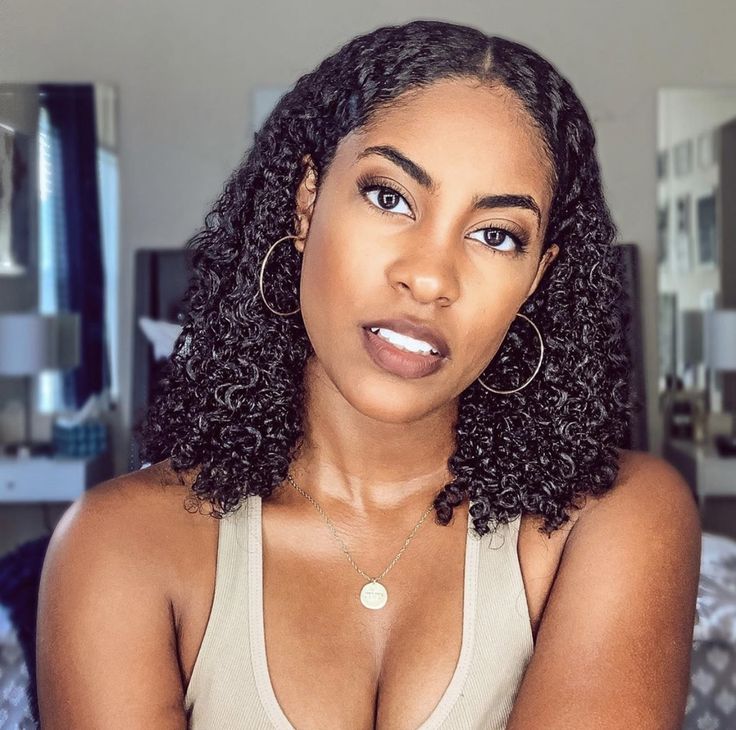
37. Cream-Defined Twist-Out
A rich styling cream can create soft definition without the firm hold of gel. This is ideal for people who prefer touchable curls.
The finish may be fluffier, but it can feel more comfortable and flexible.
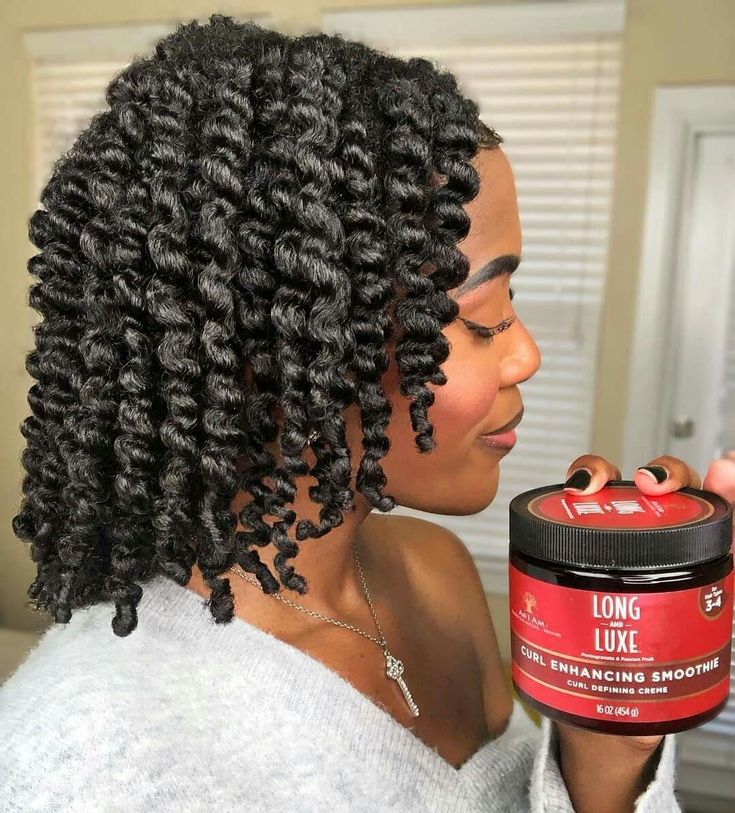
38. Gel-Defined Twist-Out
Gel gives the twists more hold and can help the curls remain visible for longer. Apply it evenly and avoid using too much on the roots.
Allow the twists to dry fully before unraveling.
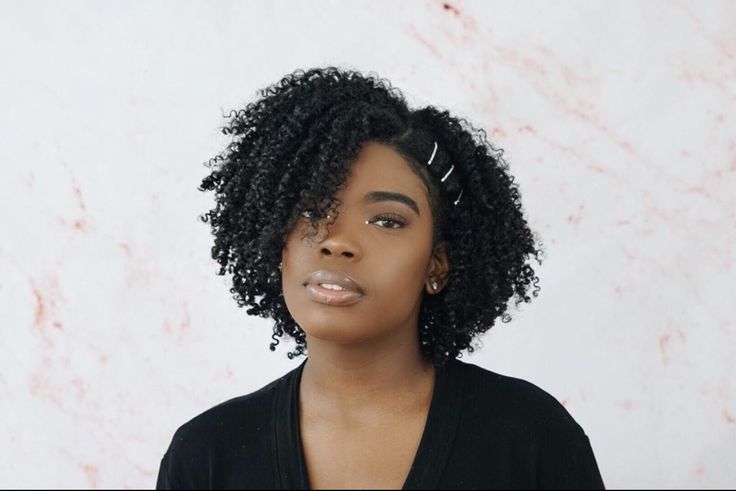
39. Braid-and-Twist-Out Combination
Combine flat twists at the front with two-strand twists at the back. This creates different textures within one hairstyle.
The contrast makes the final look more detailed without being too difficult.
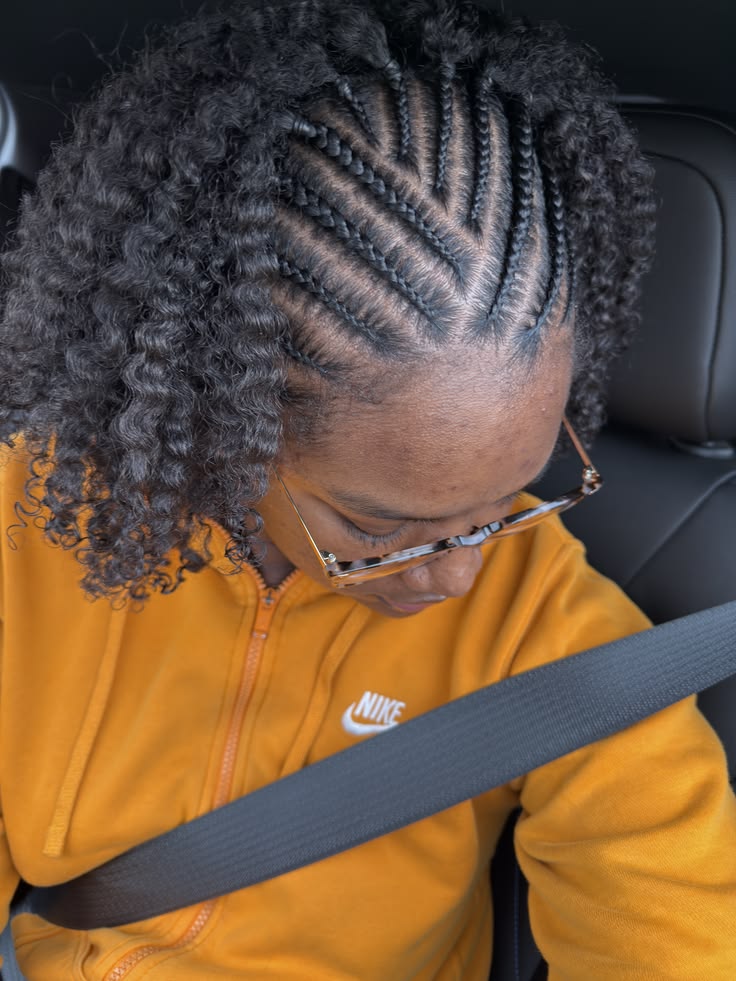
40. Flat-Twist-Out
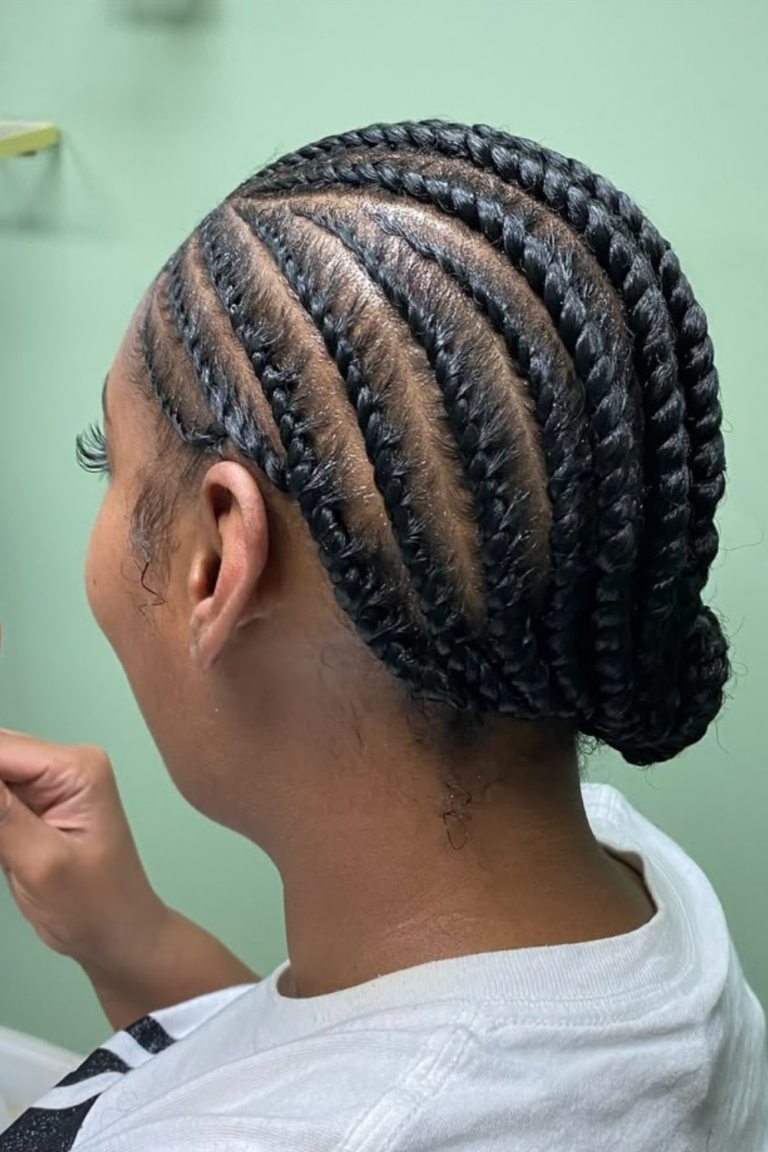
Instead of using only individual two-strand twists, flat-twist the hair close to the scalp. After takedown, the result has a more stretched and patterned appearance.
This can be helpful when you want less shrinkage at the roots.
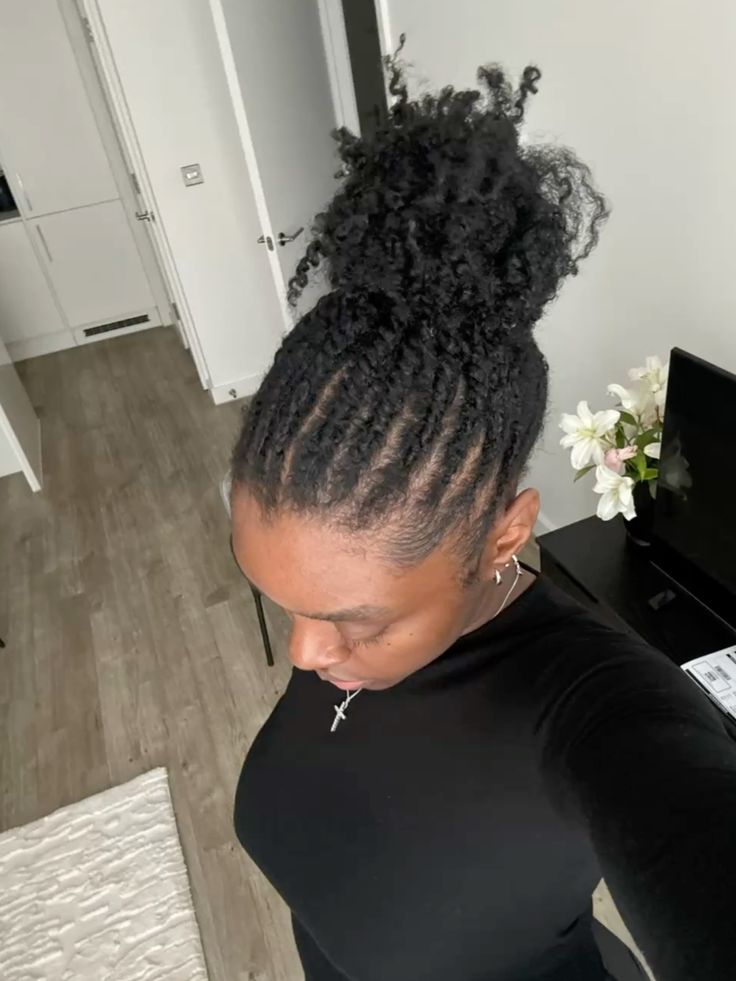
41. Chunky Twist-Out
Use very large twists to create chunky waves and a fuller shape. The installation is quick, making it useful for busy wash days.
The final curls will be less defined but more voluminous.
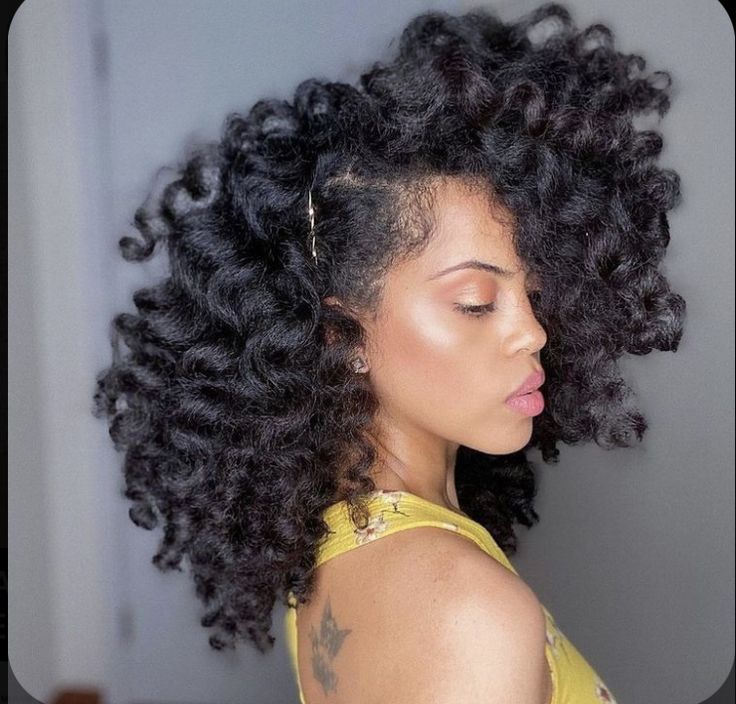
42. Mini Twist-Out
Install many small twists for a tighter, more detailed curl pattern. This style requires patience during installation and takedown.
Use your hair porosity guide to choose products that soften the strands without leaving heavy buildup.
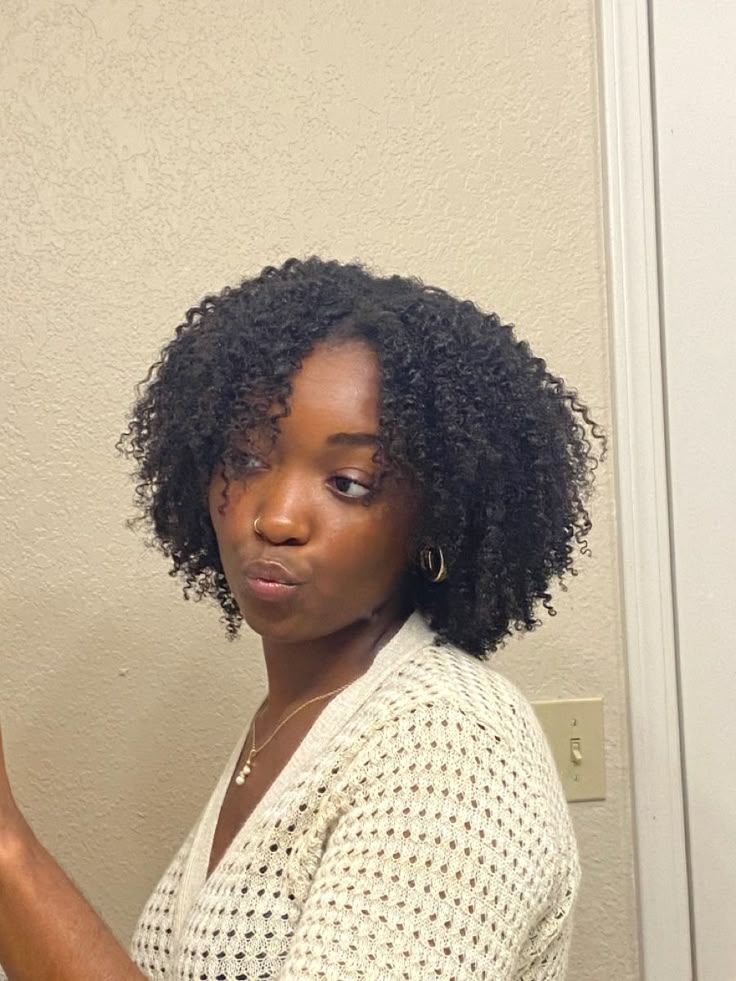
43. Two-Day Twist-Out
Create the twists at night and unravel them the following day after they have dried. This is a simple way to fit styling into a busy schedule.
Make sure the hair is not too wet before bedtime, or the twists may remain damp.
44. Twist-Out on Stretched Hair
Stretch the hair with banding, threading, or another gentle method before twisting. This creates longer-looking curls and reduces shrinkage.
Handle the strands gently during the process to avoid unnecessary breakage.

45. Twist-Out With Finger-Coiled Ends
After twisting, coil the ends around your finger to make them more defined. This gives the hairstyle a tidy finish.
It works particularly well when your ends tend to unravel quickly.

46. Twist-Out With a Side Puff
Gather one side of the hair into a small puff while leaving the opposite side loose. This creates an asymmetrical look with plenty of volume.
Use a soft band and avoid pulling the side too tightly.
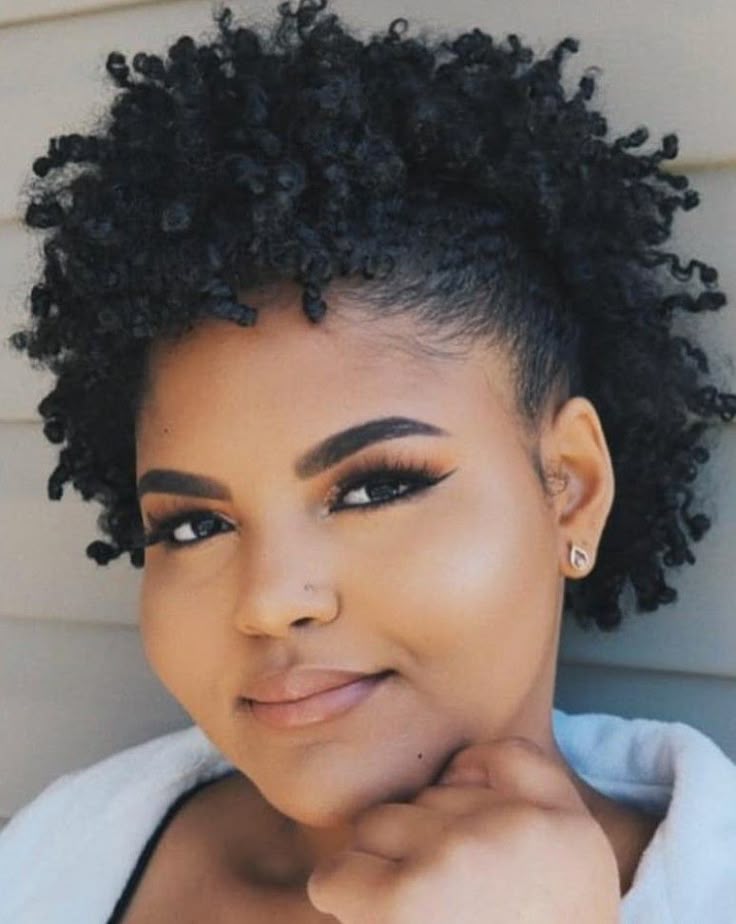
47. Twist-Out Updo
Gather the twist-out upward and pin the ends into a loose updo. Allow a few curls to fall around the face.
This is a practical option when you want your twist-out off your neck.
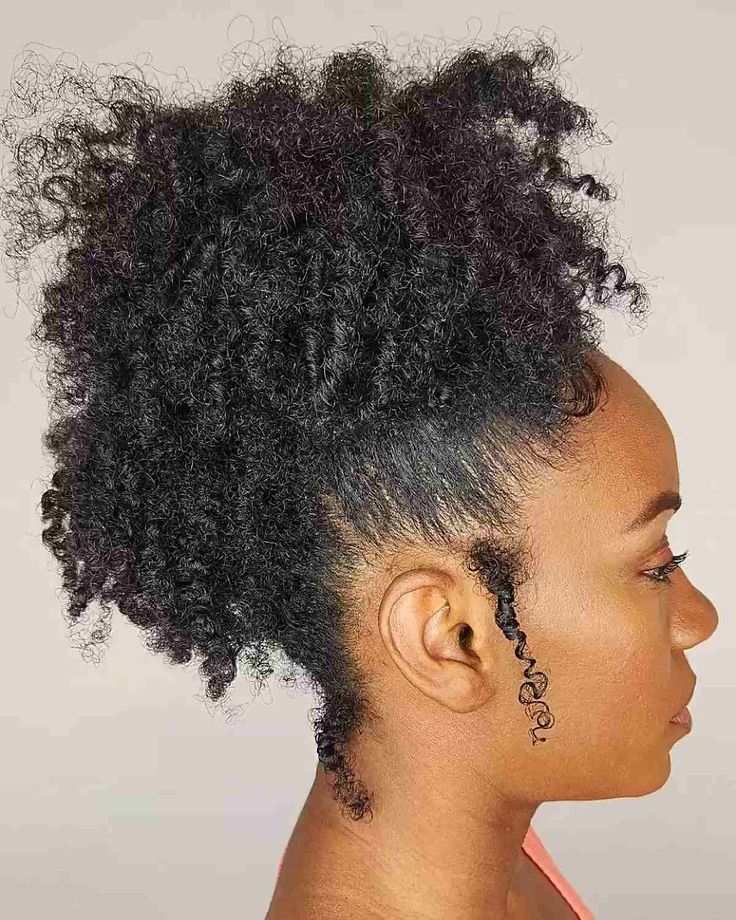
48. Twist-Out Chignon
Create a low bun at the back of the head using the twist-out texture. Keep the bun soft rather than tightly brushed.
This style gives natural hair a simple, elegant appearance.
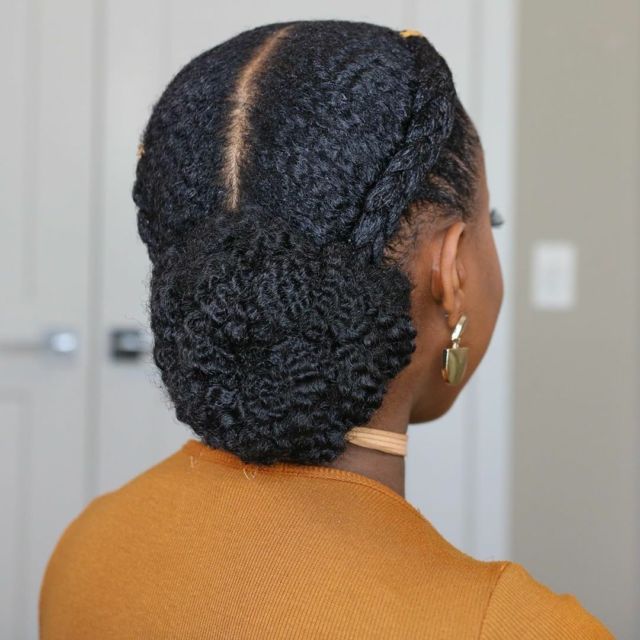
49. Twist-Out Halo
Arrange the curls around the head in a rounded halo shape. Pin selected sections underneath if you want the shape to stay compact.
This style is especially beautiful with statement earrings.
50. Twist-Out With a Low Side Bun
Sweep the hair to one side and form a low bun near the nape. Leave some curls loose around the front.
This creates a soft, sophisticated style without requiring a full updo.
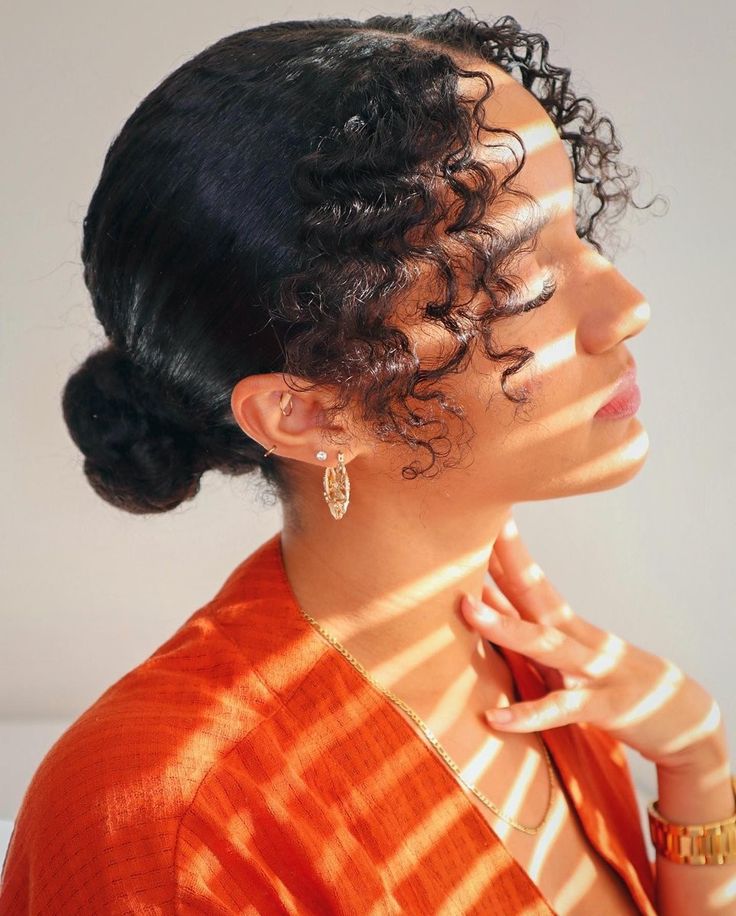
51. Twist-Out With Two Puffs
Divide the hair into two sections and create matching puffs using the twist-out texture. The curls give each puff extra volume.
This style is playful and works well for relaxed casual looks.
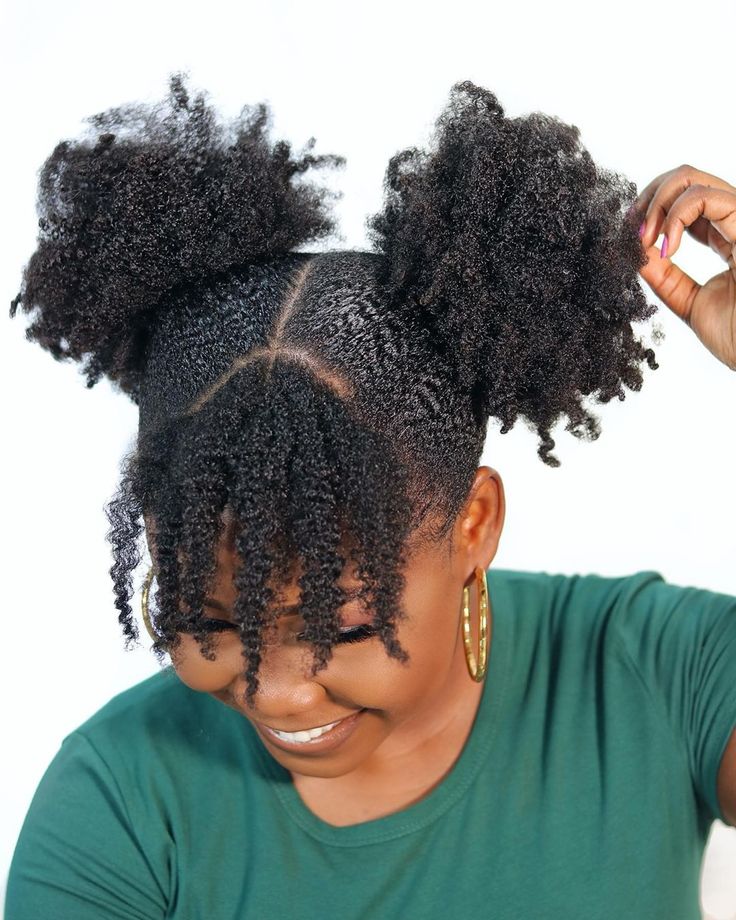
52. Twist-Out With Space Buns
Create two buns on either side of the head while leaving some curls loose around the edges. The twist-out texture makes the buns look fuller.
Use soft bands and pins to secure the shape comfortably.

53. Twist-Out With a Rolled Front
Roll the front section backward and pin it in place. Let the twist-out remain loose at the back.
This creates a vintage-inspired shape while keeping the installation simple.
54. Twist-Out With a Pompadour Front
Lift and pin the front section into a soft pompadour. Arrange the remaining curls into a rounded shape.
This is one of the more dramatic twist-out ideas for 4C hair and works well for events or photos.
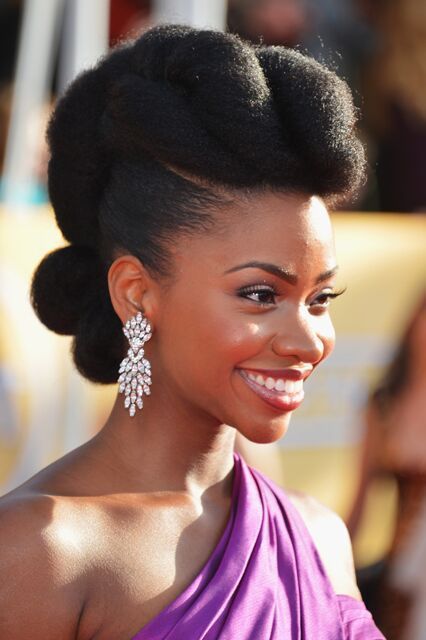
55. Twist-Out With a Braided Crown
Create two braids or flat twists around the front of the head and leave the back in a twist-out. The crown detail gives the hairstyle a protective, structured appearance.
Keep the braids loose enough to avoid tension around the hairline.

56. Twist-Out With a Faux Hawk Shape
Pin the sides upward and leave the middle section full. The twist-out creates height and texture down the center.
This style is bold without requiring the hair to be cut.
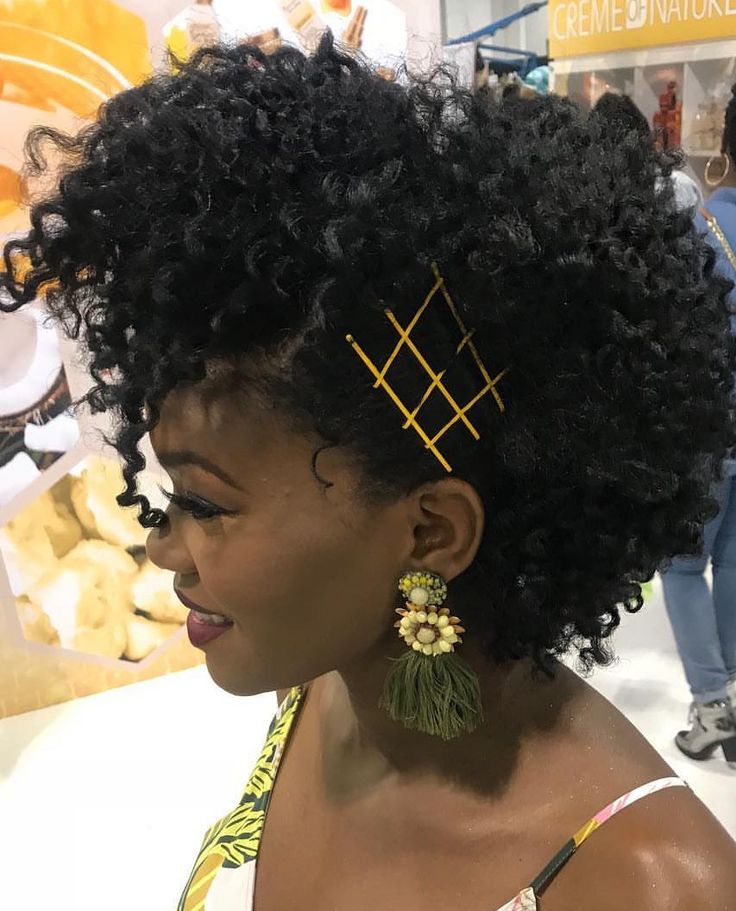
57. Twist-Out With a Mohawk Puff
Gather the middle section into a line of soft puffs while keeping the sides close to the head. The curls add texture and volume.
Use gentle pins instead of tight bands.
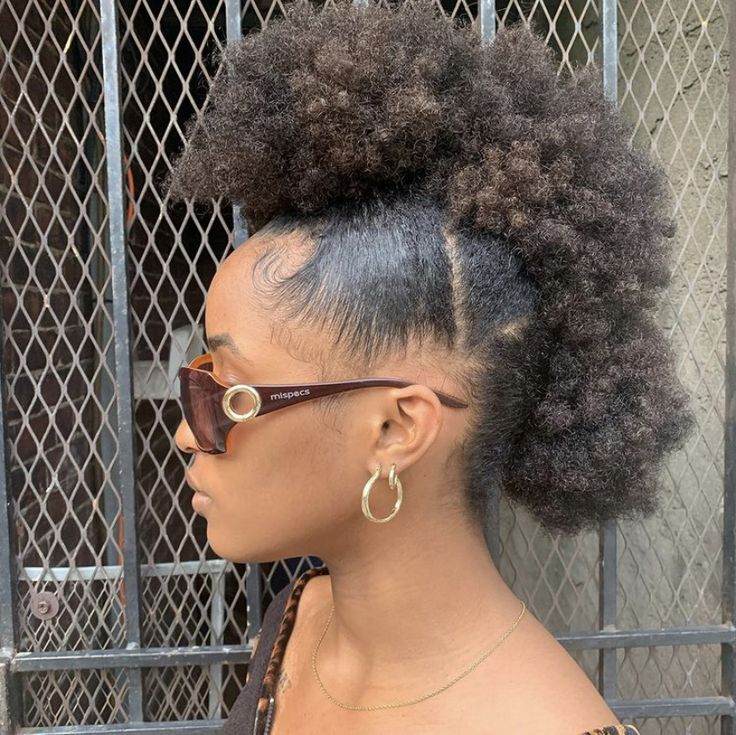
58. Twist-Out With Cornrow Details
Add two or three cornrows near one side before twisting the rest of the hair. After takedown, the loose curls contrast with the neat cornrows.
This is a good style for people who enjoy mixed textures.
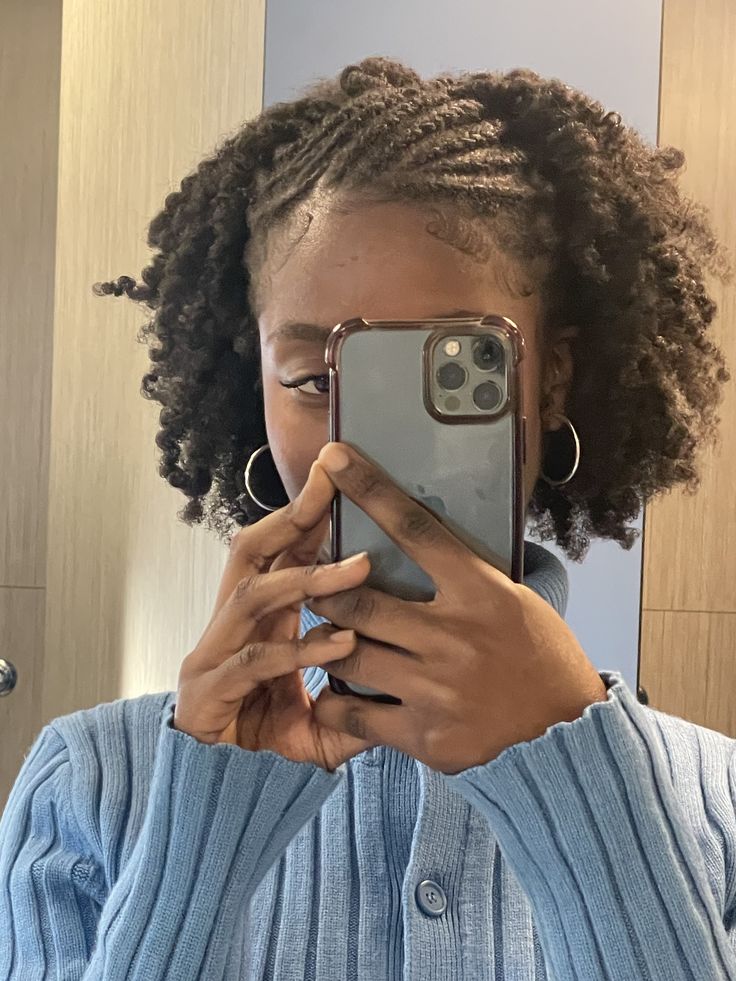
59. Twist-Out With a Temple Twist
Create a small twist near the temple and pin it backward. Leave the rest of the hair loose.
This detail keeps the hair away from the face while maintaining volume.
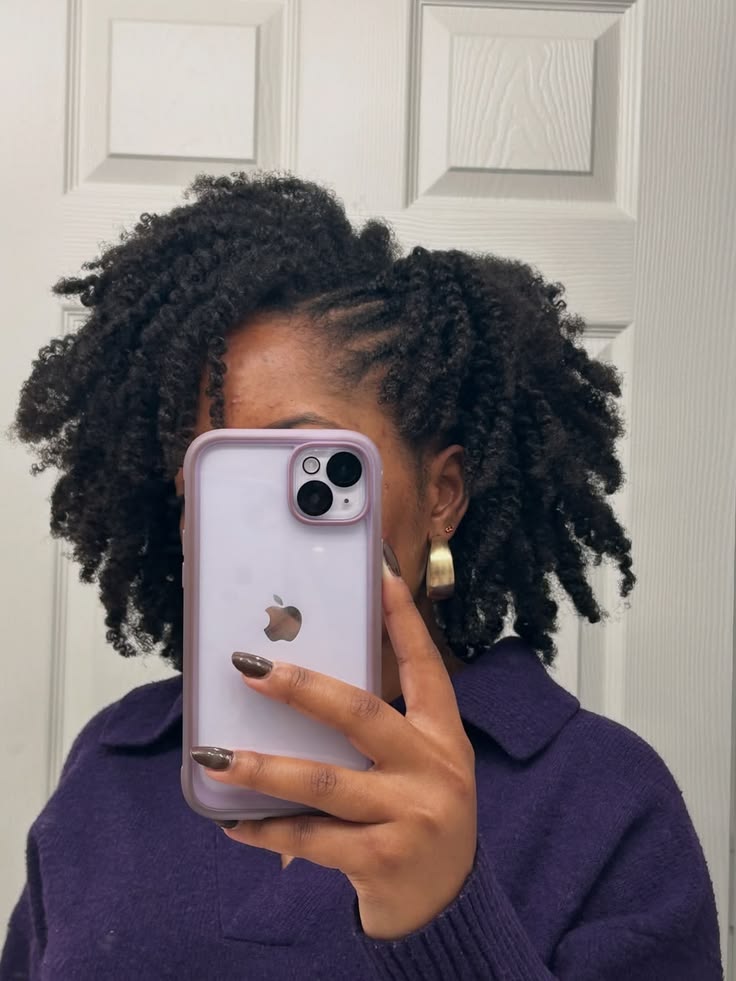
60. Twist-Out With a Low Side Part
Part the hair low on one side and arrange the curls diagonally. This creates a soft, slightly dramatic shape.
It is simple enough for everyday wear but polished enough for a dinner or gathering.
61. Twist-Out With a Defined Hairline
Keep the curls fluffy but smooth the front lightly with a small amount of product. Avoid excessive brushing or repeated edge manipulation.
The result is a clean-looking style that still maintains natural volume.
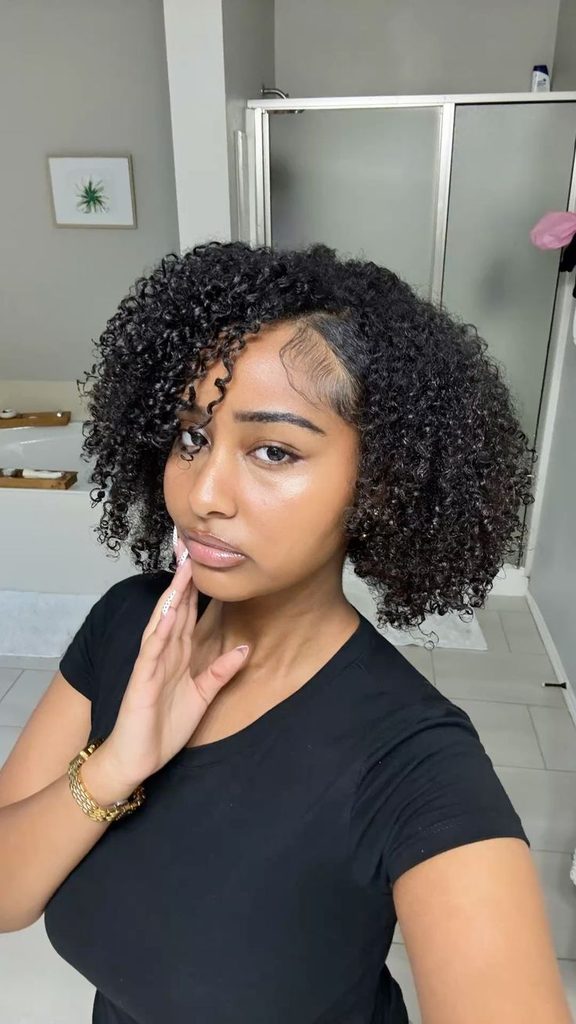
62. Twist-Out With a Soft Fro
Separate the curls more generously until the hair becomes a soft, rounded fro. This style focuses more on volume than perfect definition.
Use your fingers instead of a comb to reduce unnecessary pulling.

63. Twist-Out With a Defined Center
Create a visible center part and arrange the curls evenly on both sides. Keep the ends separated enough to show the curl pattern.
This is a neat option for work, school, or everyday errands.
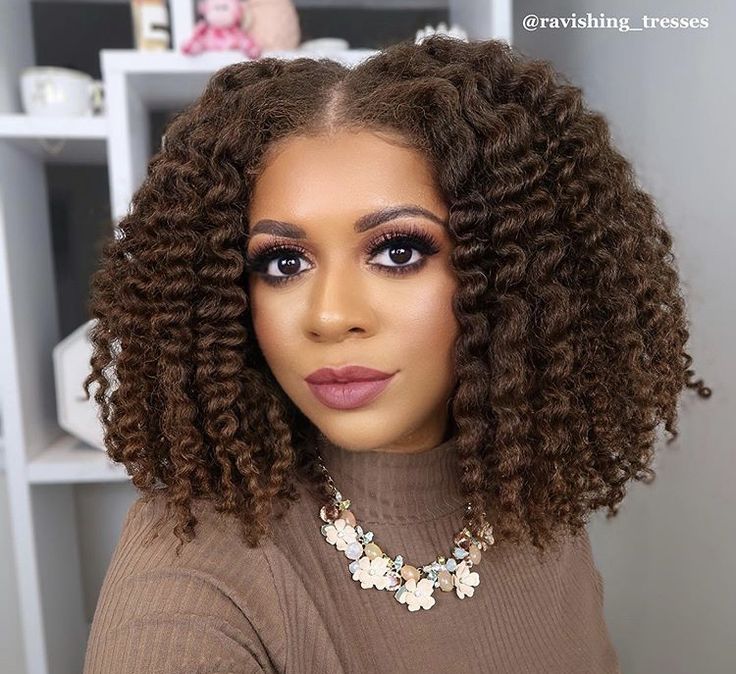
64. Twist-Out With a Side Clip
Use one clip to hold the smaller side of the hair in place. Let the larger side remain full and textured.
This creates an easy asymmetrical hairstyle with minimal effort.
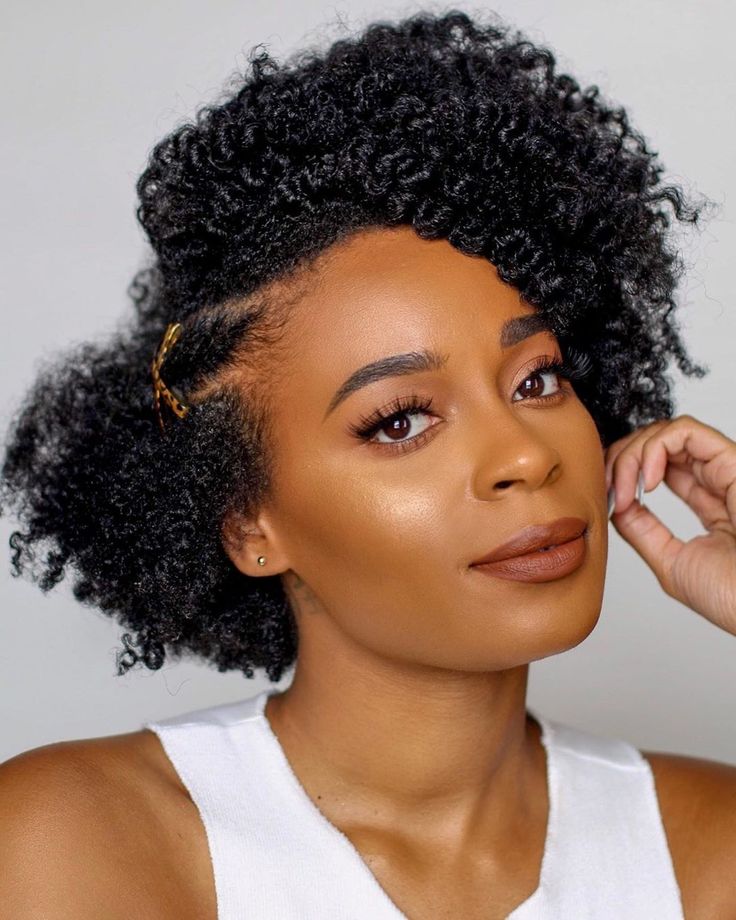
65. Twist-Out With a Satin Ribbon
Tie a satin ribbon around a low puff or use it as a headband. The ribbon adds color and makes a simple twist-out feel more styled.
Choose a smooth material to avoid snagging.
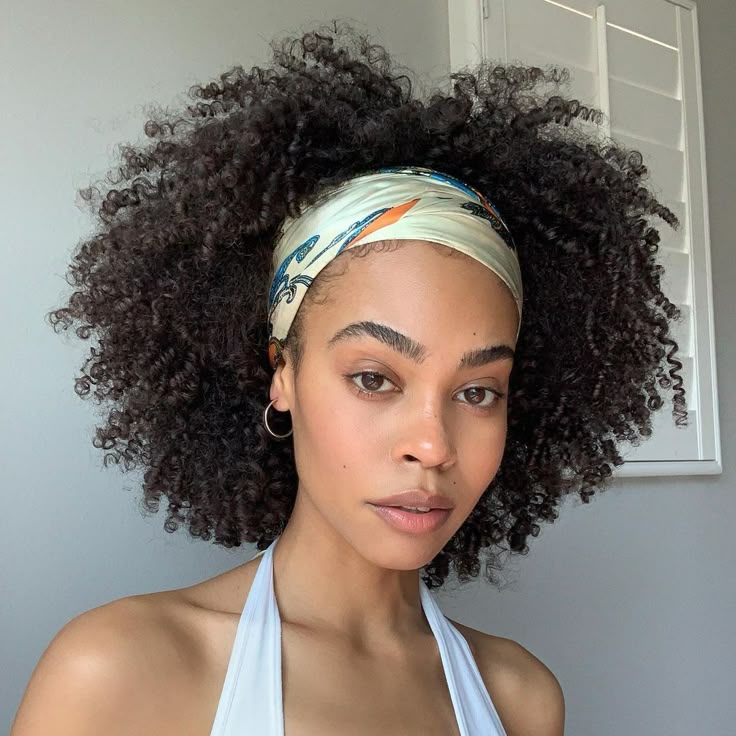
66. Twist-Out With a Floral Accessory
Add a small floral clip near the side part or at the back of a half-up style. Keep the accessory lightweight.
This is a lovely option for outdoor events, celebrations, or photos.
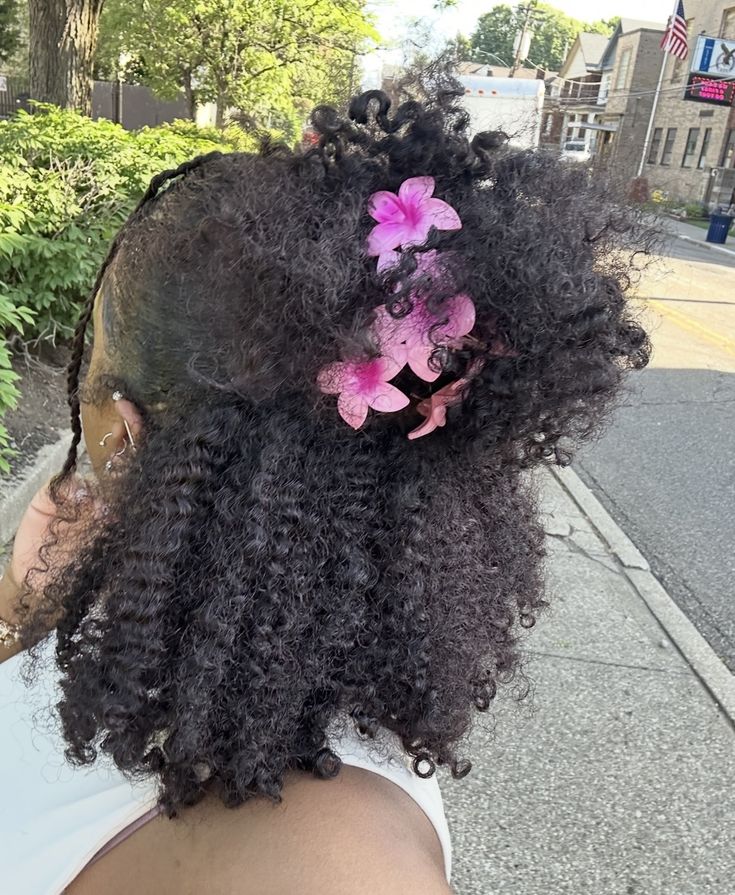
67. Twist-Out With a Headband Puff
Place a headband around the front and gather the back into a loose puff. Allow some curls to remain visible around the sides.
This style gives the hair shape while keeping the front controlled.
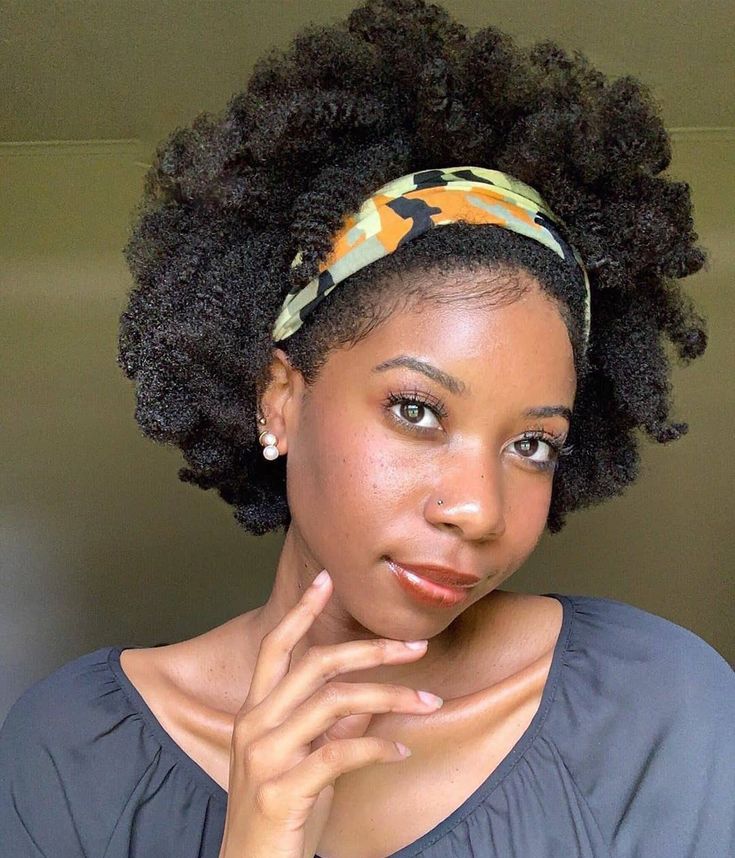
68. Twist-Out With a Tucked Back
Sweep the sides and back inward, then pin the ends underneath. Leave the front curls loose for a soft frame.
This gives the appearance of a short, elegant hairstyle without cutting the hair.
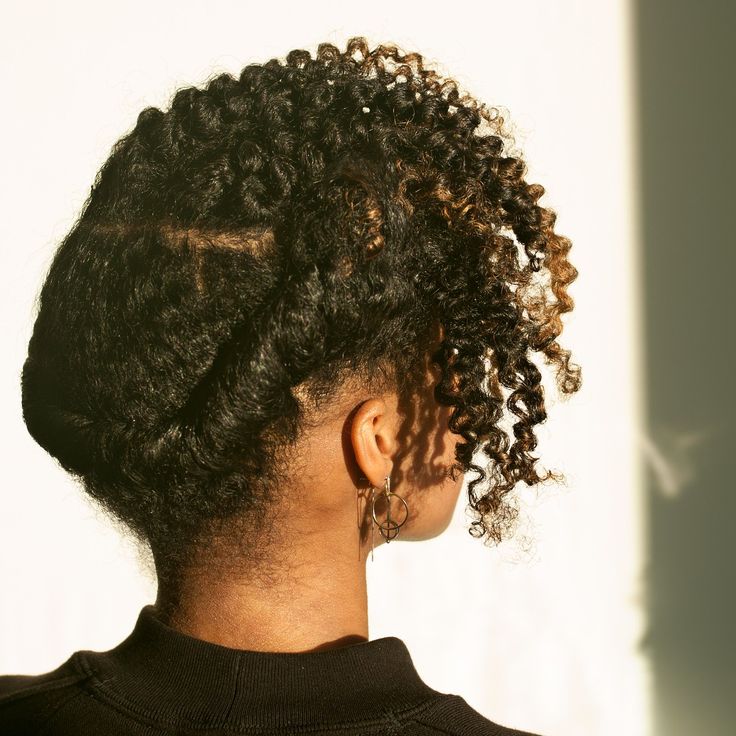
69. Twist-Out With a Curly Ponytail
Gather the hair into a loose ponytail and allow the twist-out curls to form a full puff at the back. Keep the base comfortable.
This style is quick and works well when you want your hair off your face.
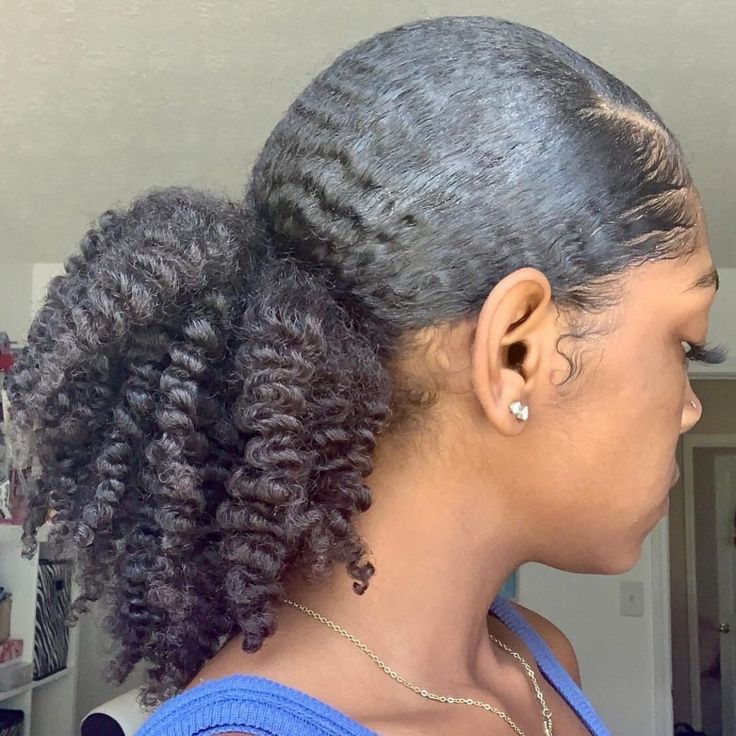
70. Twist-Out With a Loose Bun
Gather the hair into a relaxed bun and let a few curls fall naturally. Avoid forcing every strand into place.
A loose bun is especially useful when the twist-out is several days old.
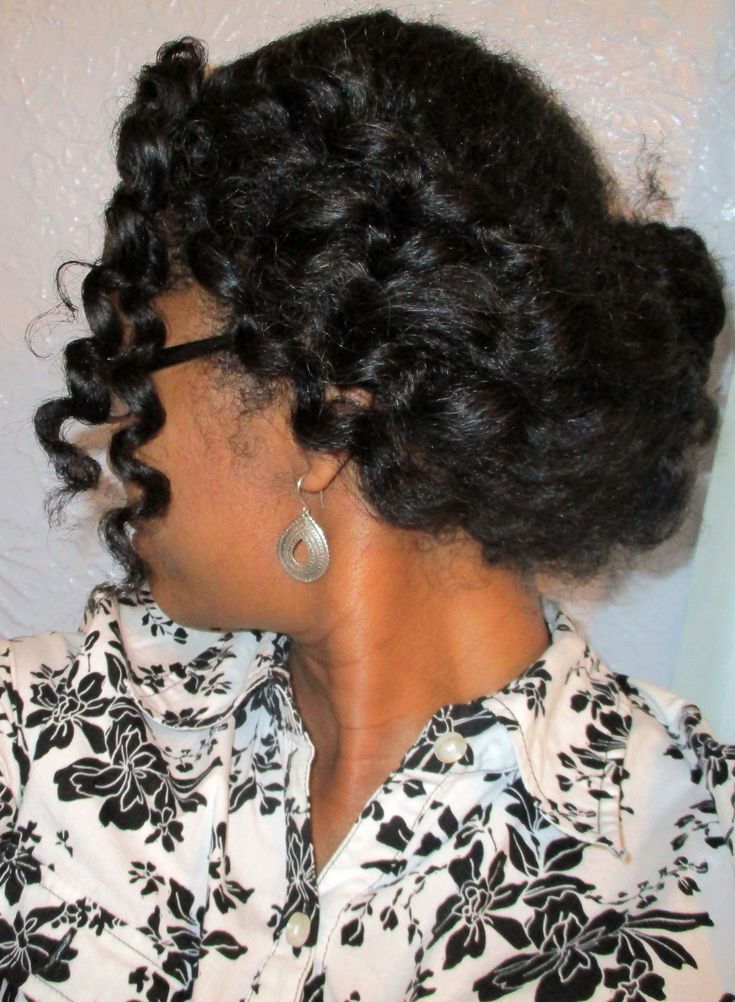
71. Twist-Out With a Side Tuck
Tuck one side behind the ear and let the opposite side remain full. This gives the hairstyle a simple, flattering shape.
Use a smooth pin if the hair does not stay tucked.
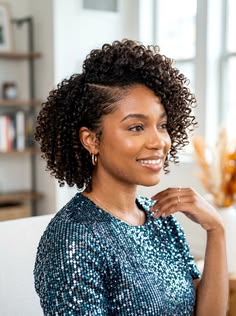
72. Twist-Out With a Voluminous Crown
Focus on lifting the crown while keeping the sides slightly flatter. This creates height and makes the hairstyle look fuller.
A pick can be used carefully at the roots, but avoid disturbing the curls too much.
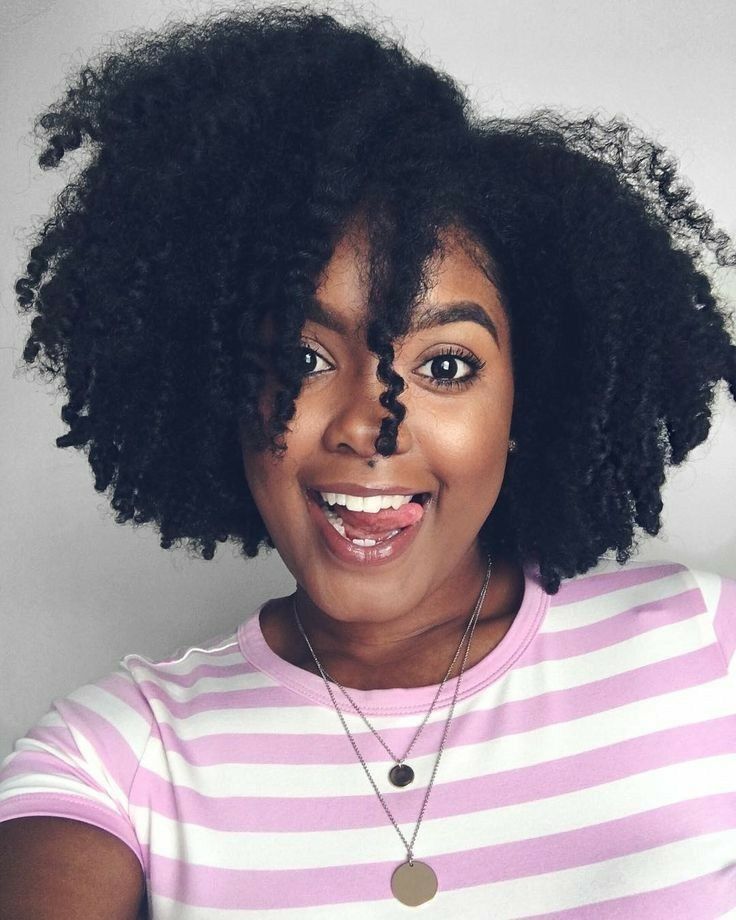
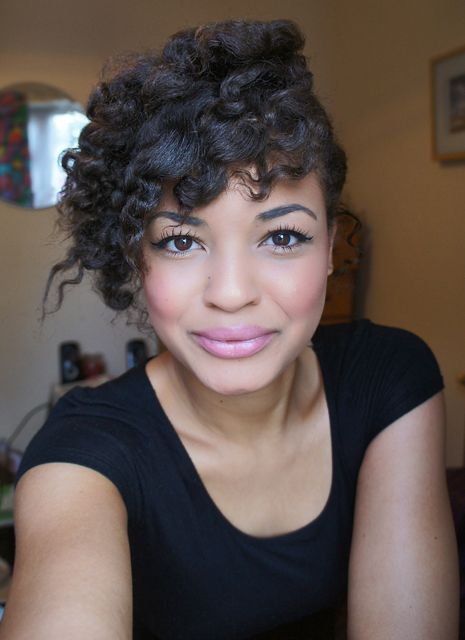
73. Twist-Out Ideas for 4C Hair With a Soft Side Sweep
Create medium twists, unravel them gently, and sweep the front toward one side. Keep the curls soft and separated for a natural finish.
This is one of the most wearable twist-out ideas for 4C hair because it combines definition, volume, and a flattering shape.
74. Twist-Out With a Protective Nighttime Finish
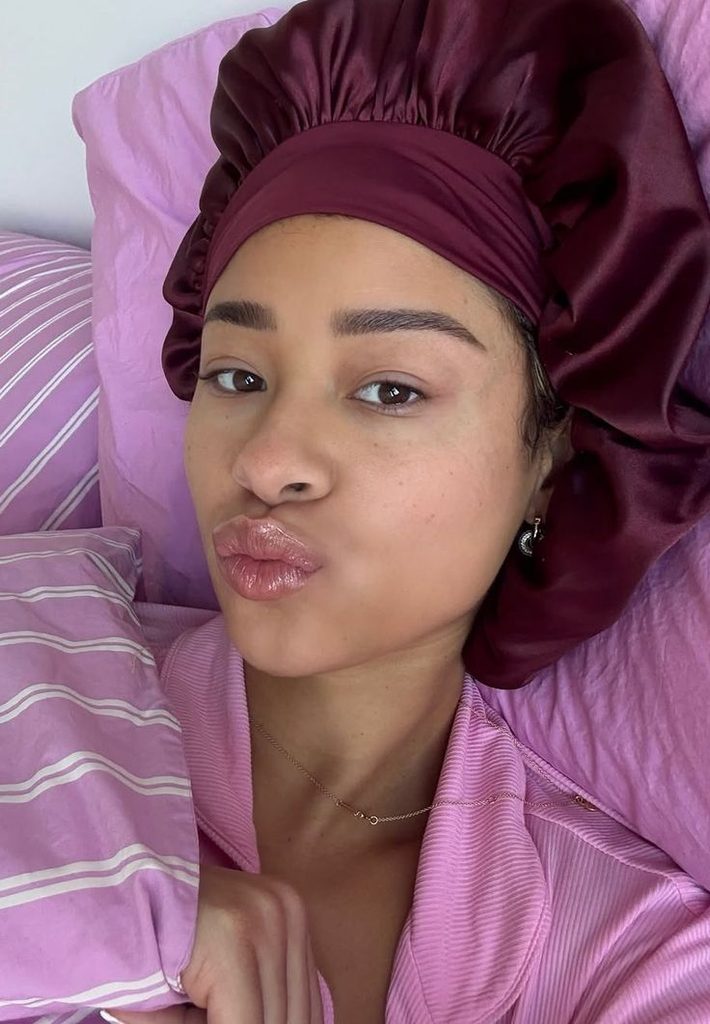
Wear the twist-out during the day, then gently divide it into a few loose sections before bedtime. Cover the hair with a satin bonnet or scarf to reduce friction.
The next morning, fluff the roots lightly and avoid completely restyling the curls.
75. Fluffy Twist-Out With Minimal Separation
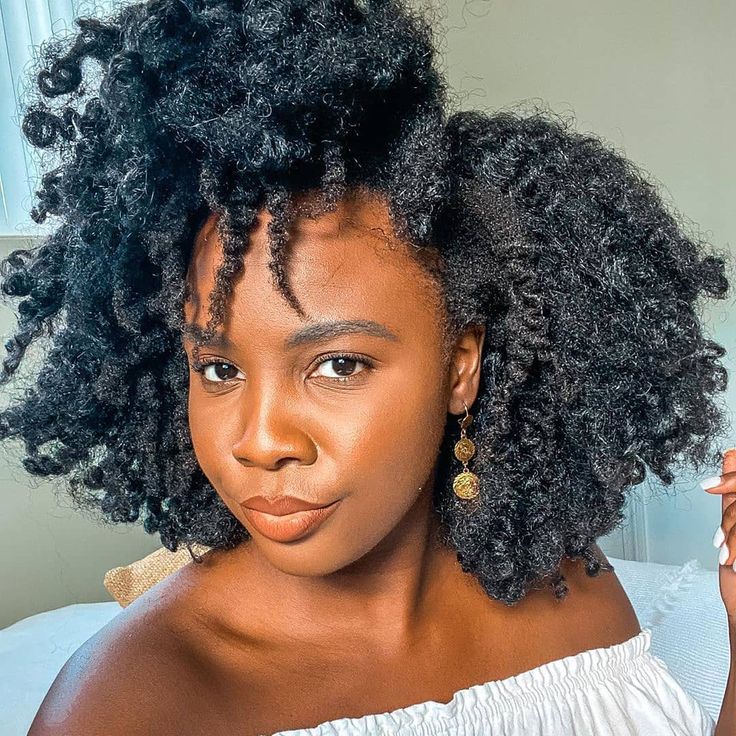
For the final look, unravel the twists and separate them only once or twice. This keeps the curl groups larger and creates a soft, fluffy finish.
If your hair becomes frizzy easily, avoid excessive touching and refresh only the areas that need attention.
How to Make Your Twist-Out Last Longer
A twist-out can last several days when the hair is prepared properly and handled gently. Start with a clean scalp and moisturized strands. Your weekly hair care routine can help you decide when to wash, condition, and restyle your hair.
Use products that suit your hair’s needs rather than copying someone else’s routine. If your hair becomes dry quickly, check whether you are dealing with moisture problems or using products that leave too much buildup.
To improve your results:
- Make sure the twists are completely dry before unraveling.
- Apply products in small sections.
- Avoid separating the curls too aggressively.
- Sleep with a satin bonnet or scarf.
- Refresh dry areas with a small amount of water and leave-in conditioner.
- Avoid brushing the finished twist-out repeatedly.
- Protect the ends when gathering the hair into puffs or buns.
- Give your hair breaks from styles that create tension.
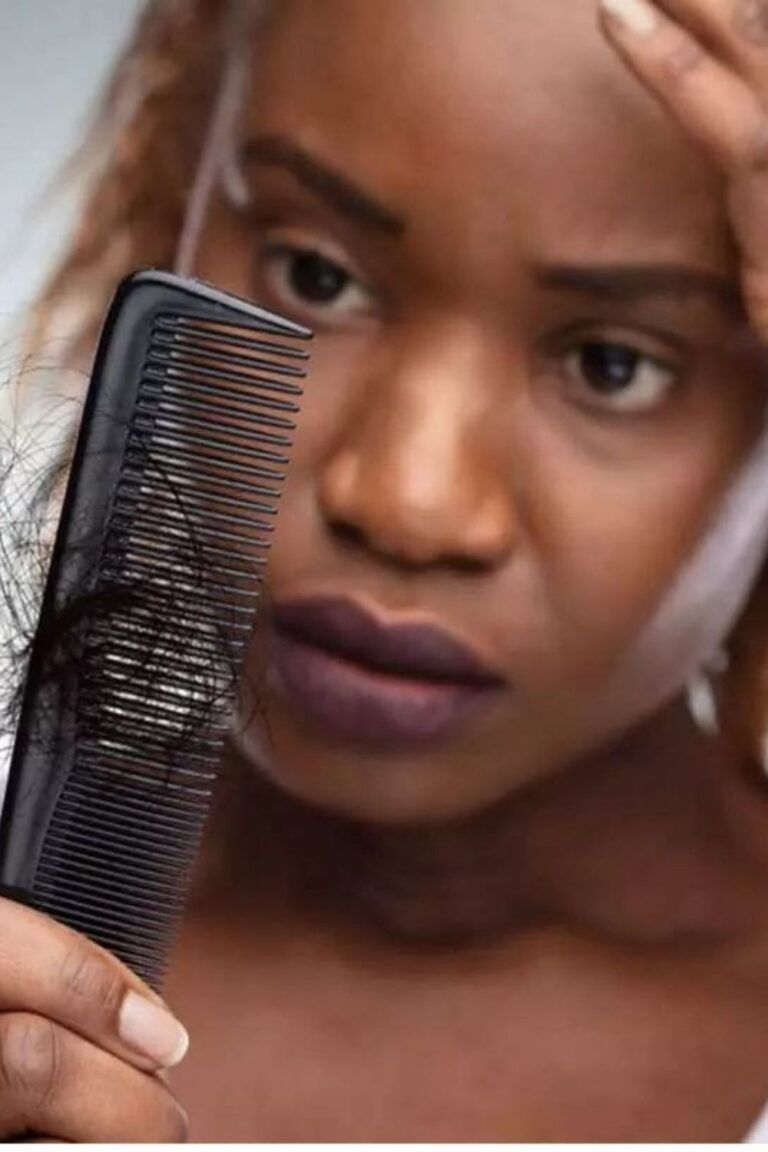
If your twist-out causes excessive tangling, review your wash-day process and explore 60 wash day tips for gentler preparation. If you notice frequent snapping, avoid tight styling and focus on breakage prevention through careful detangling and moisture management.
Final Thoughts
There are countless ways to wear a twist-out, from small defined curls and fluffy afros to puffs, buns, side parts, headbands, and detailed updos. The best choice depends on the amount of time you have, the finish you prefer, and how your hair responds to products.
You do not need to create the perfect curl pattern for your style to look beautiful. Some twist-outs look best when they are defined, while others become more attractive after they are fluffed and shaped.
Try different twist sizes, experiment with accessories, and pay attention to what keeps your hair soft and manageable. With practice, you will find the twist-out ideas for 4C hair that suit your texture, routine, and personal style.
3 Comments