101 Cute Hairstyles For 4C Hair
Disclosure: Some of the links in this post are affiliate links. This means if you click on the link and purchase an item, I will receive an affiliate commission at no extra cost to you.
Finding cute hairstyles that work for 4C hair should not feel like choosing between what looks good and what actually works for your hair.
Your natural texture can do a lot. From defined twists and fluffy puffs to intricate braids, elegant updos, and simple everyday styles, there are countless ways to wear 4C hair. The key is finding styles that suit your hair’s current length, density, condition, and the amount of time you want to spend styling it.
Some days, you may want something quick before heading out. Other times, you may be in the mood to create a detailed style that becomes the main part of your look. There are also days when keeping your hands out of your hair is the priority, making a low-manipulation or protective option much more practical.
That is why this list includes different types of cute 4C hairstyles, from beginner-friendly options to styles that work beautifully for special occasions.
If you are still getting familiar with your texture, our guide to 4C hair characteristics can help you understand why your hair may behave differently from someone with another curl pattern.
Before choosing a style, think about what your hair needs right now. If your strands are dry, fragile, or recovering from excessive manipulation, a complicated style may not be the best choice. On the other hand, healthy, well-moisturized hair can give you more freedom to experiment.
We have also included styles for different situations, including school, work, busy mornings, weddings, casual outings, protective styling, and days when you simply want to show off your natural texture.
Here are 101 ideas to add to your hairstyle rotation.
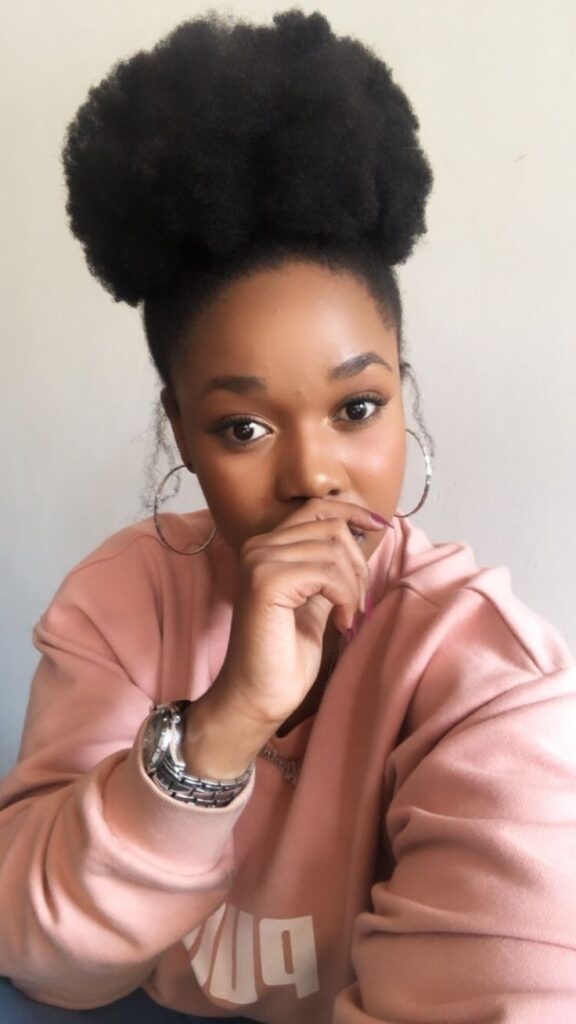
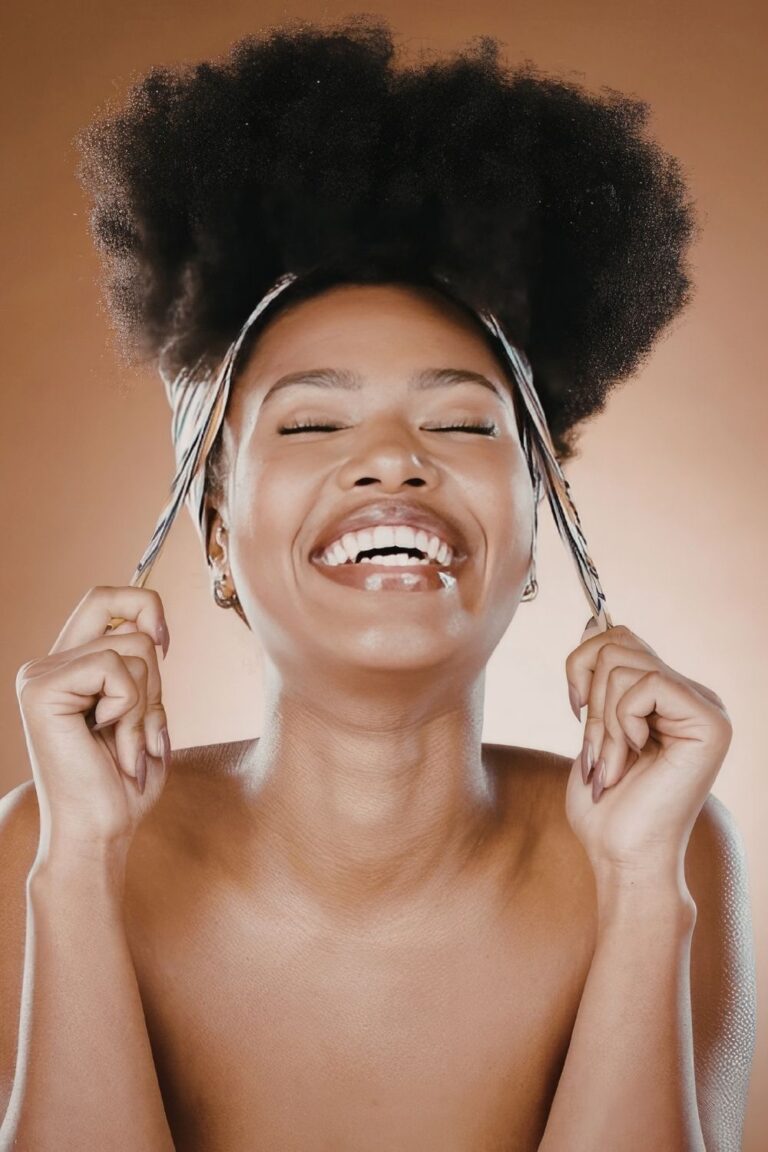
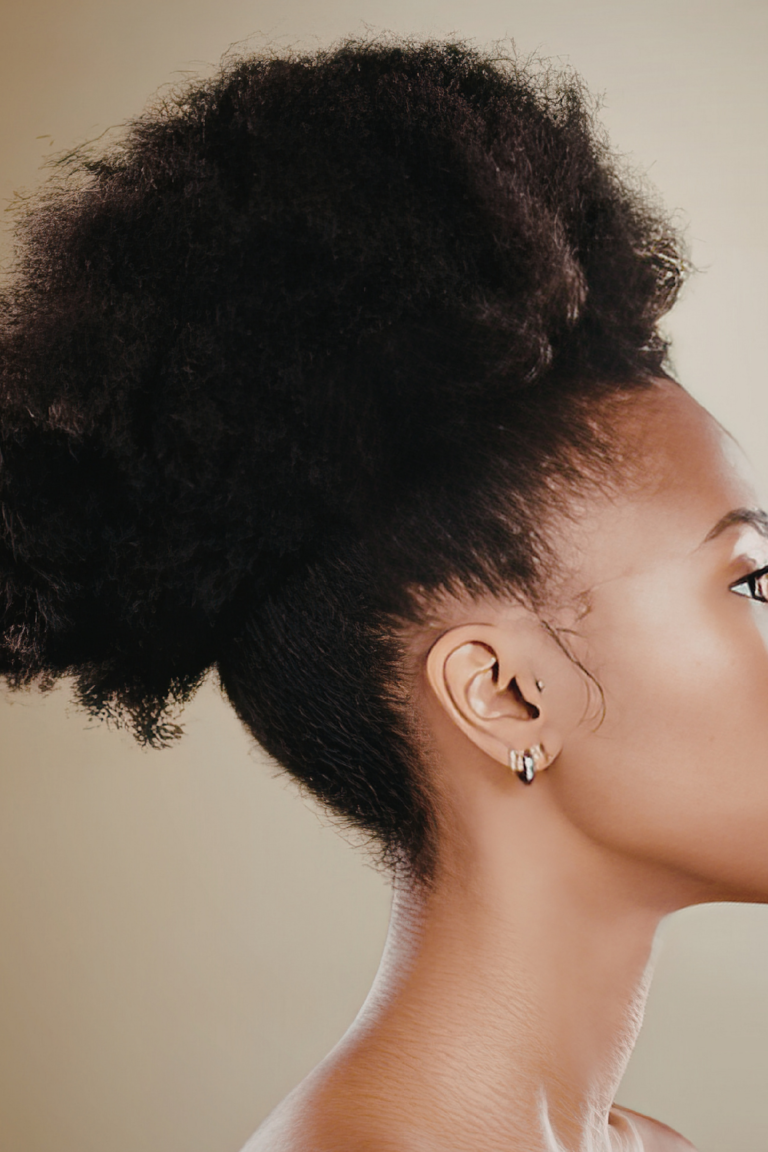
1. High Afro Puff
The high afro puff is one of those styles that proves you do not need an elaborate hairstyle to look put-together. Gather your hair toward the crown of your head and secure it gently with a soft hair tie or puff band.
Let your natural texture do the work. You can leave the puff fluffy and full or lightly stretch it beforehand if you want more volume and length.
For extra personality, add a headband, scarf, or a few simple accessories around the base. If your hair tends to shrink considerably, a stretched puff can give you a dramatically different finish.
A gentle daily hair care routine can also help keep your hair soft enough to style without excessive pulling.
2. Low Afro Puff
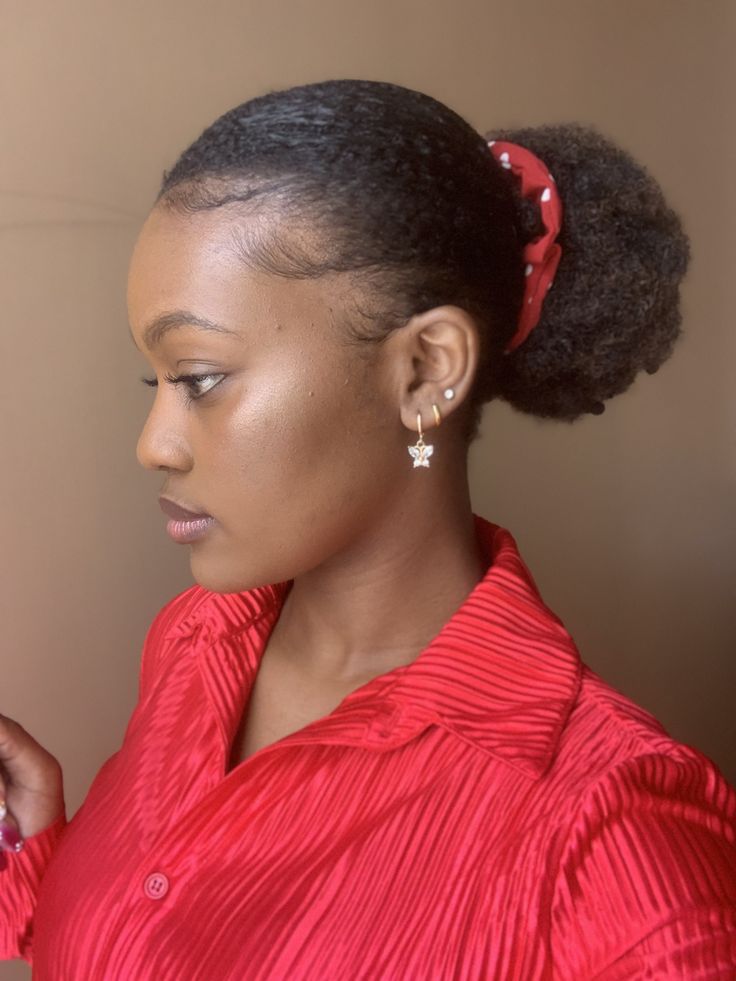
If you like the simplicity of a puff but prefer something softer and closer to the nape, try a low afro-puff.
Gather your hair toward the back of your head and secure it without pulling the hairline too tightly. The result is understated but still stylish, especially when you allow the natural texture to remain fluffy.
A middle or side part can change the appearance completely. You can also smooth only the front while leaving the puff itself natural and textured.
For days when you want less manipulation, this is an easy option that can work beautifully with a simple low manipulation style.
3. Defined Mini Afro
Sometimes the best hairstyle is simply your hair in its natural shape.
A defined mini afro works especially well when you want to showcase your coils without committing to a complicated styling session. You can use a small amount of styling product to encourage definition, then allow your hair to dry naturally.
The finished look can be rounded, slightly shaped, or left completely free depending on your preference.
This style is particularly cute when paired with statement earrings or a simple headband. If your hair is shorter, it can also make your natural texture look incredibly full.
For a healthy foundation, pay attention to your wash day routine so your hair is clean, conditioned, and manageable before styling.
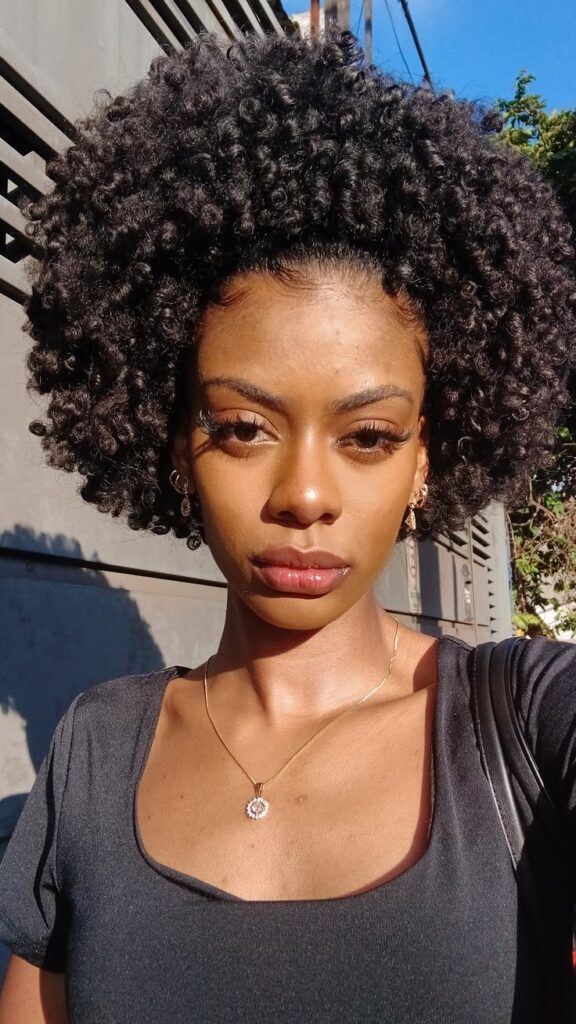
4. Side-Parted Afro
A small change in your part can completely transform a familiar hairstyle.
Instead of wearing your afro evenly rounded, create a deep side part and gently shape the larger section outward. The asymmetry gives the style a more polished appearance while keeping the natural texture visible.
You do not need perfectly defined curls for this look. In fact, a little volume and texture can make it even more interesting.
Pair it with hoops, studs, or a bold lip when you want the hairstyle to feel more intentional.
If your hair becomes particularly dry after styling, your moisture routine may need a little attention before you start experimenting with different looks.
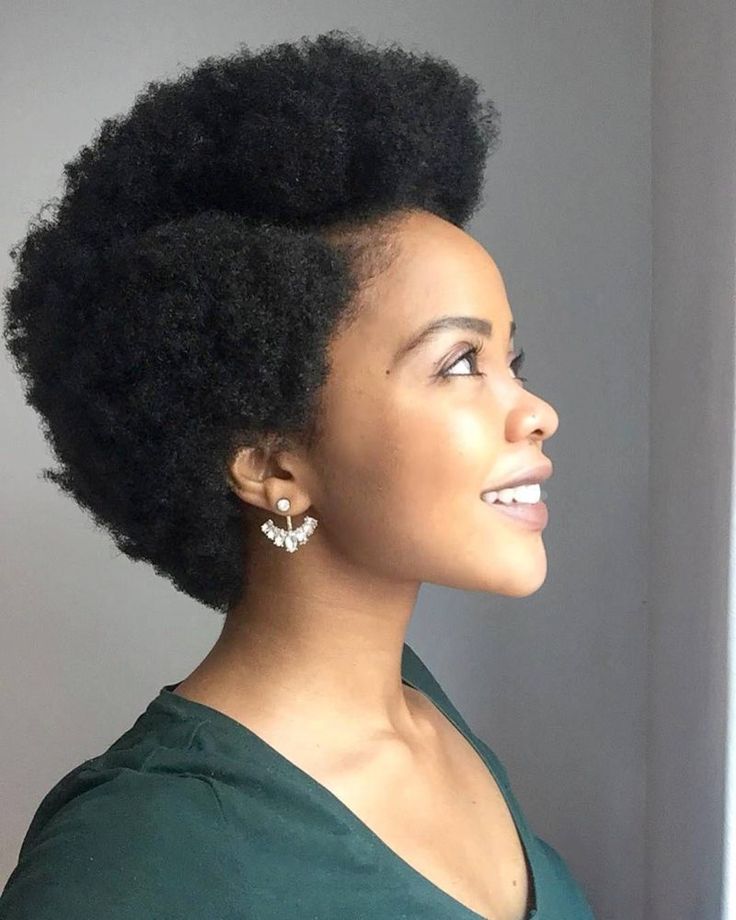
5. Two Afro Puffs
Two afro puffs are playful, youthful, and surprisingly versatile.
Part your hair down the middle and gather each side into a puff. You can position them high near the crown or slightly lower for a softer appearance.
The style works particularly well when you want something fun without spending hours manipulating your hair. Add colourful scrunchies, ribbons, clips, or small accessories around each puff if you want more personality.
For a cleaner finish, you can lightly smooth the front while keeping the puffs full and textured.
Keeping your ends protected between styling sessions can also support better length retention over time.
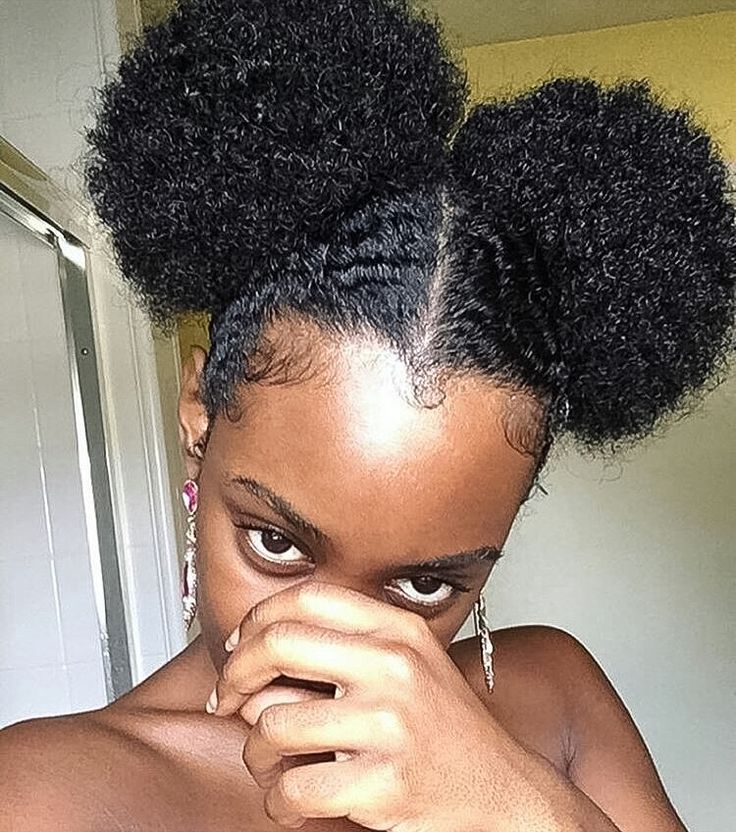
6. Puff With Headband
A headband can turn a basic puff into a completely different look.
Create your favorite afro puff and place a fabric headband around the front of your hair. Wide headbands give the style a bold appearance, while thinner ones create a more delicate finish.
This is also a useful option when you do not want to spend too much time styling your edges. The accessory naturally becomes part of the hairstyle instead of requiring everything around the hairline to look perfectly smooth.
Choose a colour that contrasts with your outfit when you want the headband to stand out.
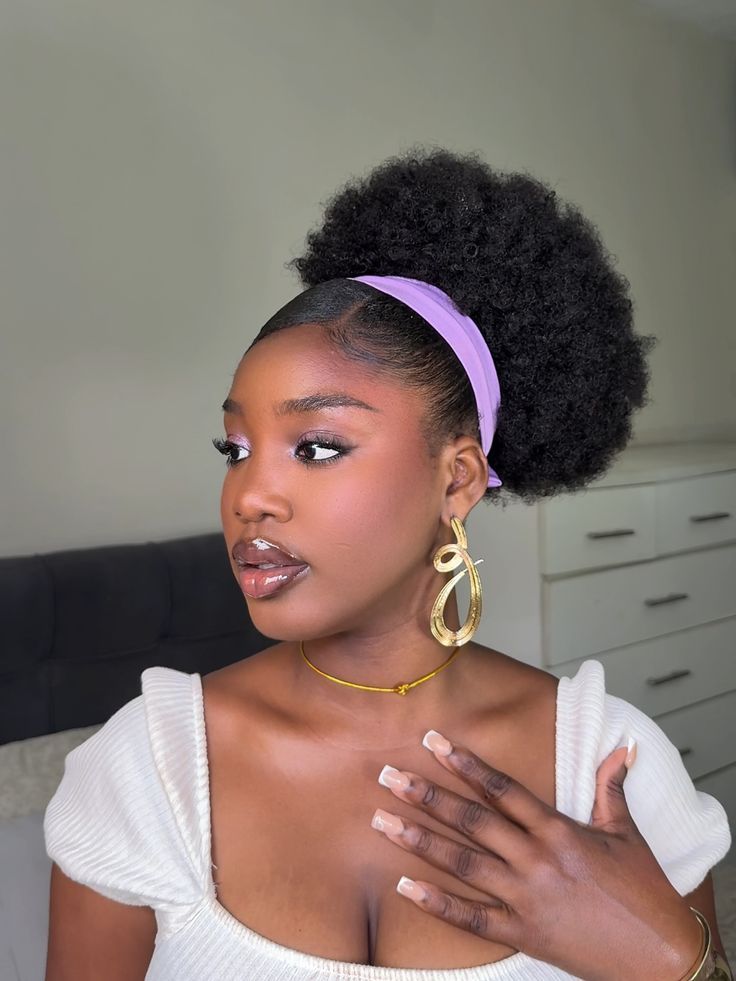
7. Flat-Twist Crown
A flat-twist crown gives you the appearance of an intricate hairstyle without requiring your entire head to be twisted.
Create two flat twists starting from one side of your head and work them around toward the opposite side. Pin the ends securely and leave the remaining hair loose or gathered into a puff.
The result has a soft, romantic appearance that works beautifully for occasions when you want something more polished.
Flat twists can also be a good alternative when you want the look of protective styling without completely covering your natural texture.
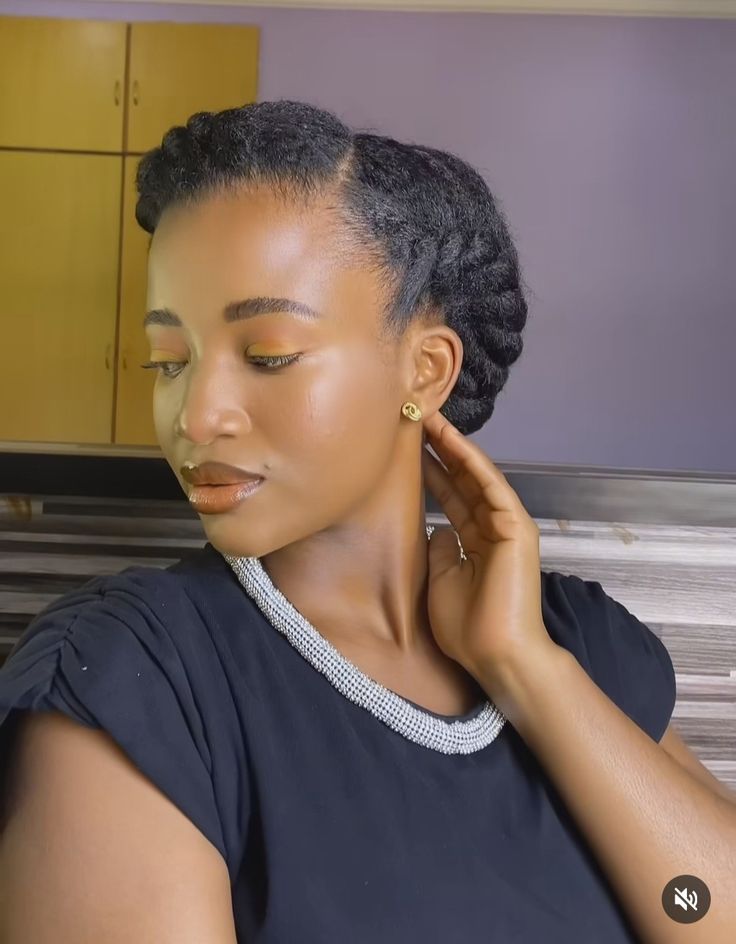
8. Two-Strand Twist-Out
A twist-out remains one of the easiest ways to create a completely different shape from your natural hair.
Start with moisturized hair and divide it into sections. Twist each section using two strands, allow the hair to dry completely, then carefully unravel the twists.
Fluff the roots gently with your fingers to create more volume. You can make the twists small for greater definition or larger for a softer, fuller result.
The beauty of a twist-out is that the final shape can look completely different depending on how you install the twists.
If you are new to this style, experimenting with twist-out hairstyles can give you plenty of ideas for different finishes.
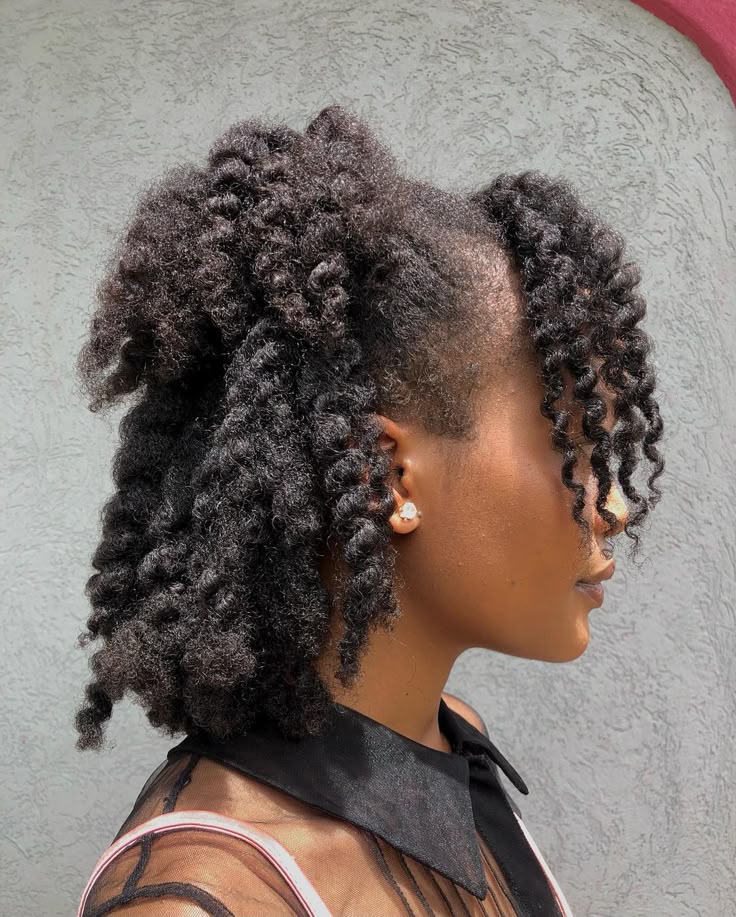
9. Chunky Twist-Out
For a fuller and less defined finish, use chunky twists instead of small ones.
Divide your hair into larger sections and create loose two-strand twists. Once completely dry, unravel them gently and separate the sections only as much as necessary.
This creates big waves and bends rather than tiny individual coils. The result is soft, fluffy, and full of volume.
It is also a good choice when you want a twist-out without spending a long time installing dozens of tiny twists.
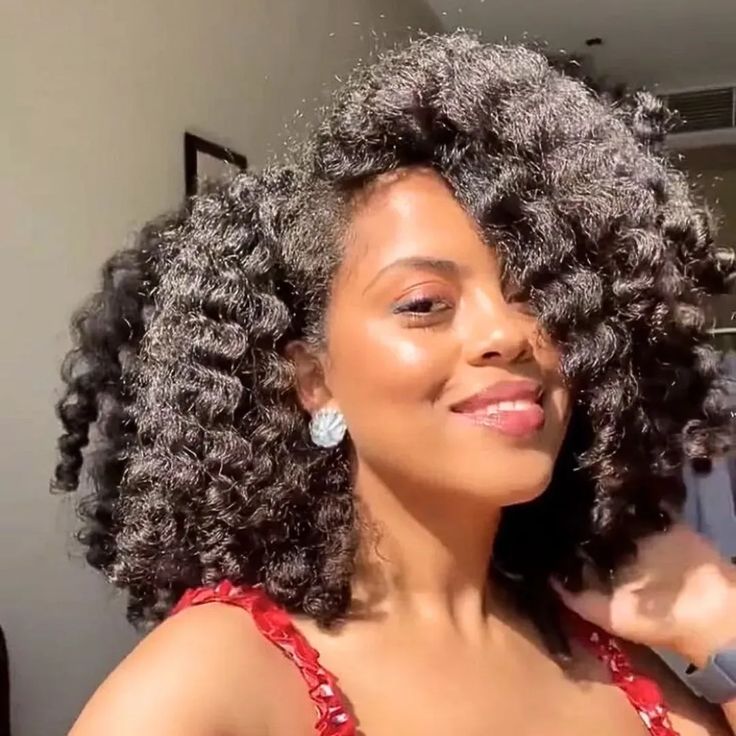
10. Side-Swept Twist-Out
Take a regular twist-out and give it a dramatic side part.
After unraveling your twists, create a deep side part and sweep the larger section toward one side. Use a few discreet pins underneath if you need help keeping the shape in place.
This small adjustment can make the hairstyle look more sophisticated without requiring a completely new styling method.
It is especially attractive when you want your natural volume to remain the main feature of the look.
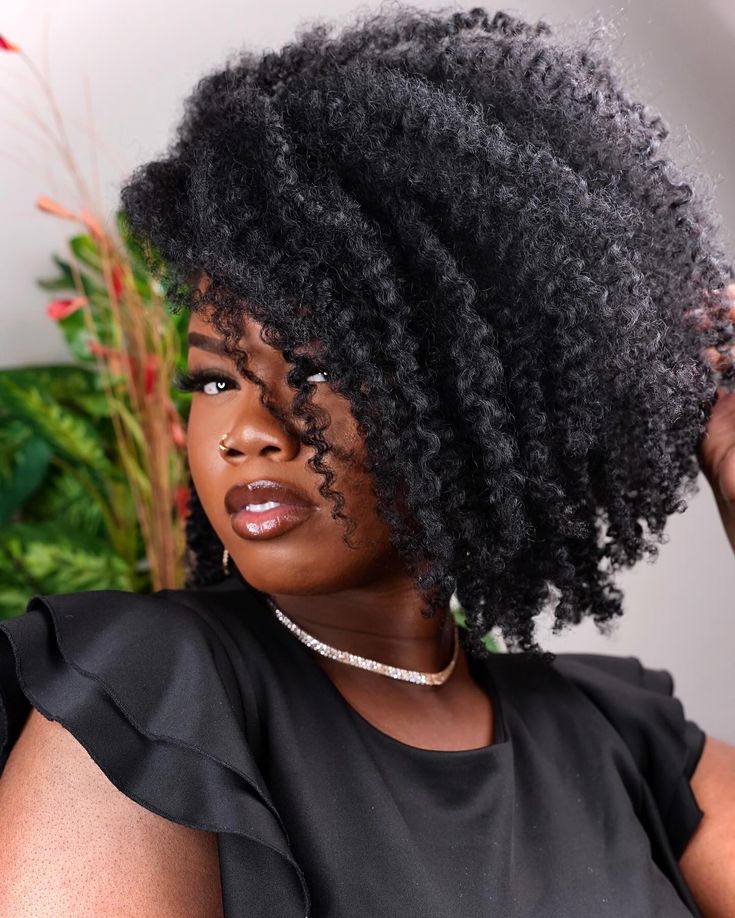
11. Braid-Out
A braid-out gives your hair a slightly different texture from a twist-out.
Divide damp or moisturized hair into sections and braid each section. Once the hair has dried completely, carefully unravel the braids and separate the resulting waves.
The finished texture can be stretched, fluffy, defined, or somewhere in between depending on the size of your braids.
If you like experimenting with different textures without using heat, a braid-out can become one of your regular styling options.
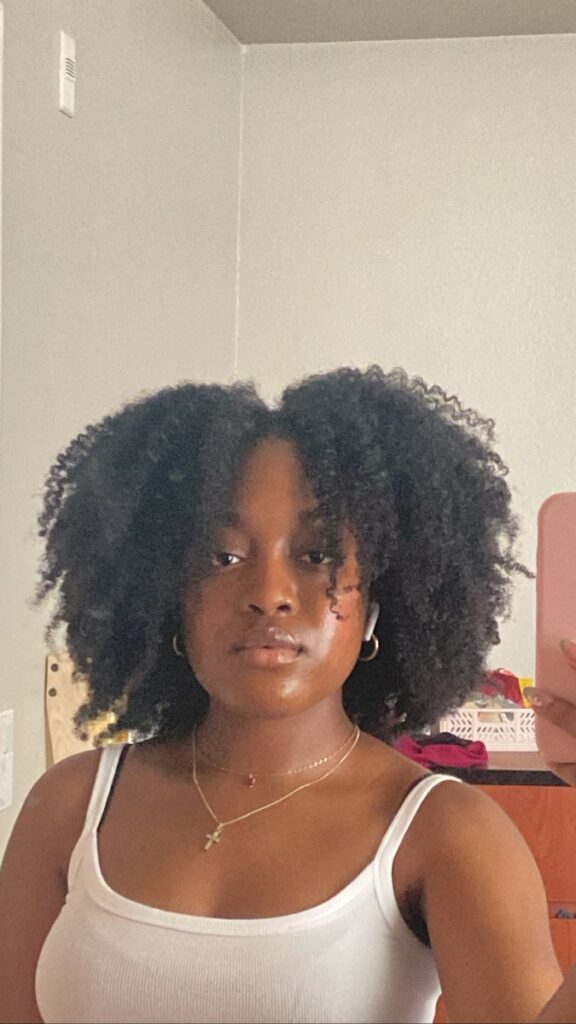
12. High Bun
A high bun is simple, neat, and easy to dress up.
Gather your hair toward the crown and secure it into a bun. Depending on your length, you can create a compact bun or use the natural volume of your hair to make it larger.
You can smooth the front lightly or leave some texture visible for a softer appearance.
Add a scarf, decorative pins, or statement earrings when you want the style to feel more formal.
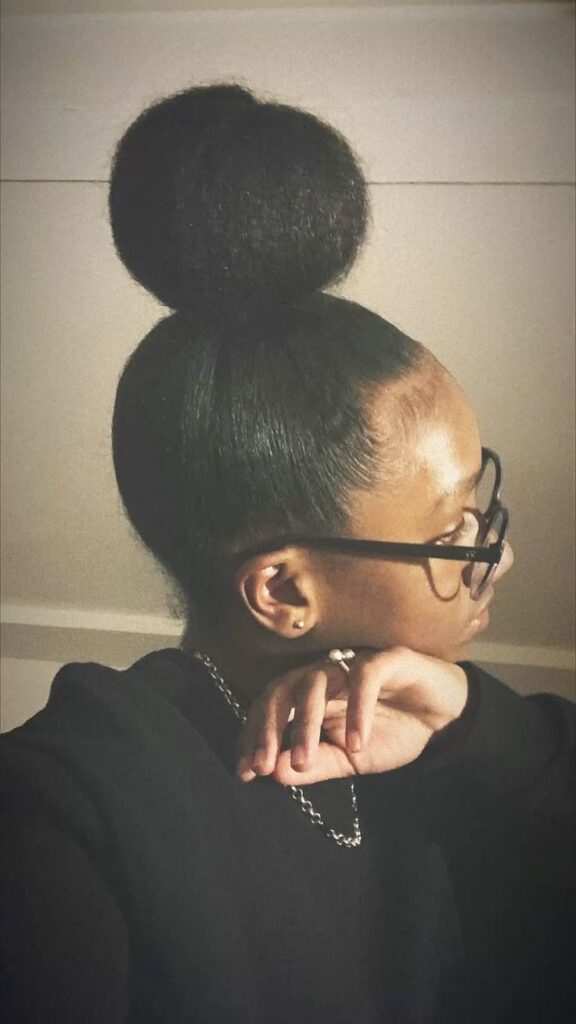
13. Low Textured Bun
A low bun creates a completely different mood from a high bun.
Gather your hair near the nape and form a loose bun while allowing some of the natural texture to remain visible. You can leave the front slightly fluffy instead of smoothing it completely.
The result is understated, elegant, and suitable for days when you want your hairstyle to look polished without looking overly done.
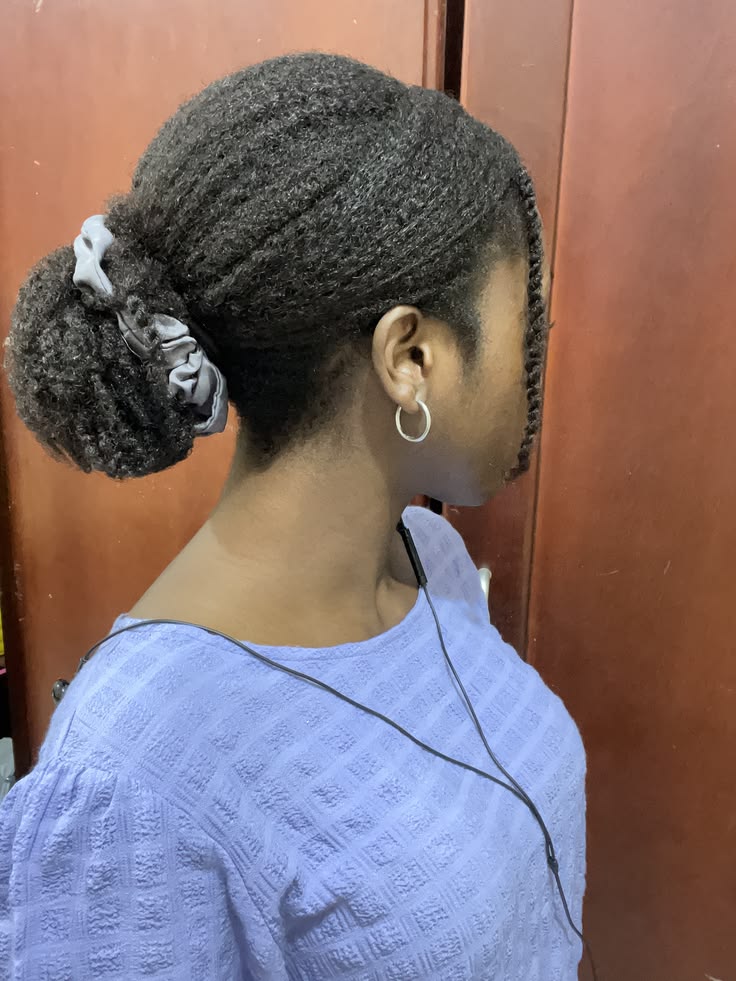
14. Space Buns
Space buns are a fun way to play with your natural volume.
Divide your hair into two sections and create a bun on each side of your head. They can be positioned high for a playful look or slightly lower for something more relaxed.
You can keep the buns fluffy and textured or smooth the base for a more polished appearance.
Colorful clips, ribbons, and small accessories can make this hairstyle even more playful.
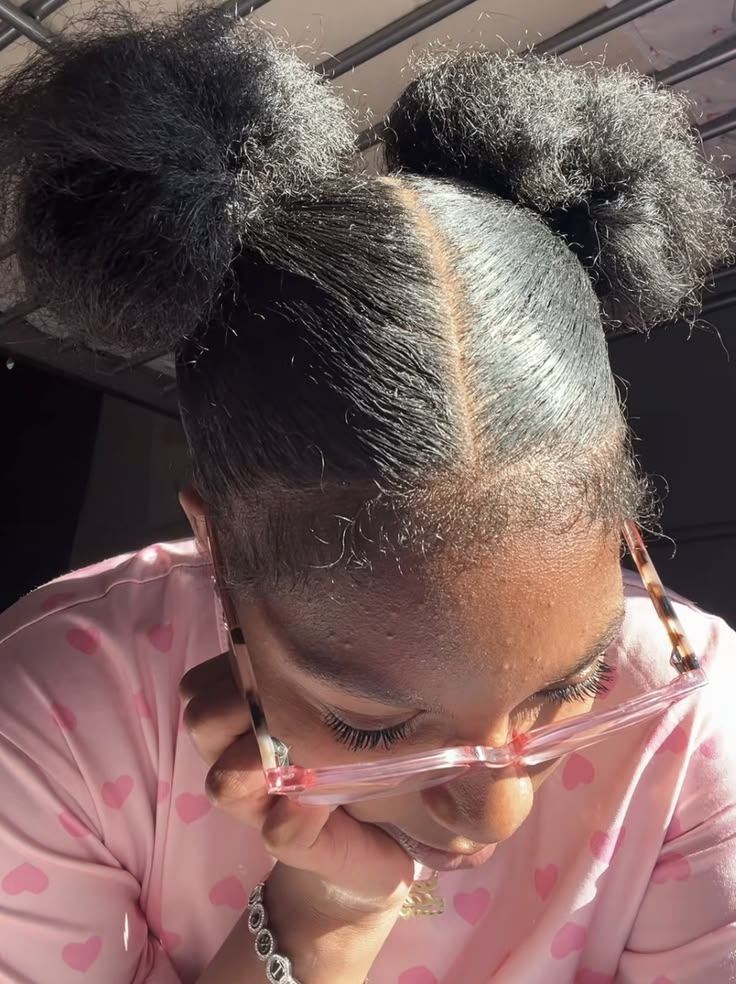
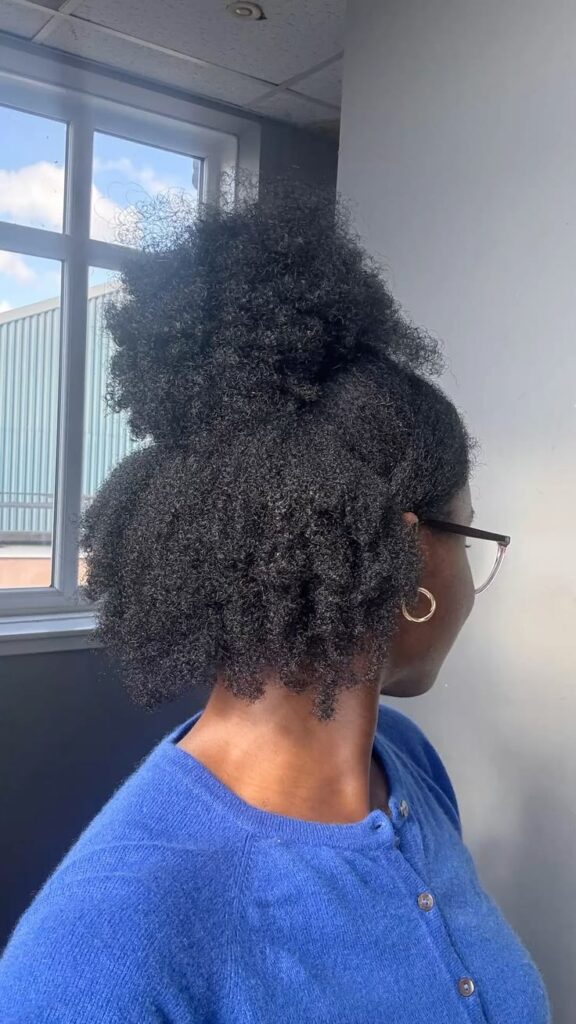
15. Half-Up Half-Down Afro
The half-up half-down style gives you the best of both worlds.
Gather the upper section of your hair into a puff or small bun while leaving the bottom section loose. The contrast between the secured top and free-flowing bottom gives the hairstyle plenty of volume.
You can also experiment with a middle part, side part, or small twists at the front.
For a slightly different finish, define the loose section with a wash-and-go before securing the top.
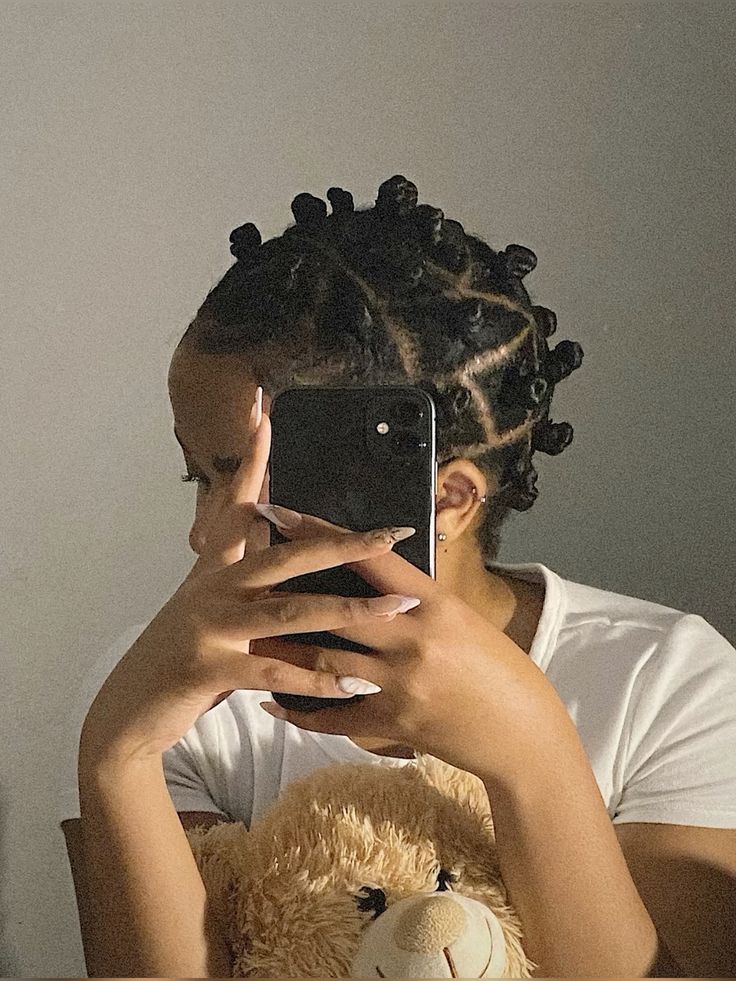
16. Mini Bantu Knots
Bantu knots are both a hairstyle and a way to create texture for another look.
Divide your hair into small sections, twist each section, and wrap it around itself to create compact knots. Secure them gently and leave them in place.
You can wear the knots as they are or unravel them later for a defined knot-out.
Small accessories placed between the knots can make the style look even more decorative.
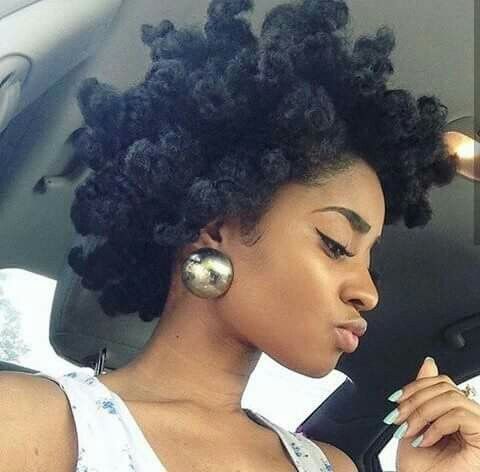
17. Bantu Knot-Out
If you want defined texture without using heat, try a Bantu knot-out.
Install your knots on moisturized hair, allow them to dry completely, then carefully unravel each one. Separate the resulting curls with your fingers and fluff the roots gently.
The finished style can be compact and defined or stretched and voluminous depending on how you separate it.
This is one of those looks where the installation process can double as a hairstyle itself.
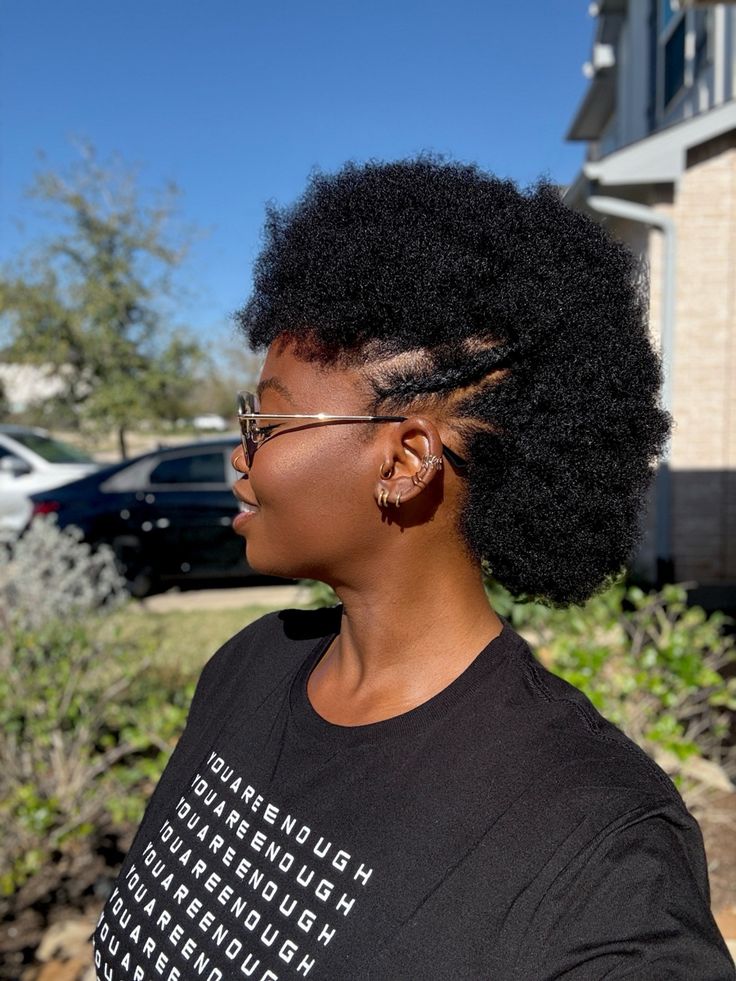
18. Frohawk
The frohawk gives your afro a bold shape without requiring you to cut your hair.
Create several sections along the sides of your head and secure them upward or toward the centre. Leave the middle section full and textured so it creates the appearance of a mohawk.
You can make the sides smooth, twisted, braided, or simply pinned back.
This is a great option when you want your natural volume to make a statement.
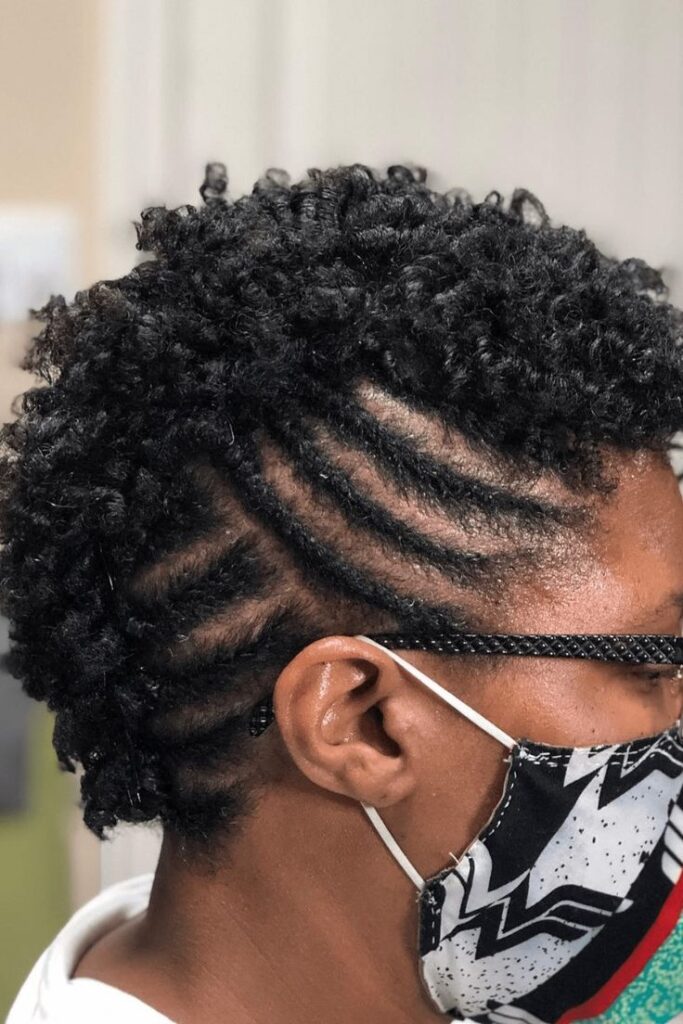
19. Flat-Twist Frohawk
For a more detailed version of the frohawk, replace the pinned sides with flat twists.
Create several flat twists running upward along both sides of your head, directing them toward the center. Leave the middle section loose and full.
The contrast between the structured twists and the fluffy center creates a striking hairstyle without hiding your natural texture.
20. Defined Wash-and-Go
A wash-and-go can give your hair a fresh, defined appearance while allowing your natural pattern to take center stage.
Apply your preferred styling products to clean, conditioned hair and work through small sections. Encourage your coils with your fingers, then allow the hair to dry completely.
The final result will depend heavily on your natural curl pattern, density, products, and technique. You do not need every coil to look identical for the style to look good.
For inspiration, you can explore different wash-and-go styles and adjust the technique to suit your own hair.
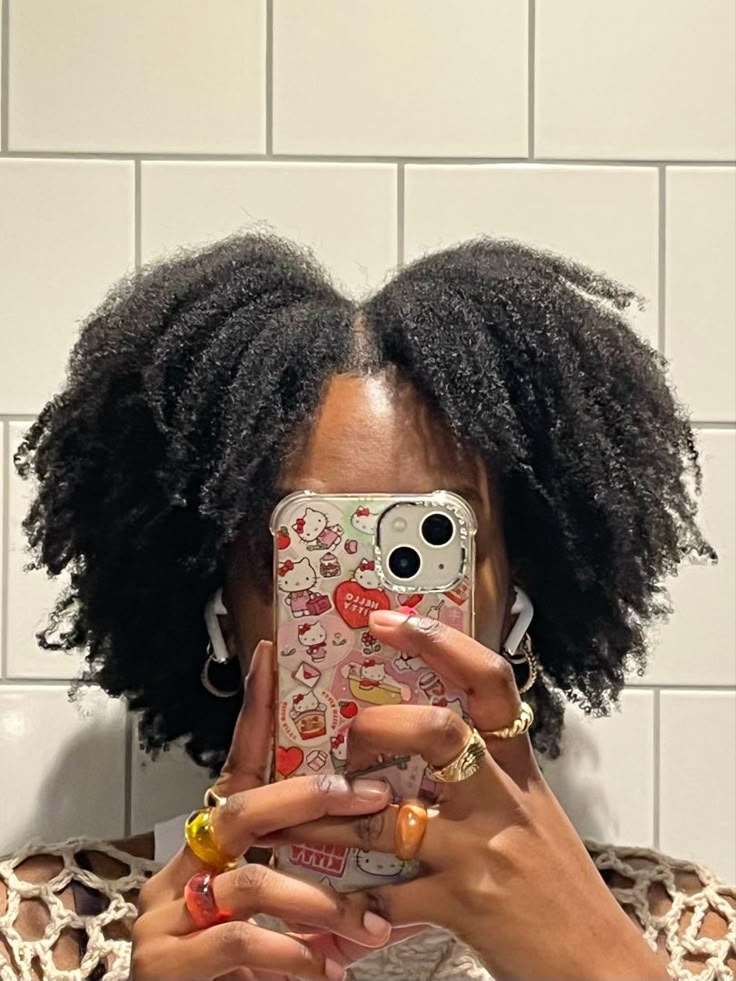
21. Side-Parted Wash-and-Go
Give your wash-and-go a different shape by changing the part.
Instead of allowing the hair to fall evenly around your face, create a deep side part while the hair is still wet or damp. Once dry, gently arrange the larger side for more volume.
This simple change can make the same wash-and-go look completely different from one styling session to the next.
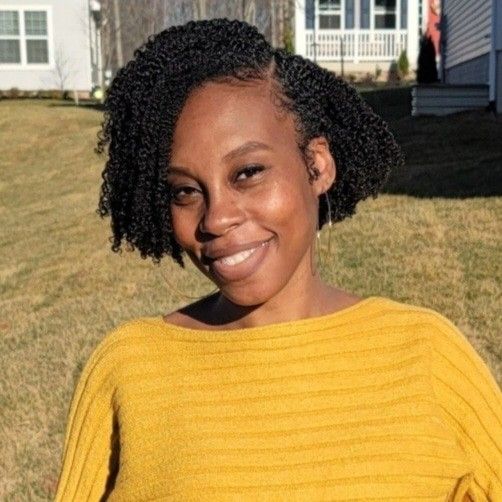
22. Flat Twists With a Puff
Create two or more flat twists at the front of your head and gather the remaining hair into a puff.
This style gives you structure around the face while keeping plenty of natural volume at the back. You can make the twists simple or add a decorative parting pattern.
The combination works particularly well when you want a hairstyle that looks detailed without requiring your entire head to be manipulated.
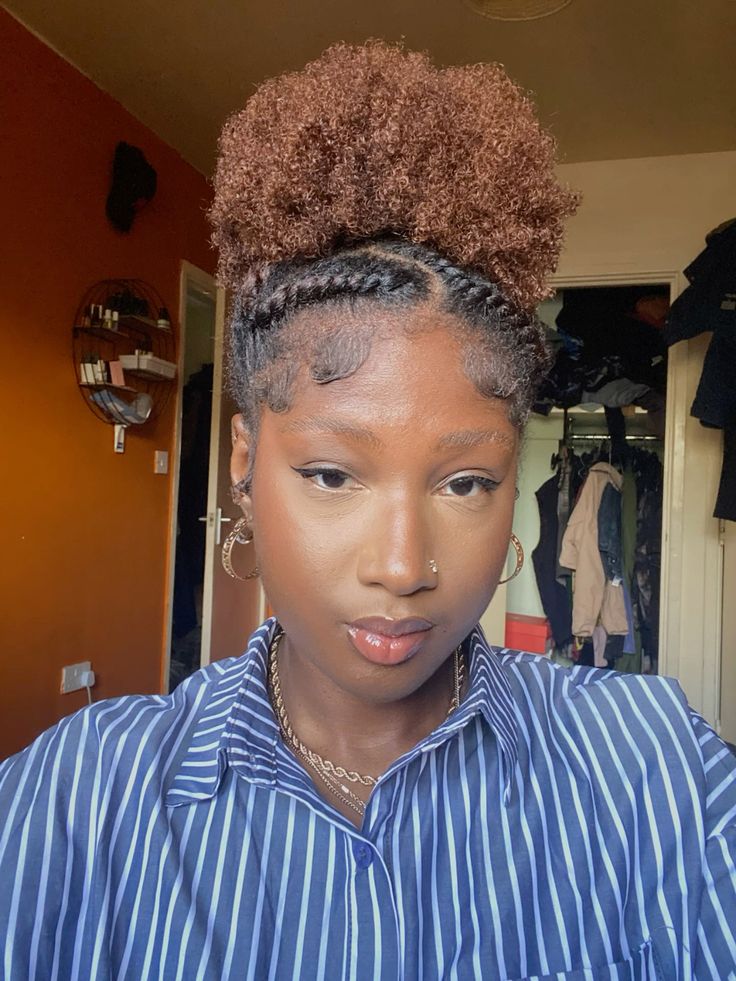
23. Two Flat Twists With Loose Hair
Keep the rest of your hair completely loose and use two flat twists to frame your face.
Part the front section down the middle, create one flat twist on each side, and secure them toward the back. Let the remaining hair stay fluffy and natural.
The result is simple enough for everyday wear but still has enough detail to make the hairstyle interesting.
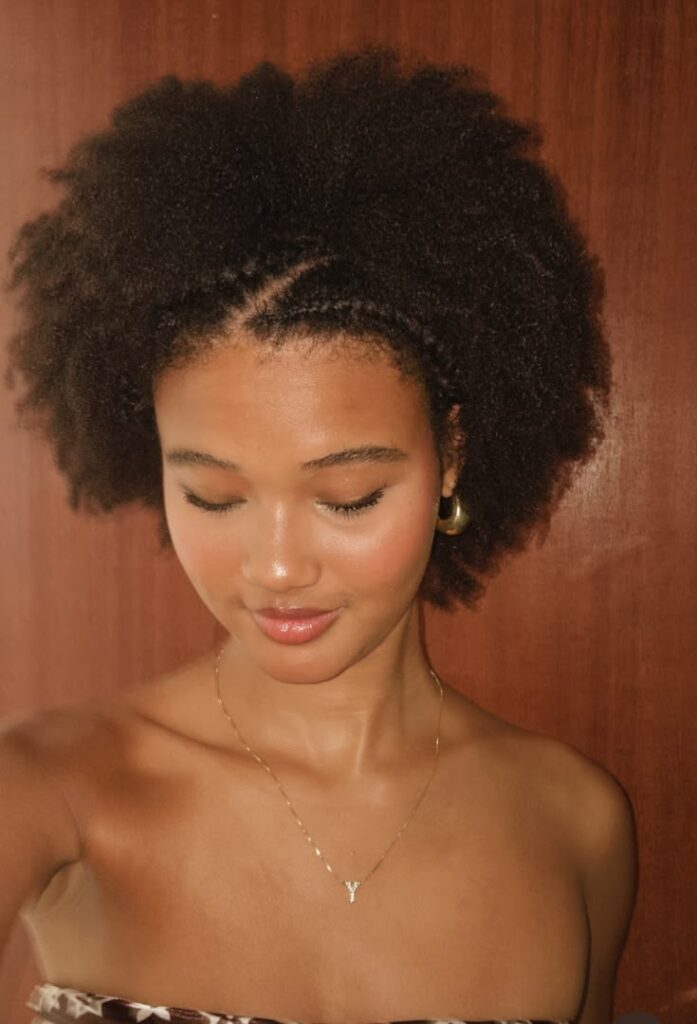
24. Flat-Twist Side Part
Instead of creating a traditional part, turn the part itself into a hairstyle.
Create a deep side section and flat twist along the parting line. Leave the remaining hair loose or shape it into an afro.
This gives a simple natural hairstyle an intricate detail without overwhelming the overall look.
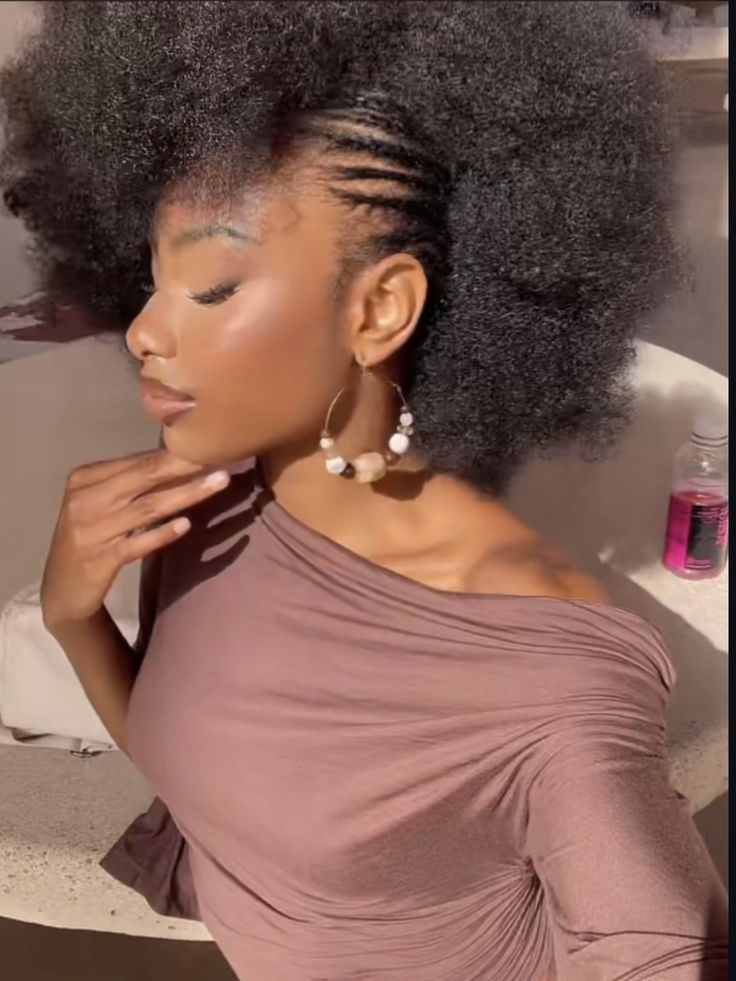
25. Rolled and Pinned Updo
A rolled and pinned updo can make natural hair look elegant without requiring heat.
Divide your hair into sections and roll each section upward before securing it with pins. You can leave a little texture visible around the front instead of aiming for a completely sleek finish.
The style works beautifully with earrings and formal outfits, but it can also be dressed down for everyday wear.
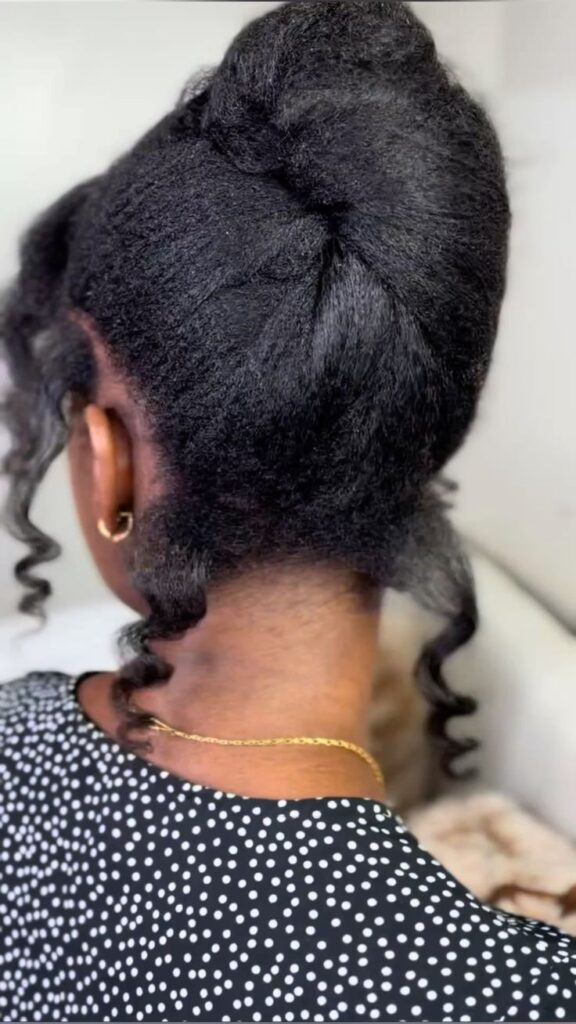
26. High Puff With Defined Edges
A high puff becomes instantly more polished when you add a little definition around the front. Gather your hair toward the crown and secure it gently, then use a small amount of styling product around the hairline if you want a cleaner finish.
You do not need extremely slick edges for the hairstyle to look good. A few softly shaped sections can frame your face while the puff stays big and natural.
If your edges are delicate, avoid repeatedly brushing them into place. Your hairline care matters just as much as the finished style.
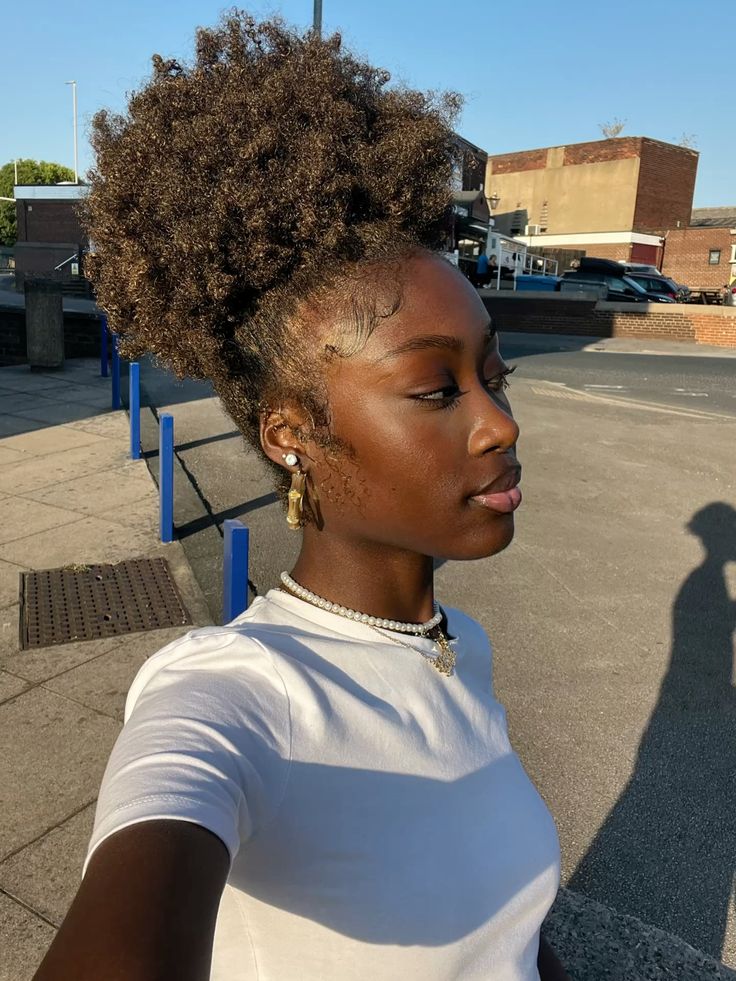
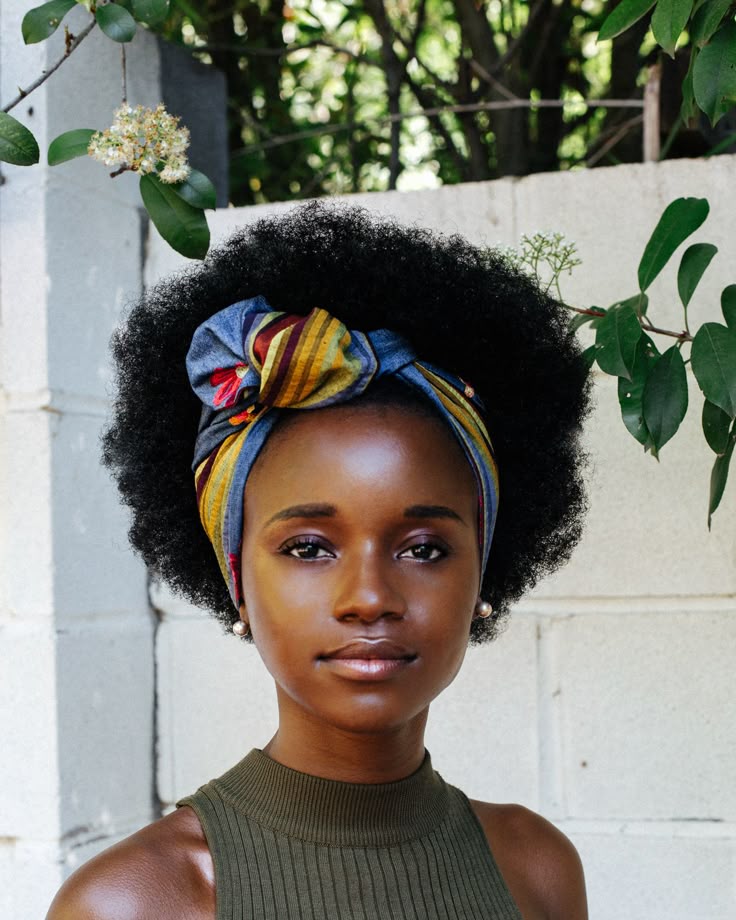
27. Afro With a Head Scarf
A simple scarf can completely change the appearance of an afro.
Leave your hair loose and full, then tie a colorful scarf around the front or back of your head. You can fold the scarf into a thin band or use it wider for a more dramatic look.
Printed scarves work particularly well when the rest of your outfit is simple.
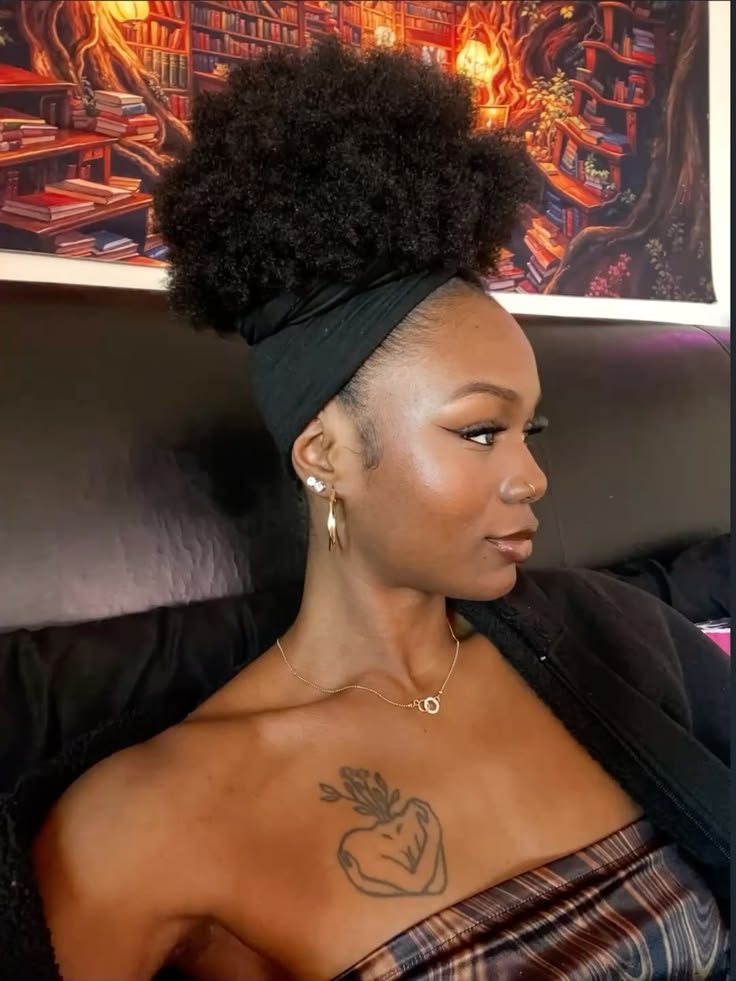
28. Scarf-Wrapped Puff
Take your regular puff and wrap a scarf around its base.
The scarf can cover the hair tie completely and add a pop of colour without changing the actual hairstyle. Try different wrapping methods to create different looks from the same puff.
This is also a convenient option when you want your hair styled quickly but still want it to look intentional.
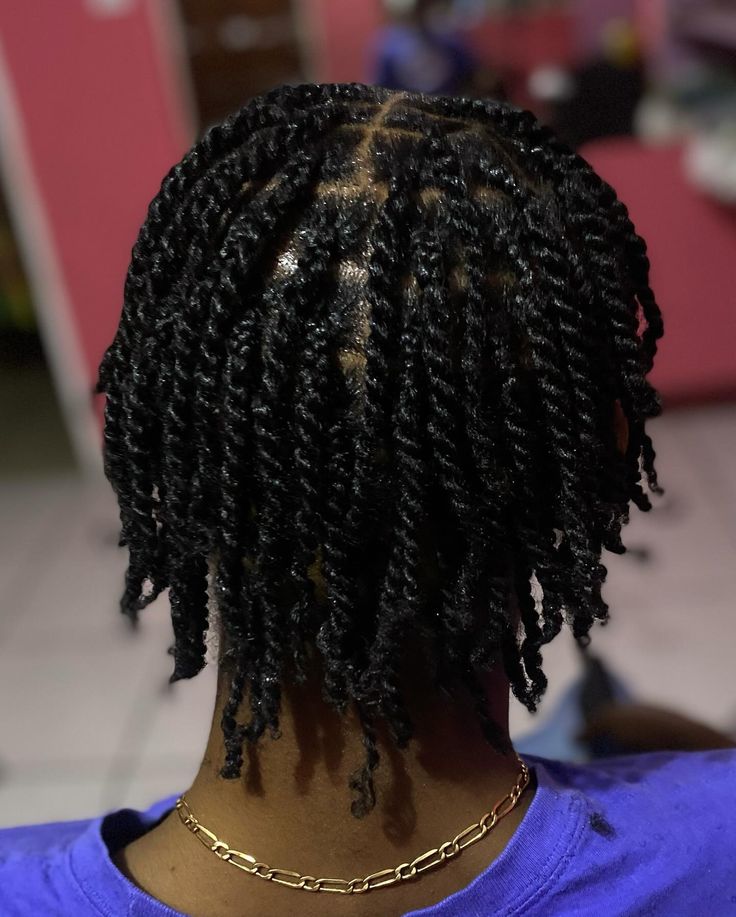
29. Two-Strand Twists
Two-strand twists are a classic natural hairstyle because they are simple, versatile, and easy to customize.
You can make them tiny and detailed or large and chunky. Wear them hanging freely, gather them into a bun, or accessorize the ends with beads.
The finished style can also become the starting point for another look once you unravel the twists.
Keeping your twists moisturized can make them more comfortable to wear and help reduce unnecessary hair breakage.
30. Chunky Two-Strand Twists
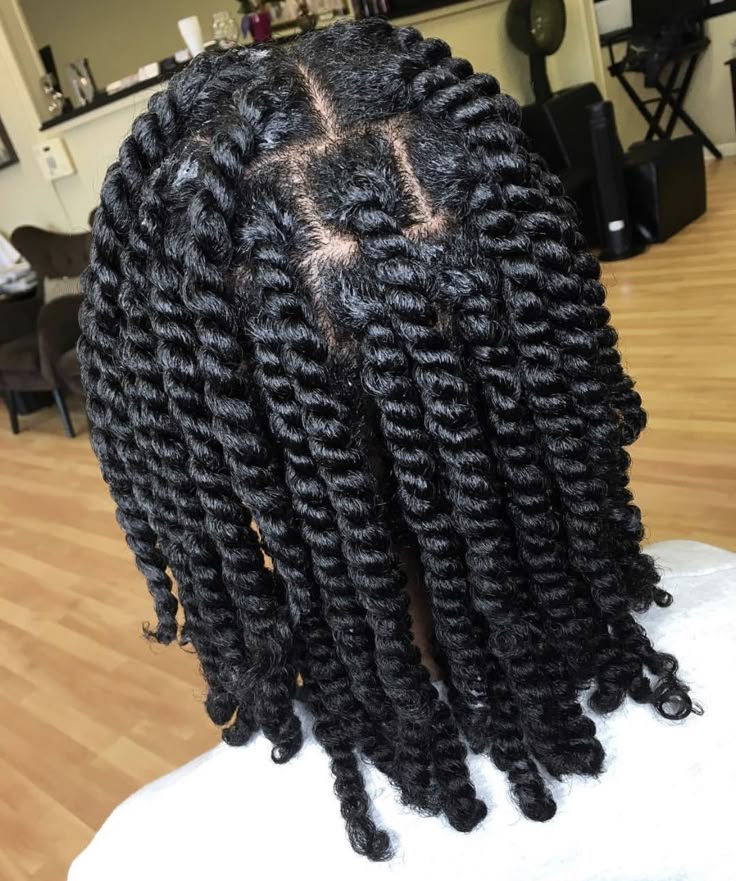
If you like the look of twists but do not want to spend hours creating tiny sections, chunky twists are a great alternative.
Use larger sections of hair to create thick, noticeable twists. The finished hairstyle has a relaxed appearance and can be worn loose or gathered into another style.
Chunky twists also make it easy to switch up your look later.
31. Mini Two-Strand Twists
Mini twists take more time to install, but the finished result can last beautifully when maintained properly.
Create many small two-strand twists throughout your hair and allow them to hang naturally. You can leave them loose, pin them into an updo, or style them into a puff.
The smaller sections also give you plenty of flexibility when changing your hairstyle during the week.
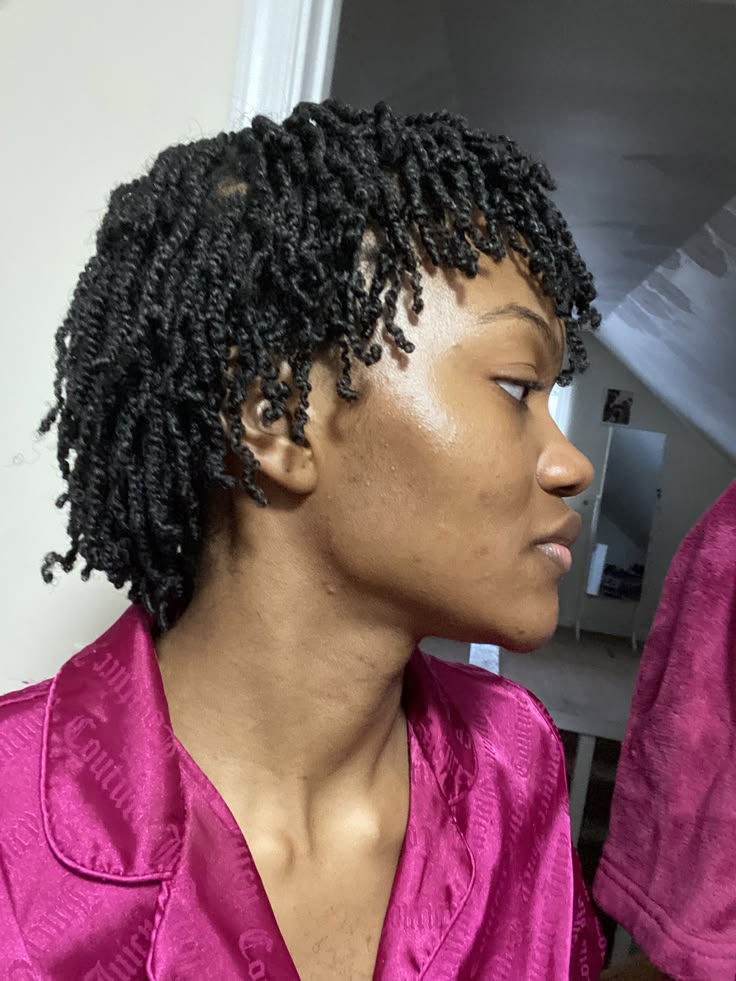
32. Twists With Beads
Adding beads is one of the easiest ways to make ordinary twists feel completely different.
Place a few beads near the ends of your twists or use several colours for a more playful appearance. Wooden, clear, metallic, and colourful beads can all create different moods.
Just make sure the accessories do not become so heavy that they pull on your hair.
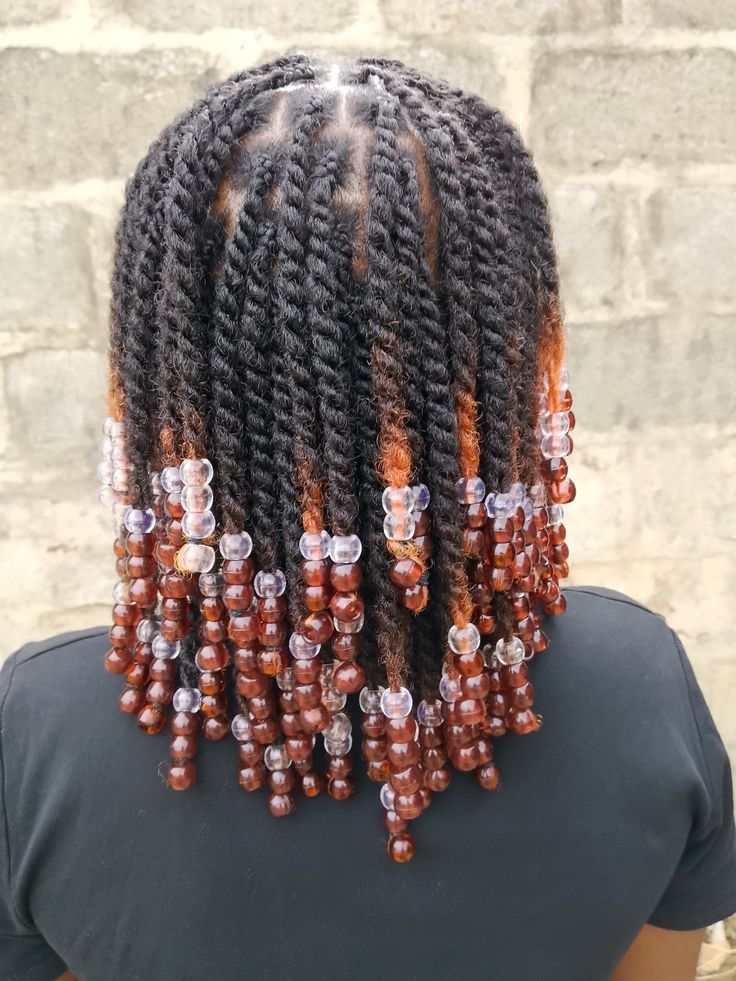
33. Twist Updo
Your twists do not have to stay hanging down.
Gather your twists upward and secure them into a loose bun or pinned updo. Leave a few twists around the front if you want a softer appearance.
This is an easy way to turn a casual twist style into something that feels more elegant.
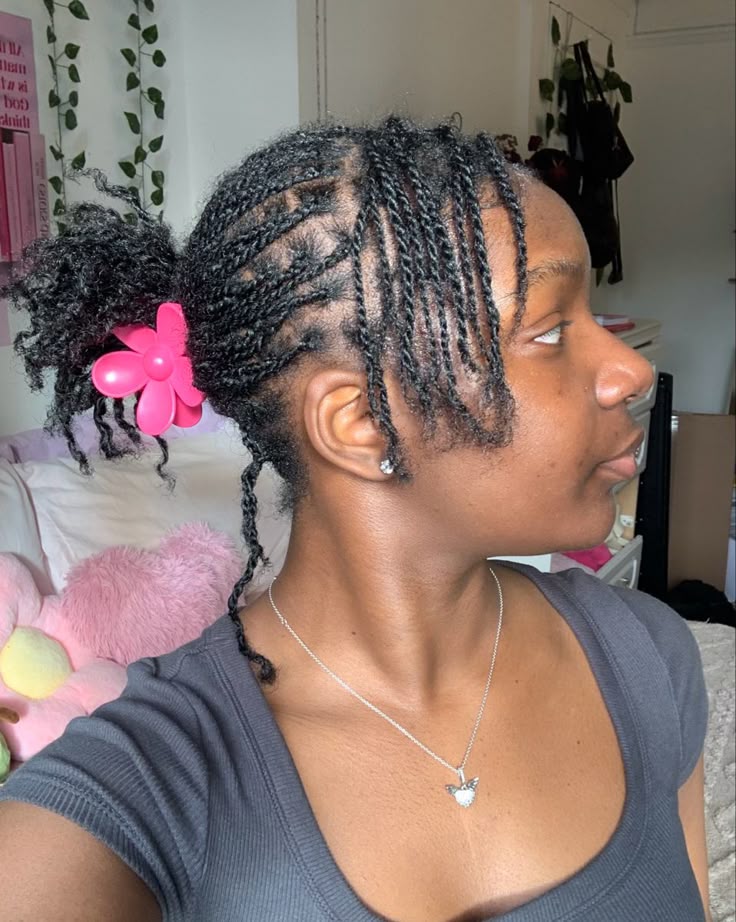
34. Half-Up Twists
Gather only the upper half of your twists into a puff or bun while leaving the lower half loose.
This gives you an interesting combination of structure and movement. A simple hair accessory can make the style feel even more finished.
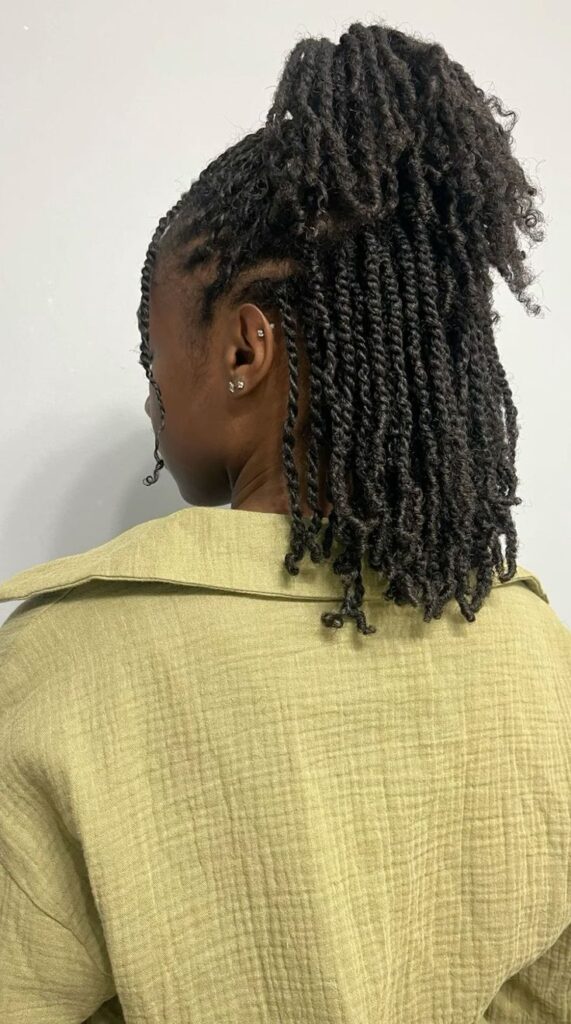
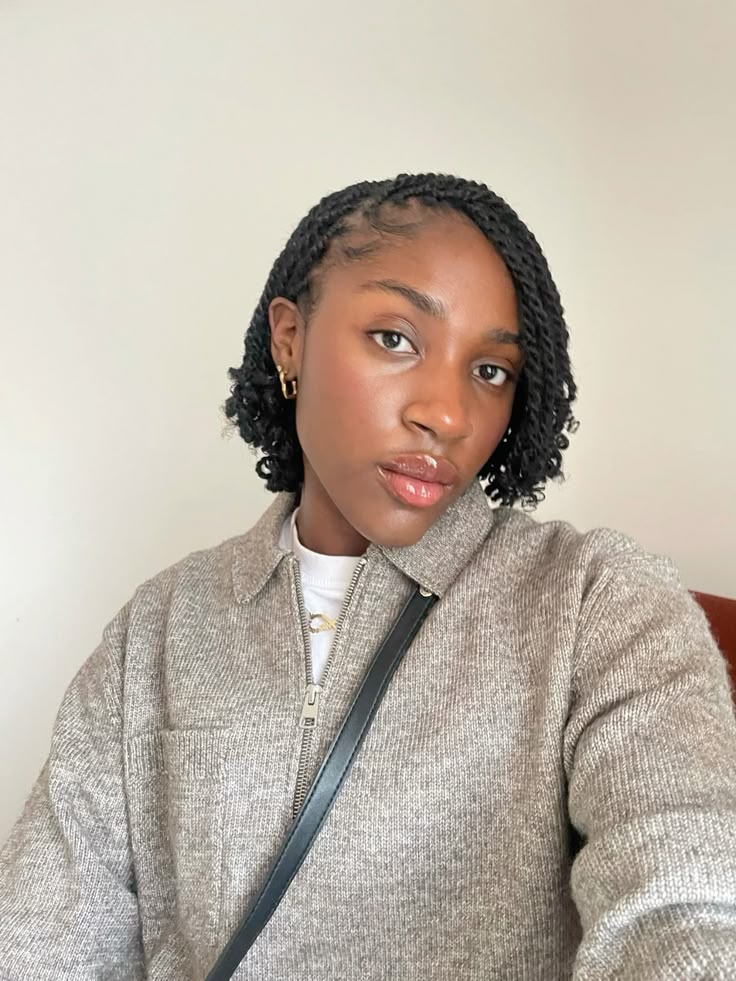
35. Side-Swept Twists
Create your twists as usual, then gather them toward one side of your head.
Use discreet pins to hold them in place if necessary. The asymmetrical shape gives the hairstyle a more dramatic appearance while keeping the installation simple.
36. Flat-Twist Updo
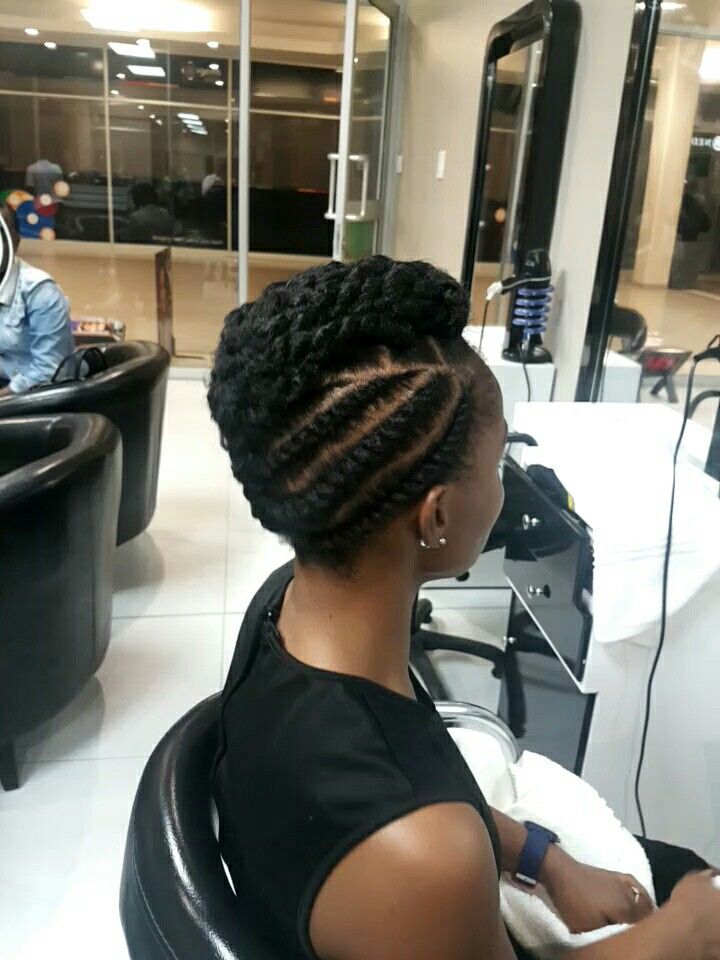
Flat twists can create a beautiful foundation for an updo.
Create several flat twists leading toward the back or crown, then gather the remaining hair into a bun. You can keep the design simple or experiment with curved parting.
The finished style looks intricate without requiring extensions.
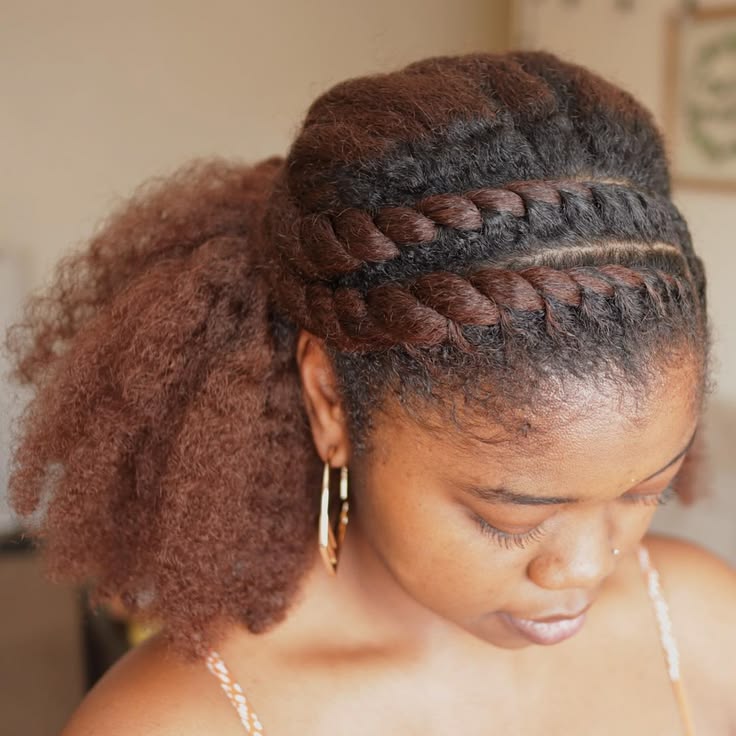
37. Flat-Twist Ponytail
Instead of gathering loose hair into a ponytail, use flat twists to create the front and sides.
Direct the twists toward the back and secure the remaining hair into a ponytail. The contrast between the structured twists and textured ponytail makes the style stand out.
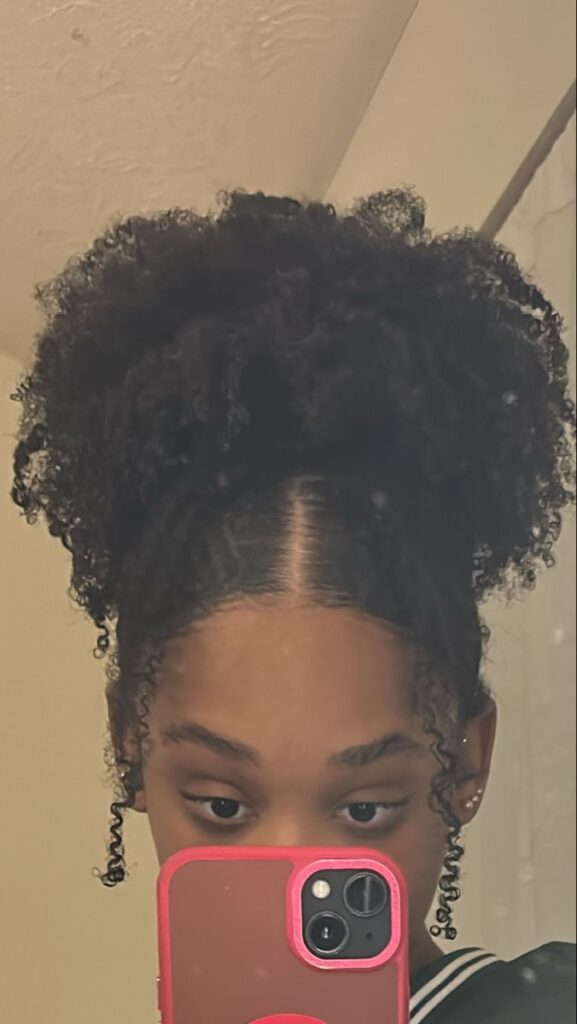
38. High Natural Ponytail
A high ponytail does not have to be perfectly sleek.
Gather your hair toward the crown and secure it gently. Leave the ponytail full and textured rather than brushing every strand flat.
You can also stretch the hair beforehand if you want the ponytail to appear longer.
39. Low Natural Ponytail
A low ponytail gives natural hair a softer and more relaxed appearance.
Gather the hair at the nape and secure it with a soft band. Keep the ponytail fluffy or lightly stretch it for extra length.
A simple part can make the style look more polished.
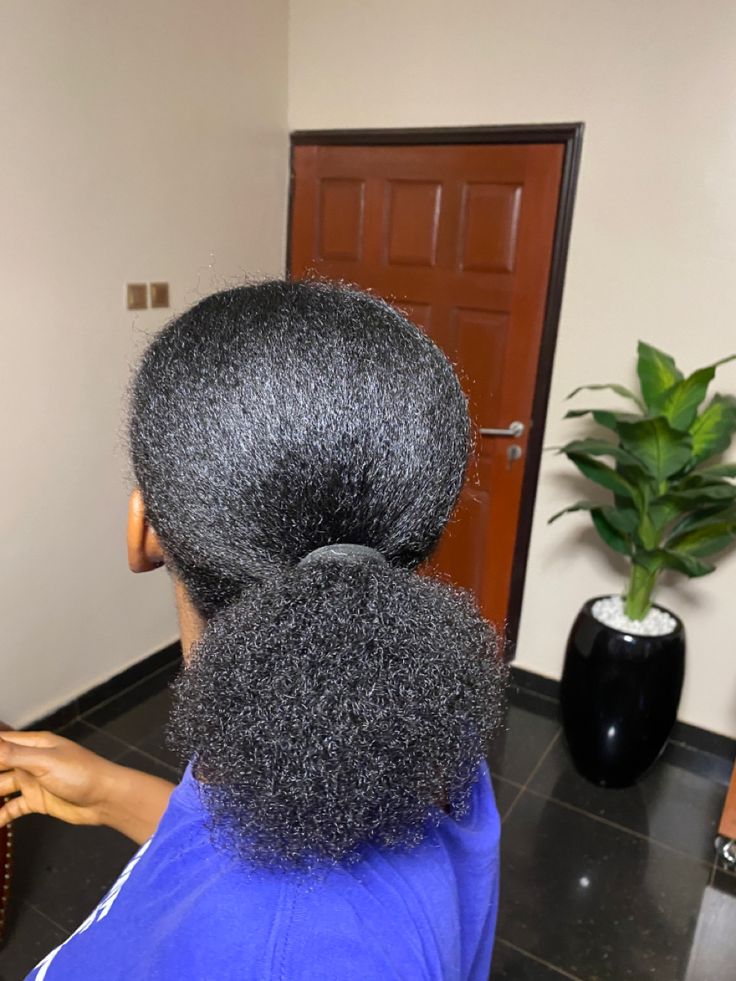
40. Bubble Ponytail
Turn a regular ponytail into something more playful by creating several sections along its length.
Place soft elastics at intervals down the ponytail and gently pull each section outward to create rounded bubbles.
This works especially well on stretched natural hair because the sections become easier to shape.
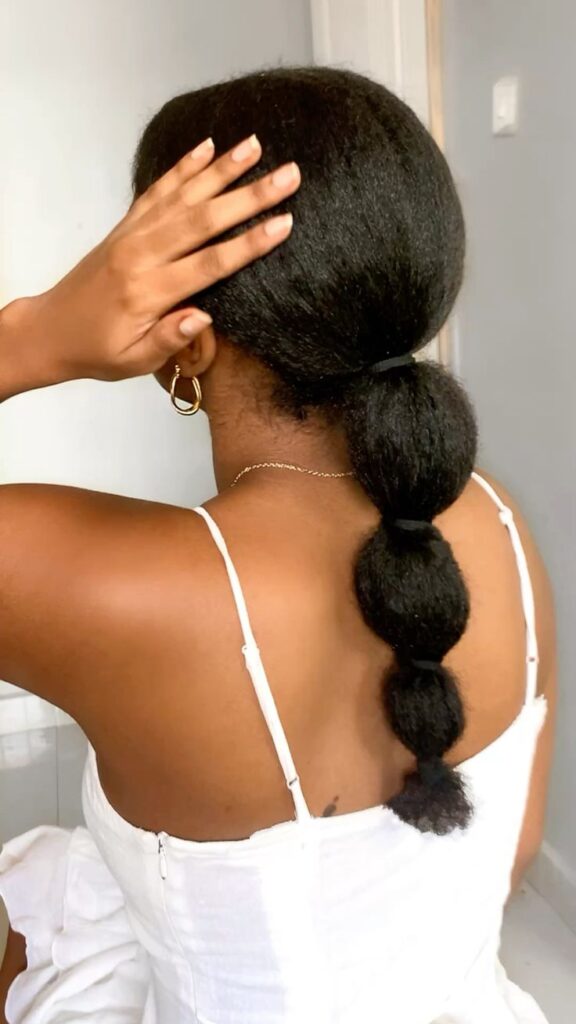
41. Braided Ponytail
A braided ponytail gives you length, structure, and plenty of styling options.
Gather your hair into a ponytail and braid the length. You can create one thick braid or several smaller braids depending on the look you want.
Adding cuffs or beads can make the finished style more decorative.
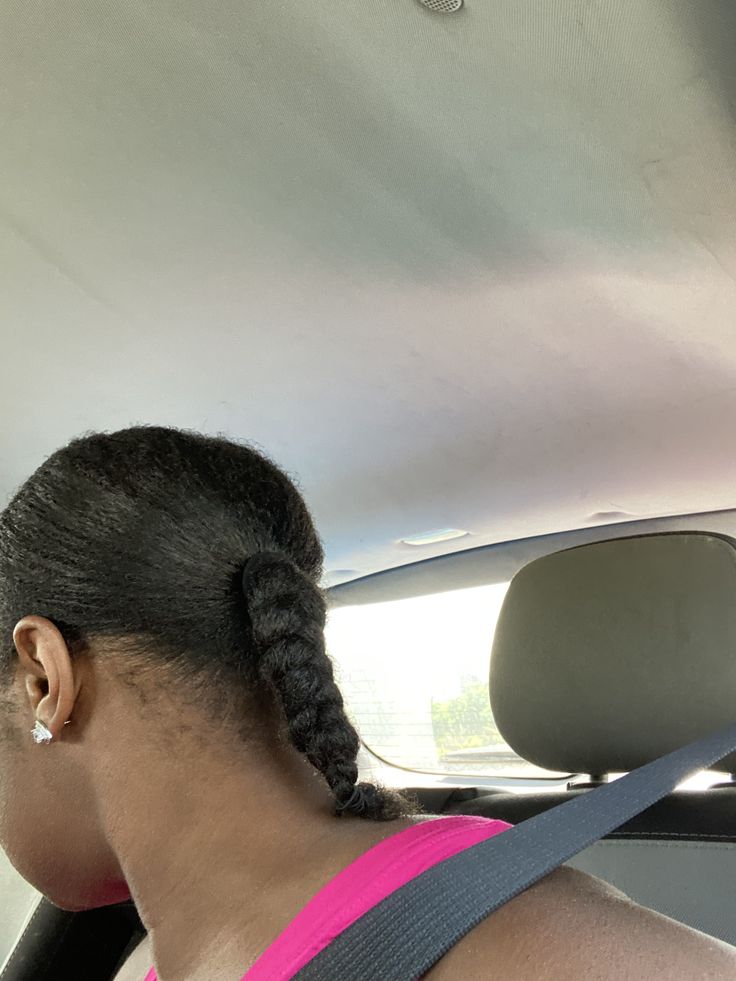
42. Crown Braid
Create a braid around the perimeter of your head so that it resembles a crown.
You can braid your natural hair directly or use an easier variation with flat twists. Keep the rest of your hair loose or tuck it into a bun.
The style feels elegant without looking overly formal.
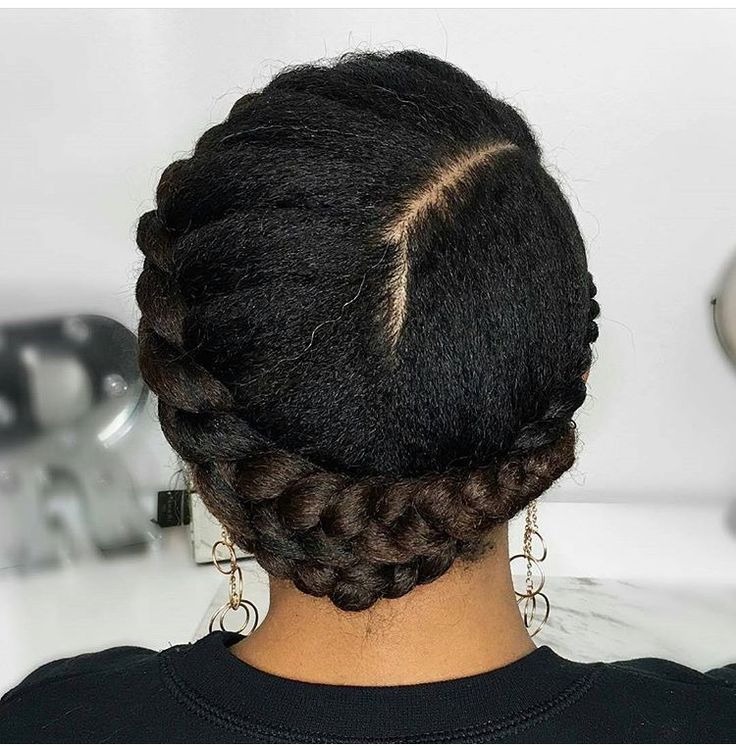
43. Halo Braid
A halo braid wraps around the head and creates a soft, romantic shape.
The style can be worn close to the hairline or positioned slightly farther back. Add flowers, pins, or simple accessories when you want to dress it up.
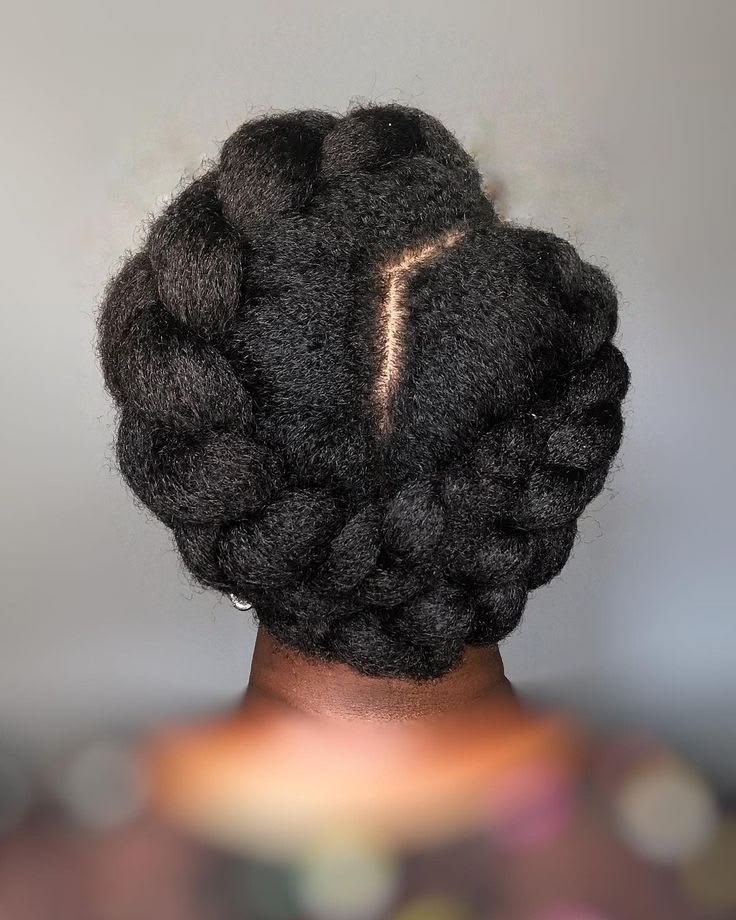
44. Braided Bun
A braided bun combines the neatness of a bun with the detail of braiding.
Create several braids or one larger braid and wrap them around themselves into a bun. Secure everything carefully so the style feels comfortable rather than tight.
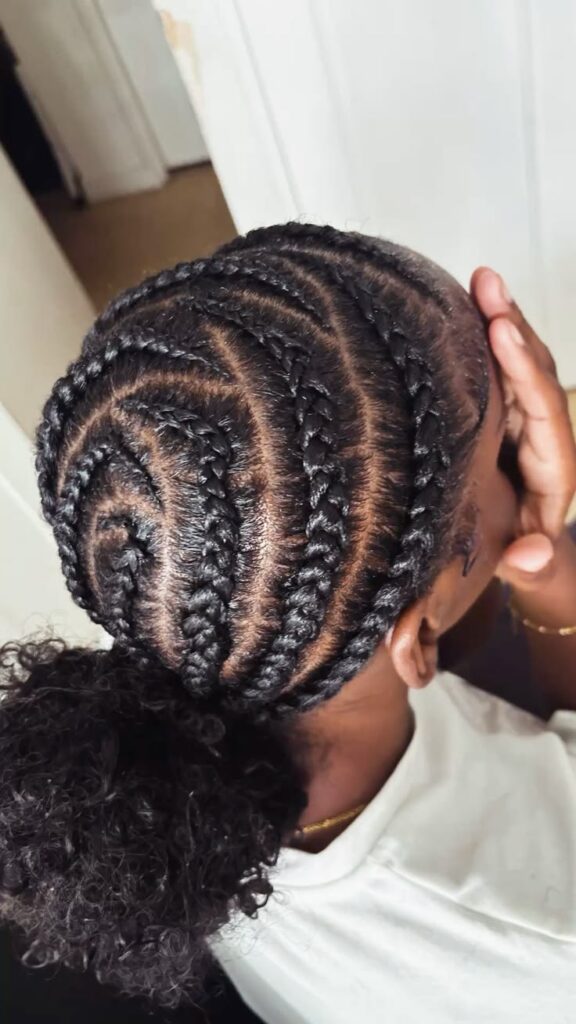
45. Cornrow Ponytail
Simple cornrows can make a ponytail look much more detailed.
Create straight-back cornrows from the front toward the back and gather the remaining hair into a ponytail. The ponytail can stay natural or be braided.
Keep the cornrows comfortable and avoid excessive tension around the edges.
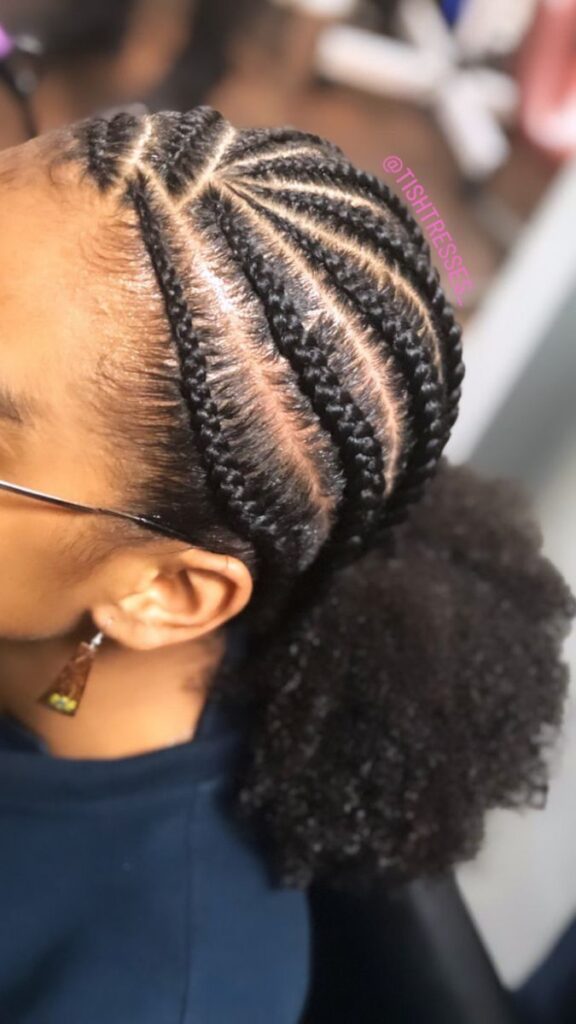
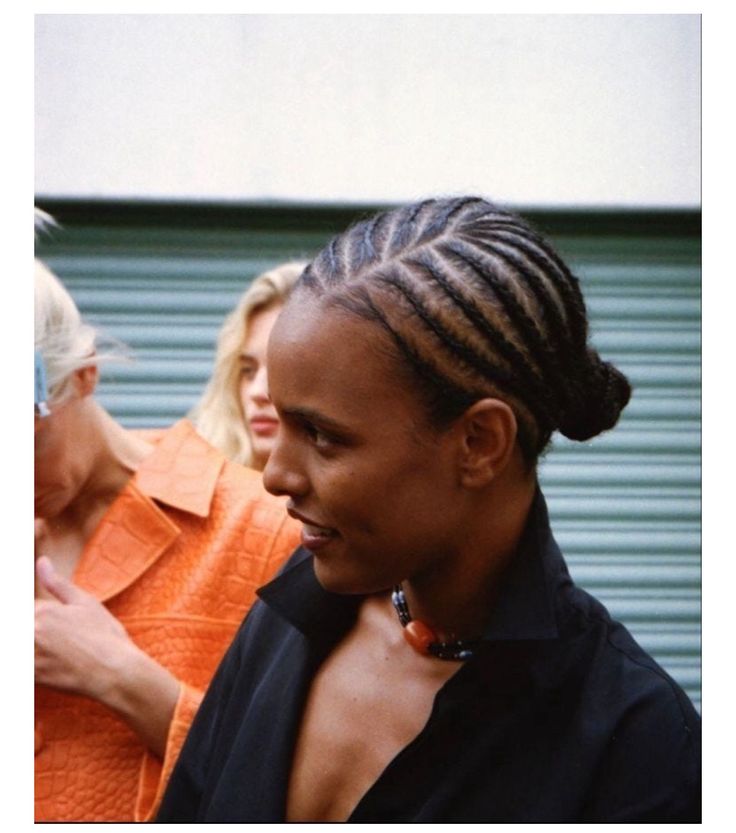
46. Straight-Back Cornrows
Classic straight-back cornrows remain one of the most versatile natural hairstyles.
Create several neat rows running from the forehead toward the back of the head. You can vary the number and size of the rows depending on the desired look.
The style is simple, practical, and easy to customize.
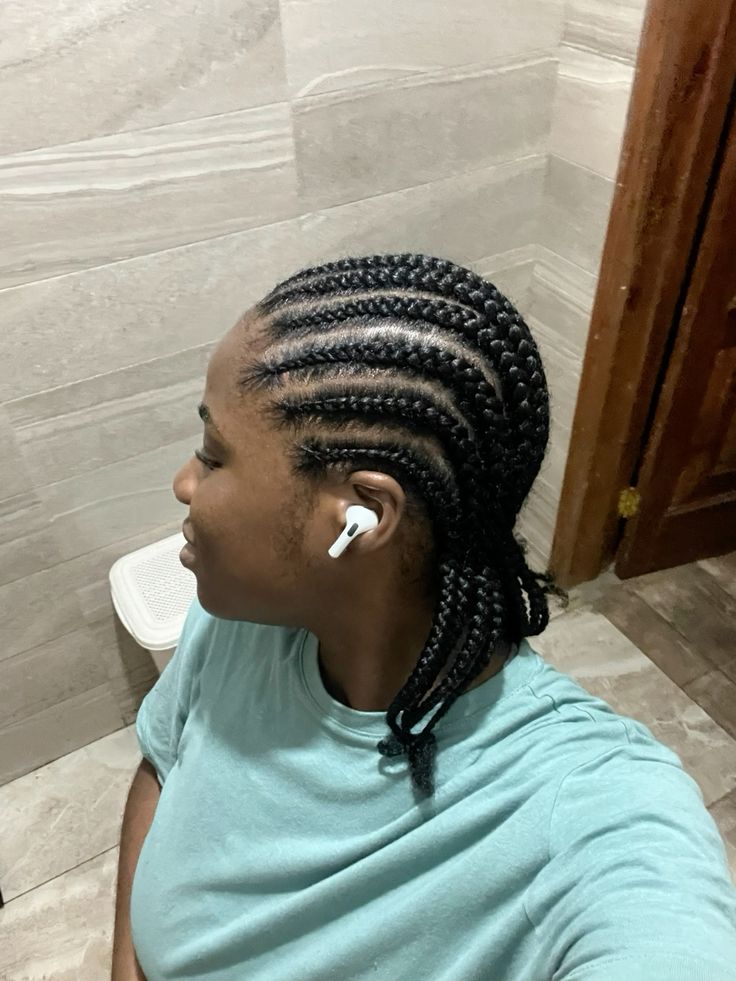
47. Side Cornrows
Instead of directing every cornrow backward, create rows that move diagonally toward one side.
The different direction immediately makes the style more interesting while keeping the overall design relatively simple.
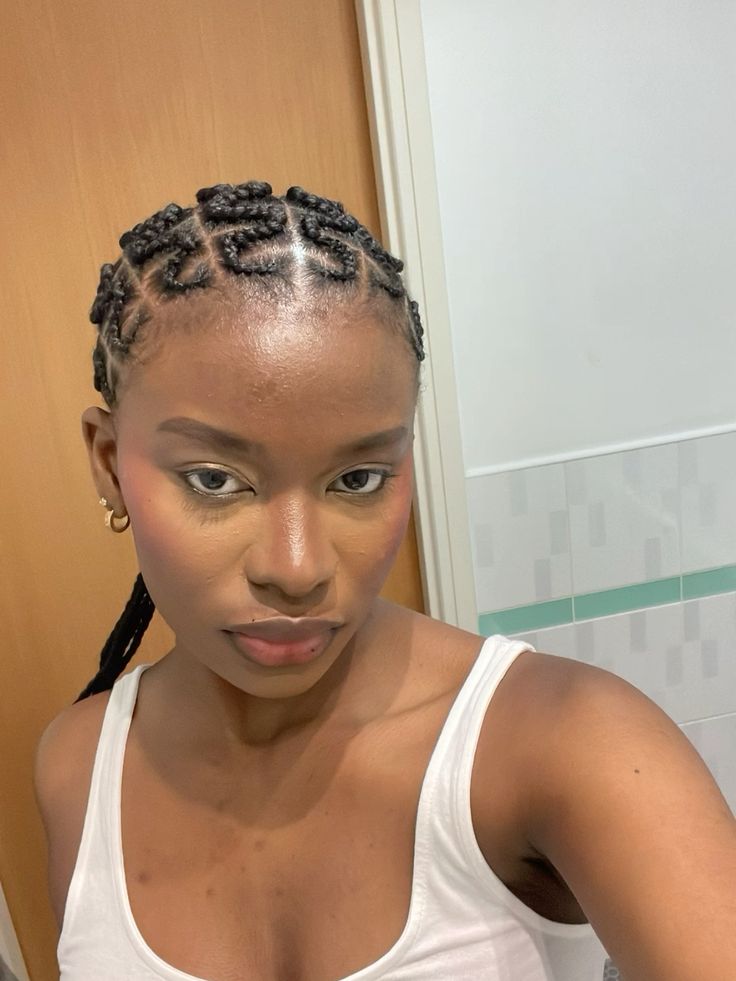
48. Zigzag Cornrows
Zigzag parting can make even a basic cornrow style look much more creative.
Create sections with curved or zigzag lines before braiding each row. The finished pattern becomes part of the hairstyle itself.
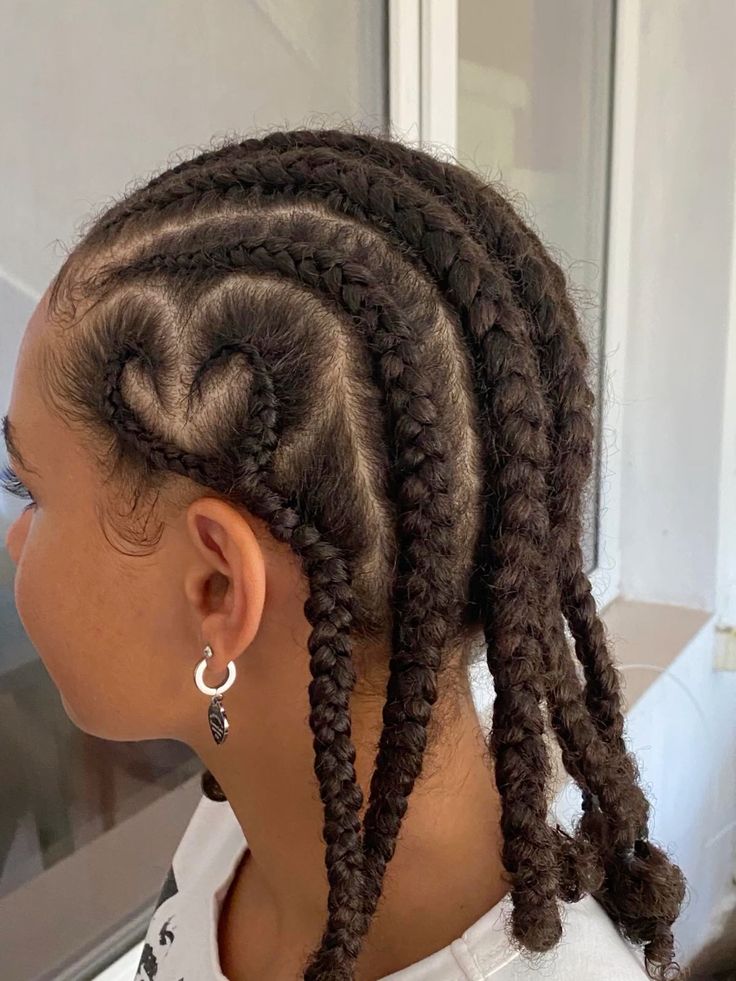
49. Cornrow Heart Design
Heart-shaped parting can turn a simple braided style into something eye-catching.
The heart can be small and subtle or large enough to become the main feature of the hairstyle. Keep the surrounding braids relatively simple so the design stands out.
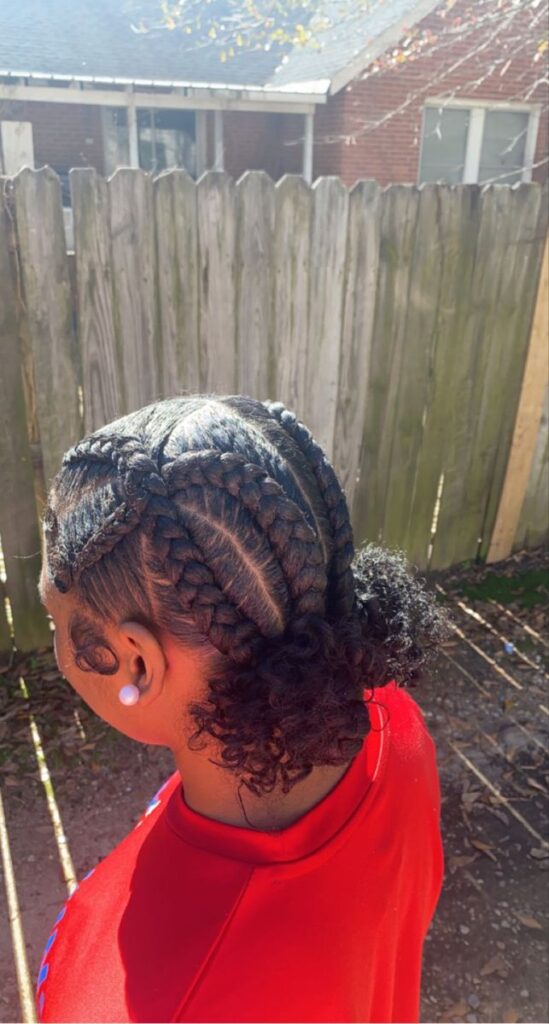
50. Criss-Cross Cornrows
Criss-cross patterns create movement across the scalp and give a braided hairstyle a more detailed appearance.
The sections can be symmetrical or intentionally uneven for a more creative result.
51. Cornrows With Beads
Add beads to the ends of your cornrows for a playful finish.
Clear beads keep the look subtle, while colorful beads can make the hairstyle feel much more expressive. You can also mix several bead sizes for added detail.
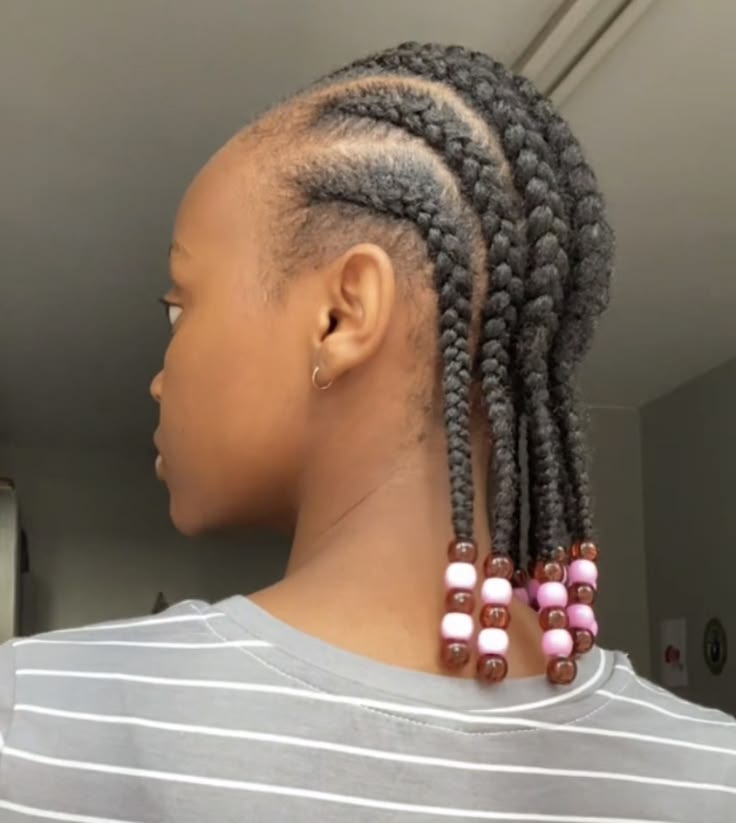
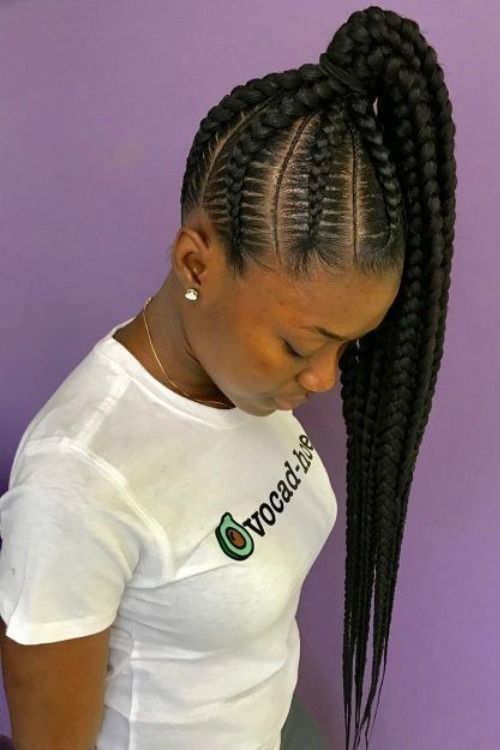
52. Feed-In Braid Ponytail
A feed-in braid ponytail creates a sleek, elongated shape while still allowing you to customise the braid pattern.
The braids can begin small near the front and gradually become larger as they move toward the back.
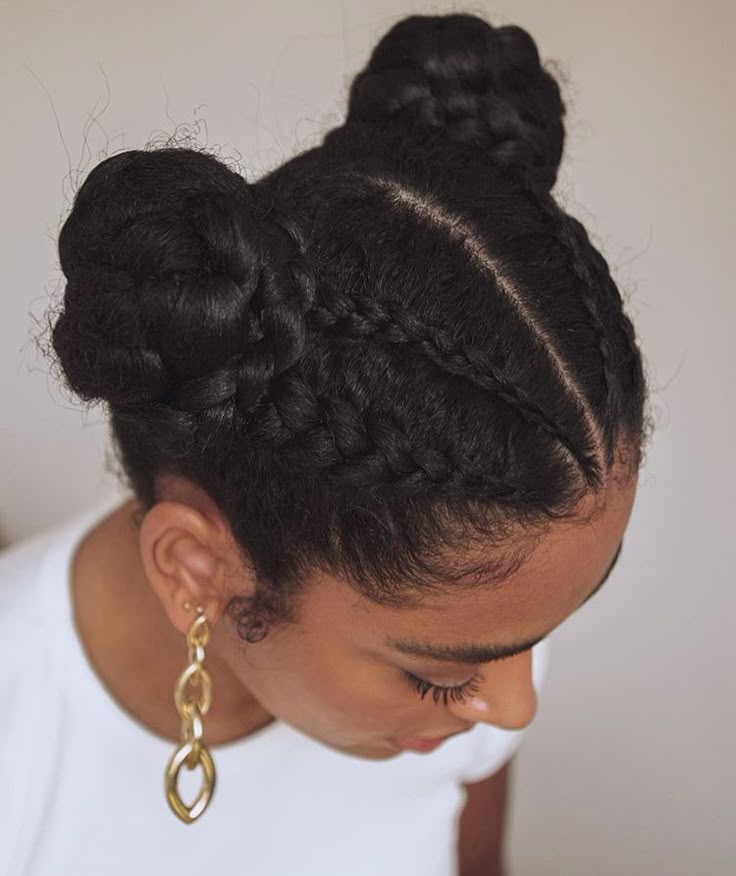
53. Braided Space Buns
Combine space buns with braids for a playful hairstyle with extra detail.
Create two sections, braid each one, and wrap the braids into buns. Leave the ends tucked away or decorate them with small accessories.
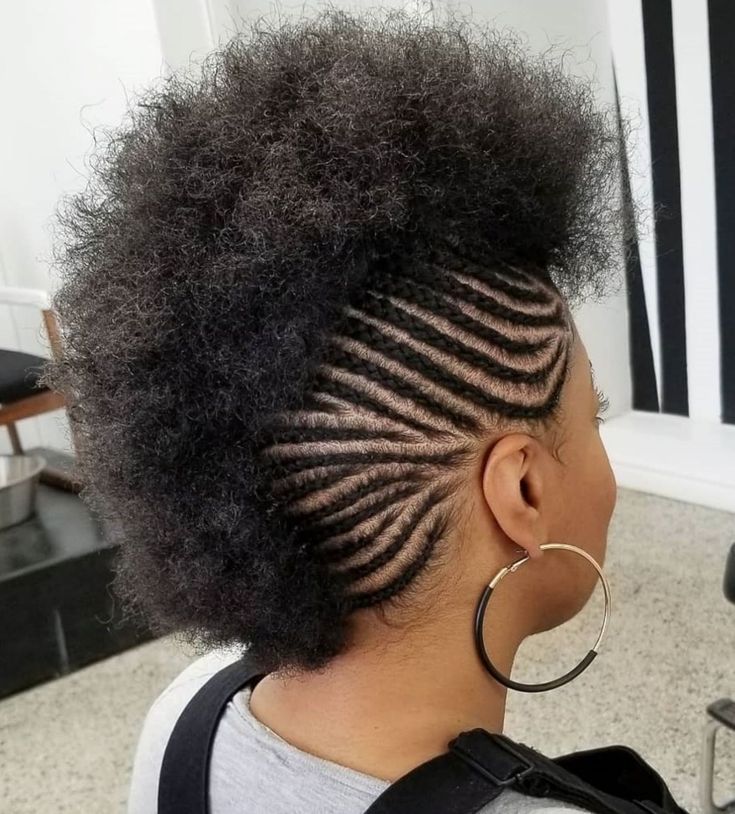
54. Braided Mohawk
A braided mohawk gives you a dramatic shape without cutting your hair.
Braid or cornrow the sides upward toward the center, then leave the middle section full or gather it into textured twists.
55. Faux Hawk With Twists
Use twists instead of braids to create a softer faux hawk.
Pin the sides toward the center and arrange the twists upward. The result has plenty of height while retaining a soft natural texture.
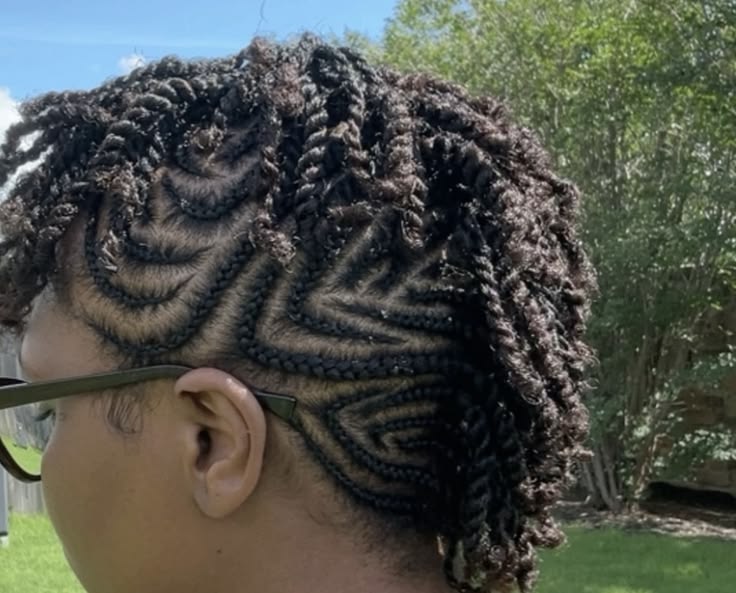
56. Tucked Afro Updo
A tucked afro updo lets you create a sophisticated shape from your existing volume.
Gather the hair upward and tuck the ends underneath, securing them with pins. Keep the front slightly textured instead of forcing it completely flat.
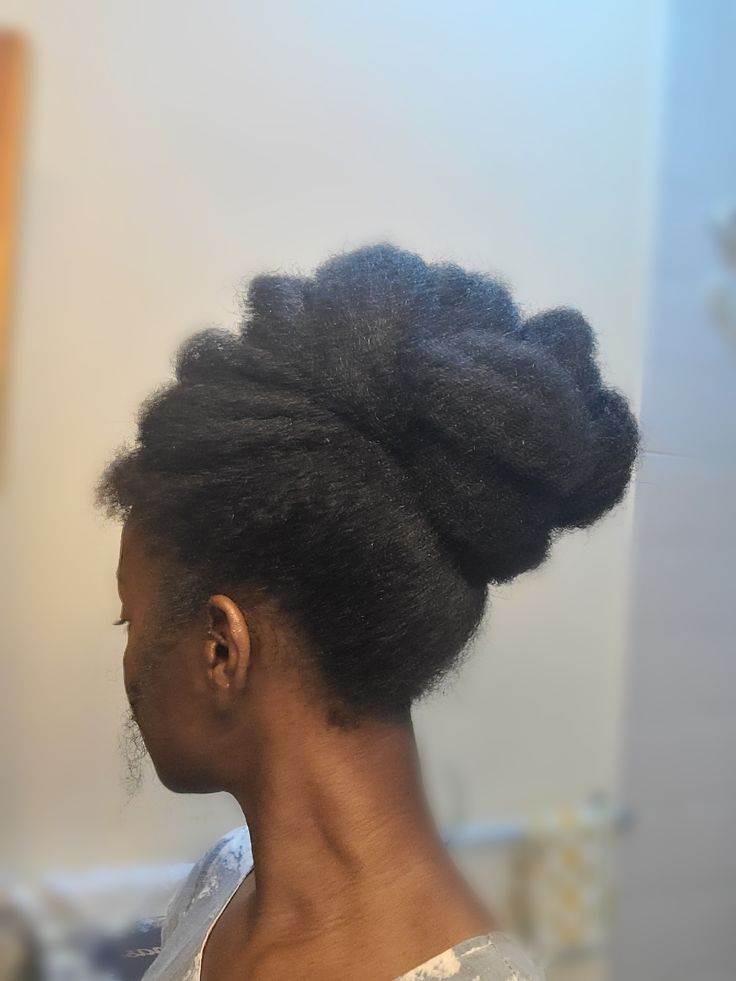
57. Rolled Side Updo
Create several rolls along one side of your head and pin them toward the back.
Leave the opposite side fuller for an asymmetrical finish. This creates a sophisticated hairstyle without needing extensions.
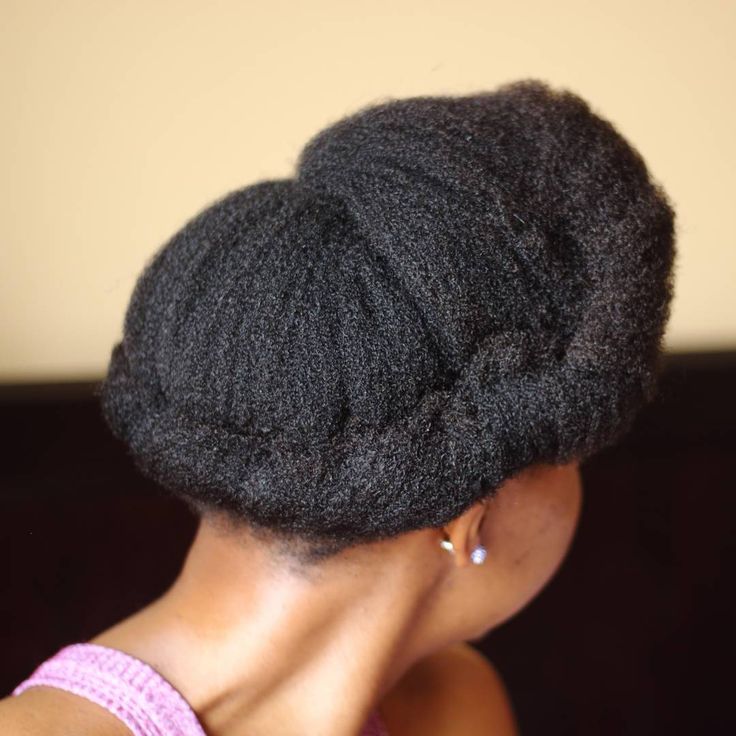
58. Side Bun
A side bun is an easy way to make a simple updo feel more distinctive.
Gather your hair toward one side and create a loose bun near the ear or slightly behind it. Add a decorative clip for a special occasion.
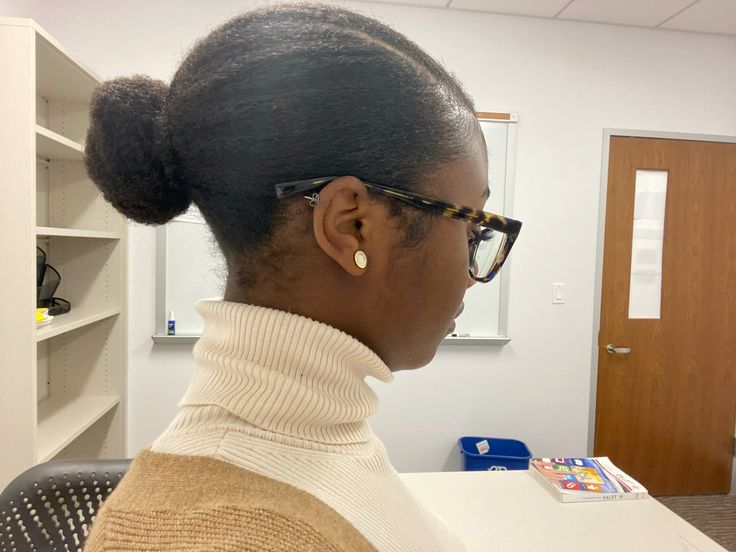
59. Puff With Two Front Twists
Create two twists at the front and gather everything else into a puff.
The twists frame the face while the puff provides the volume. It is simple enough for everyday wear but still looks thoughtfully styled.
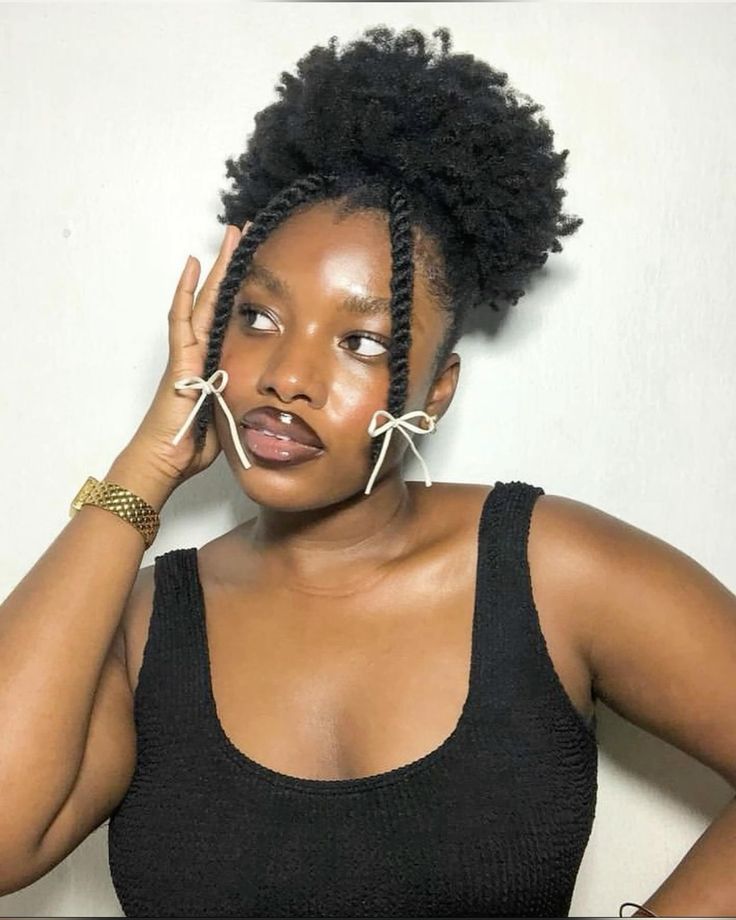
60. Flat-Twist Pony With Curls
Use flat twists at the front and leave the back in a defined or stretched texture.
Gather the back into a ponytail while allowing some curls or coils to remain visible. The combination creates a textured hairstyle with several dimensions.
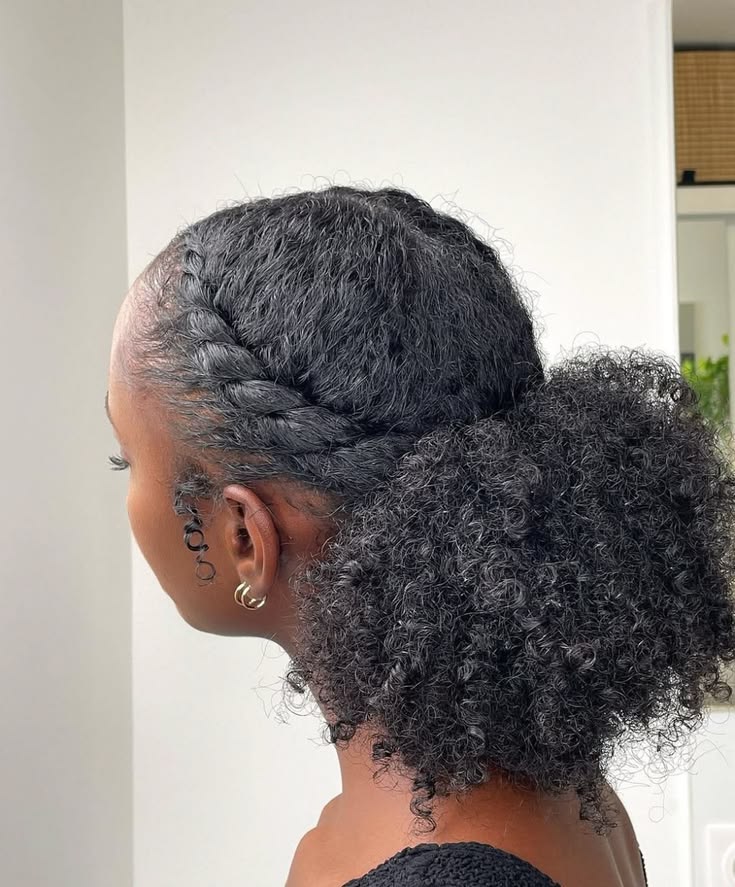
61. Stretched Afro
Sometimes stretching your hair is enough to create an entirely new hairstyle.
Use banding, threading, twists, or another gentle stretching method to elongate your hair. Once stretched, shape it into a rounded afro or allow it to fall into a softer silhouette.
This can also make your hair appear significantly longer than it does in its shrunken state.
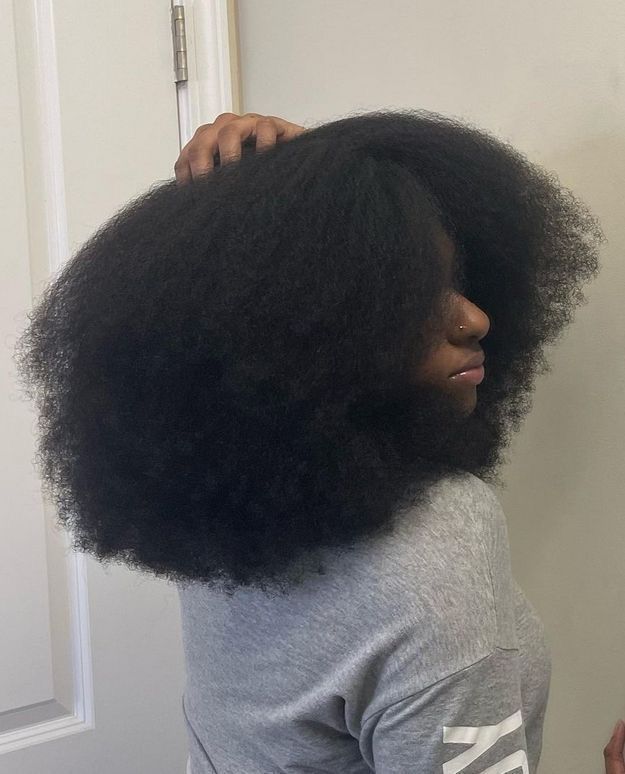
62. Stretched Puff
A stretched puff combines the height of an afro with the length created through gentle stretching.
Stretch the hair first, then gather it loosely toward the crown. The puff will appear longer and more elongated than a traditional shrunken puff.
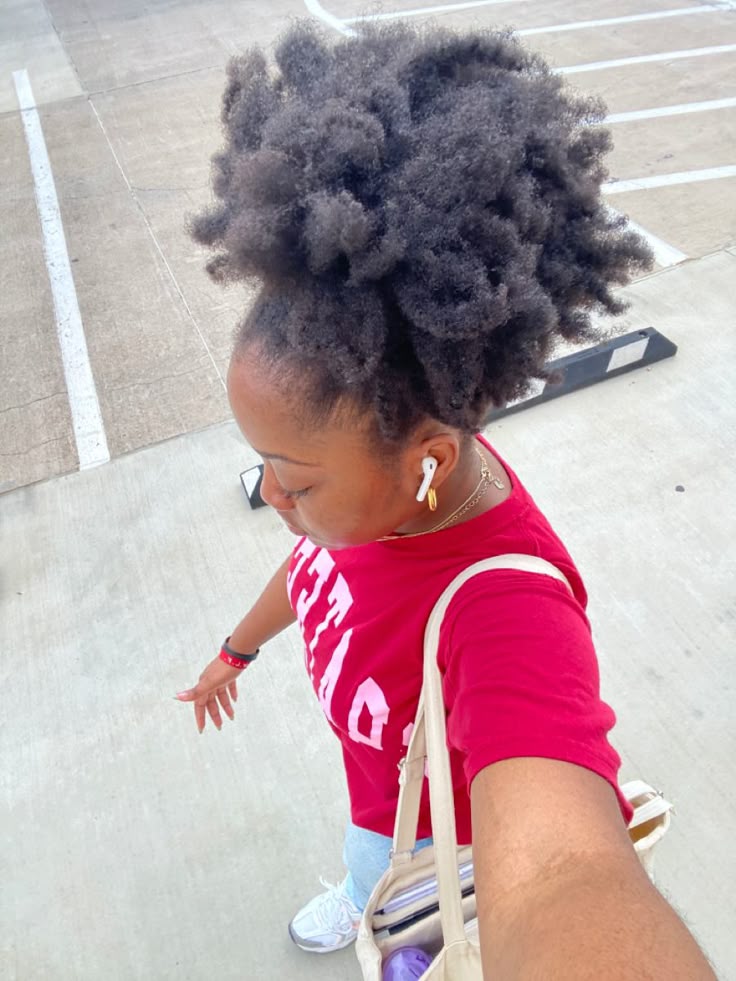
63. Threaded Afro
African threading can stretch 4C hair without relying on direct heat.
Divide the hair into sections and wrap each one with thread. Once removed, the hair has a stretched appearance that can be shaped into another hairstyle.
The threading itself can also become part of the final look if you enjoy a more traditional aesthetic.
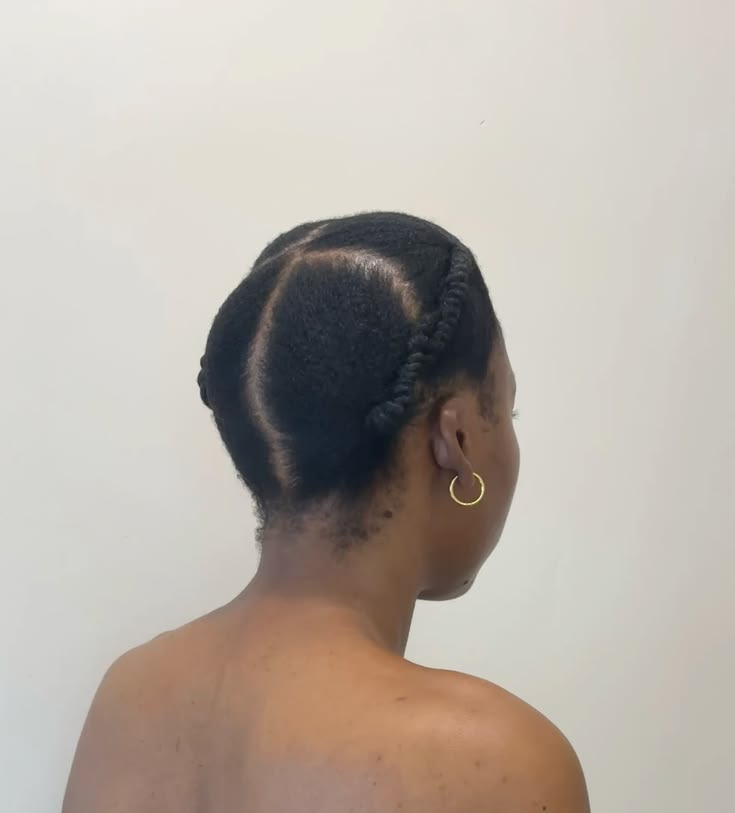
64. Threaded Updo
Instead of removing the thread before styling, arrange the threaded sections into an updo.
The wrapped sections create a striking pattern and give the hairstyle a traditional yet modern feel.
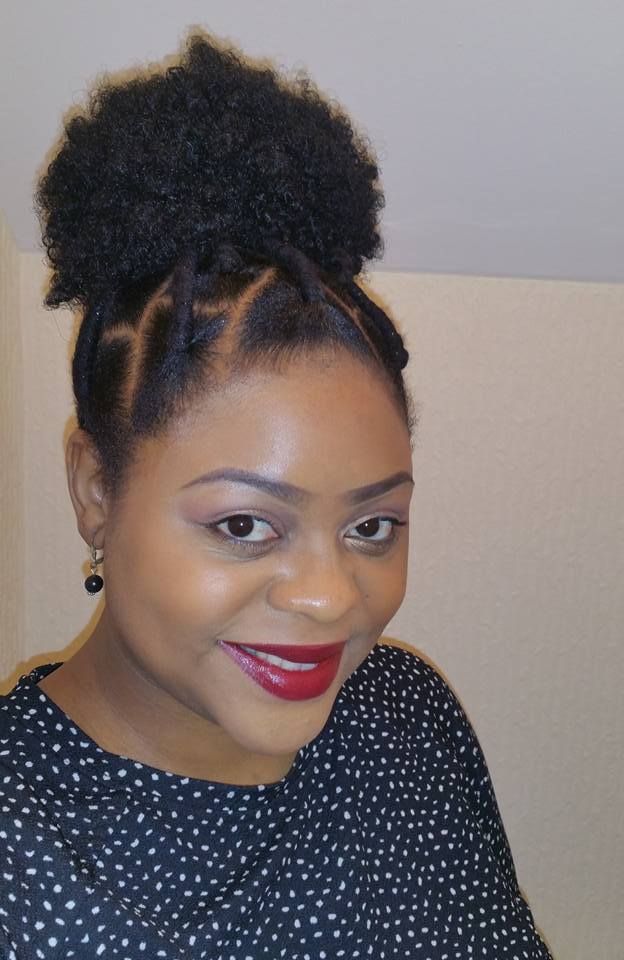
65. Finger Coils
Finger coils create a highly defined appearance by shaping small sections of hair around your finger.
Work through manageable sections and allow the coils to dry completely. The final hairstyle can be compact, defined, and full of visible texture.
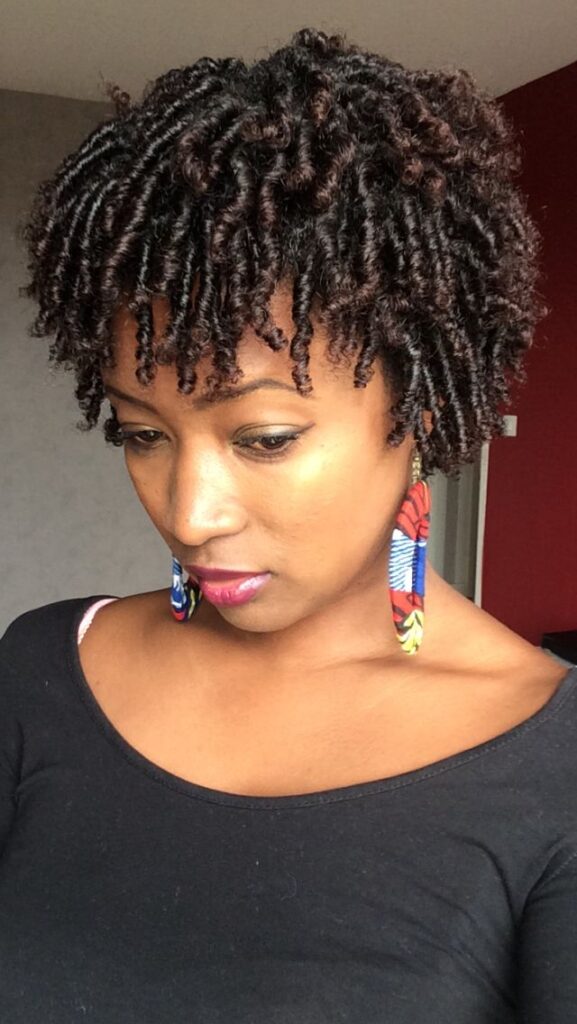
66. Shrunken Wash-and-Go
You do not always need to stretch your hair.
Allow your wash-and-go to shrink naturally as it dries. The result is a compact, rounded style that highlights the density and texture of your hair.
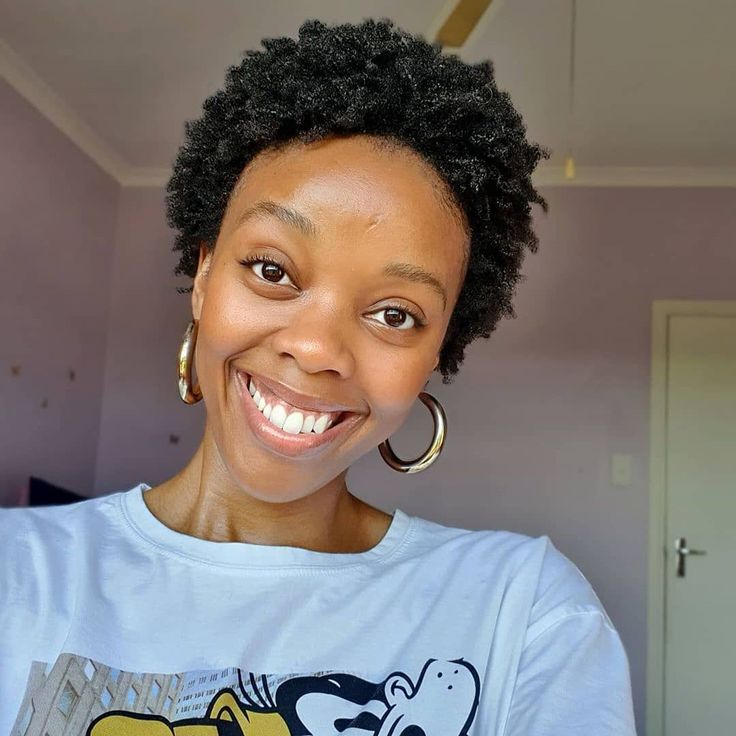
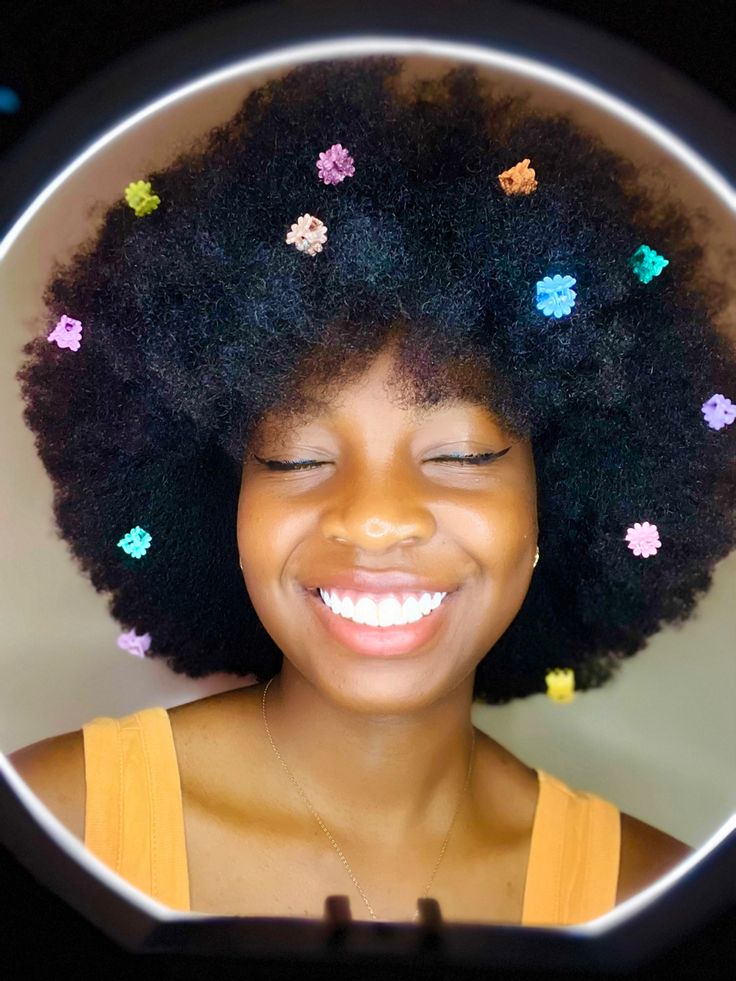
67. Afro With Hair Clips
Decorative clips can turn an ordinary afro into a completely different look.
Place several clips around one side of your hair or use matching clips on both sides. Pearls, metallic clips, flowers, and colorful designs all work well.
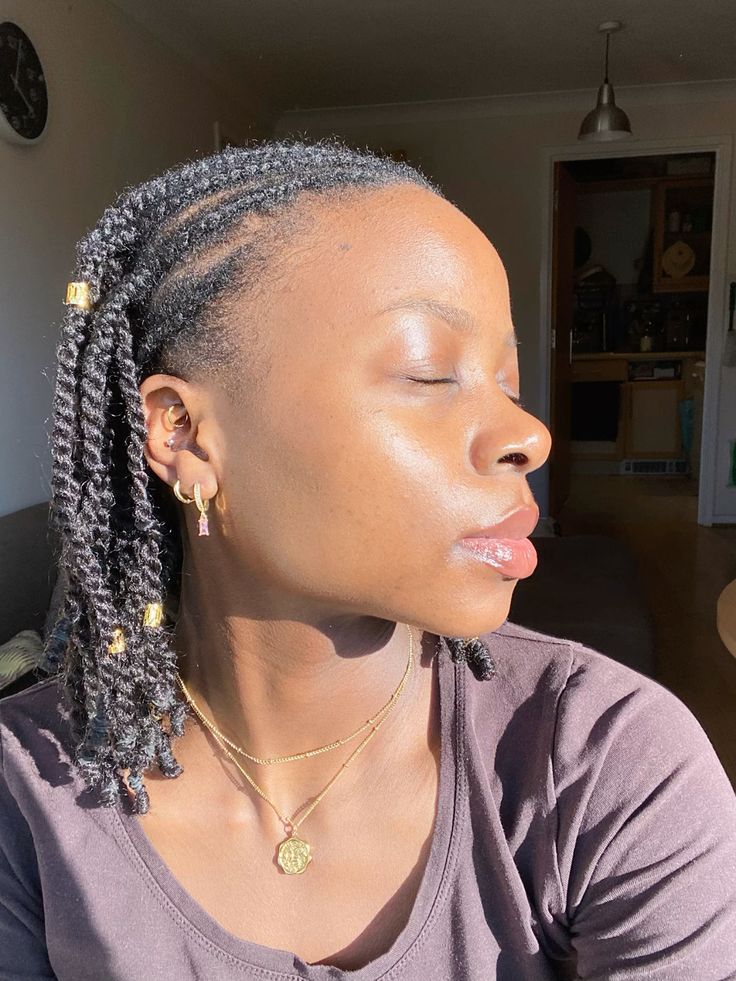
68. Afro With Gold Cuffs
Gold accessories look especially striking against natural textured hair.
Place small cuffs around selected twists, braids, or sections of your afro. You do not need many accessories for them to make an impact.
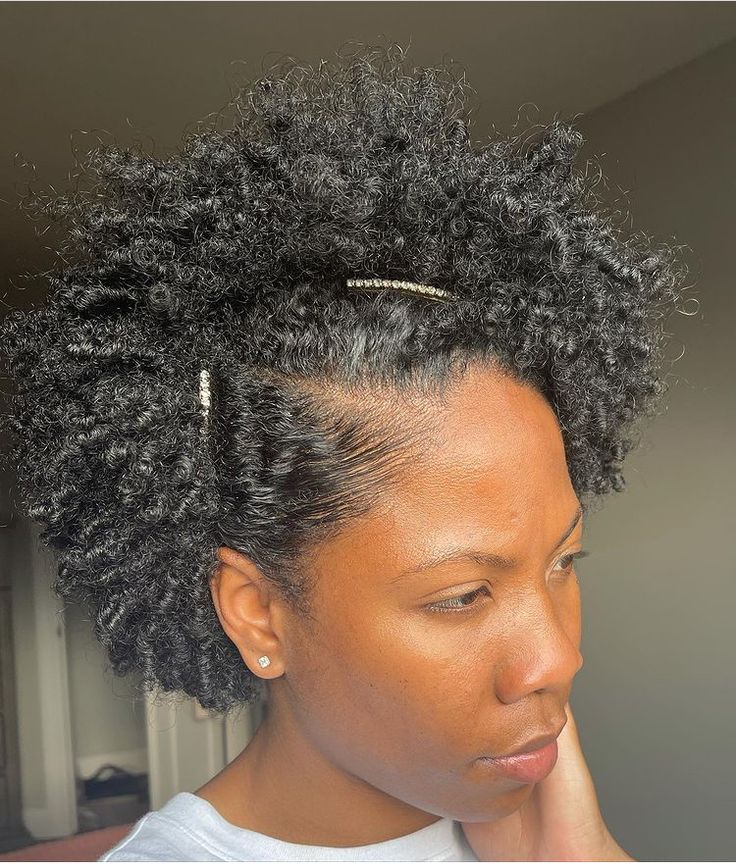
69. Side-Pinned Afro
Create a deep side part and pin one side backward.
Leave the rest of the afro full and rounded. The pinned section creates a simple asymmetrical shape that looks polished without flattening the entire hairstyle.
70. Pinned-Up Afro
Gather sections of your afro upward and secure them with pins to create a lifted shape.
Allow the natural texture to remain visible rather than trying to make the style perfectly smooth.
71. Curly Puff
Create definition before gathering your hair into a puff.
The combination of visible curls and a rounded silhouette gives the style a softer finish than a traditional afro puff.
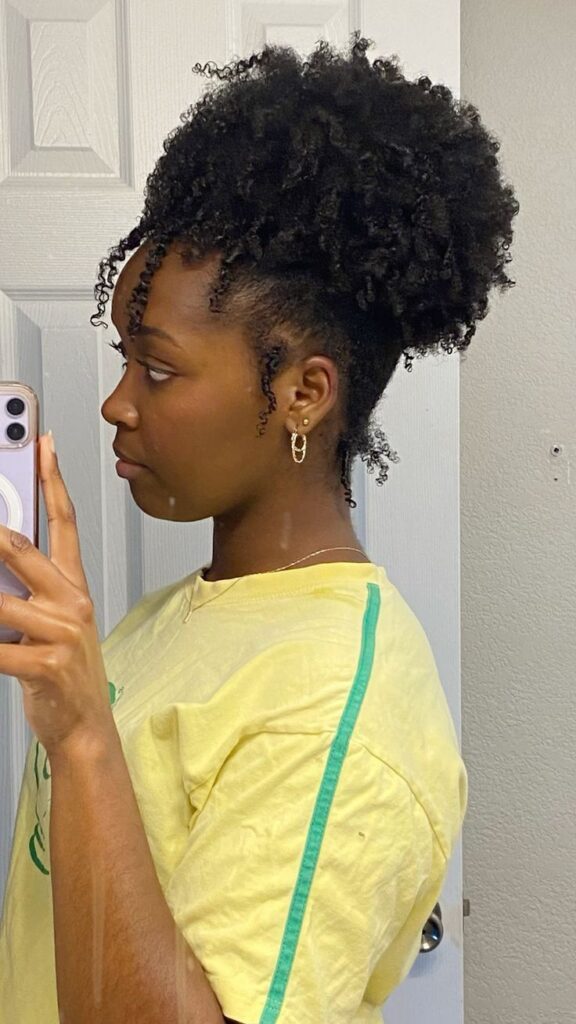
72. Curly Half-Up Style
Define the loose sections of your hair and gather the upper portion into a small puff.
The result combines a controlled shape at the top with free curls around the shoulders and face.
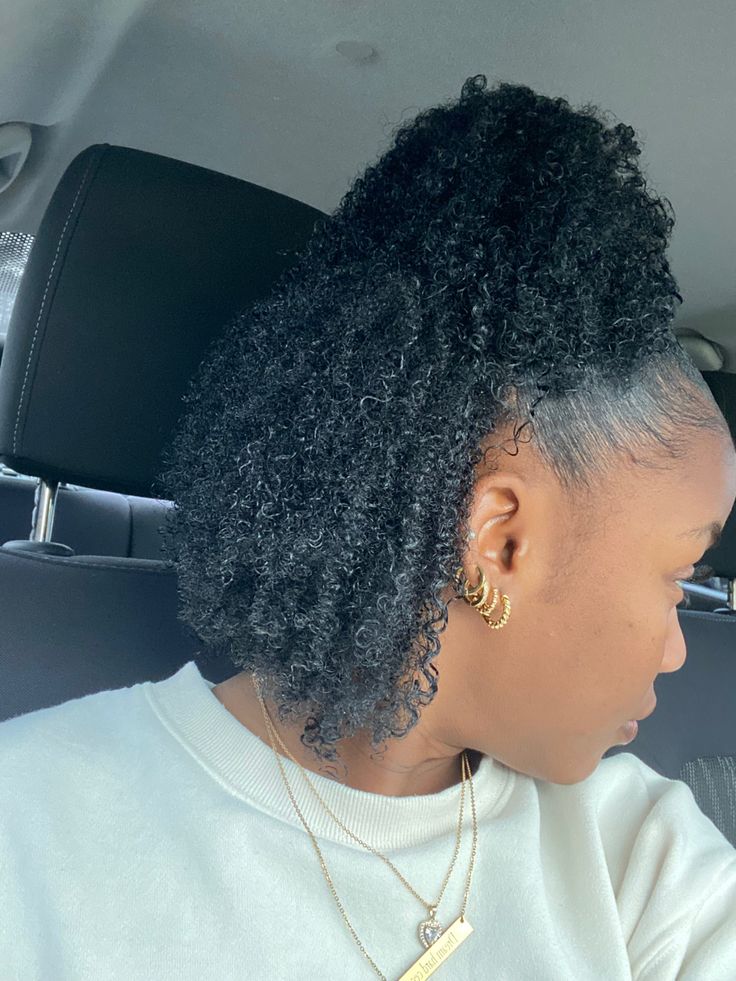
73. Mini Puff Mohawk
Create several small puffs down the center of your head while keeping the sides relatively close to the scalp.
The repeated puffs create a playful mohawk effect without braiding or cutting your hair.
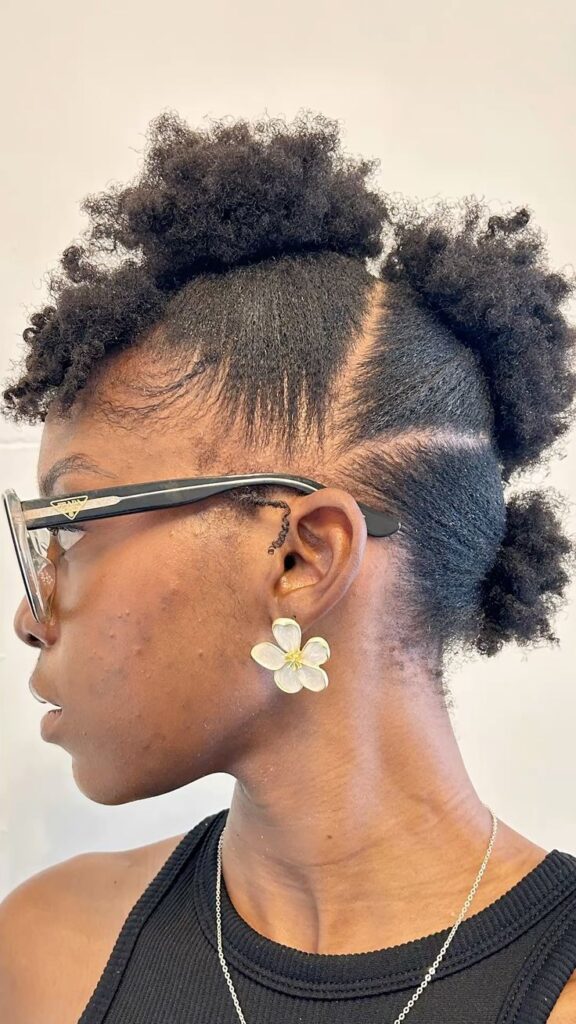
74. Three-Puff Mohawk
Take the puff mohawk idea a little further by creating three larger puffs running from the front toward the back.
Use soft bands and avoid making the sections too tight. The result is playful and bold.
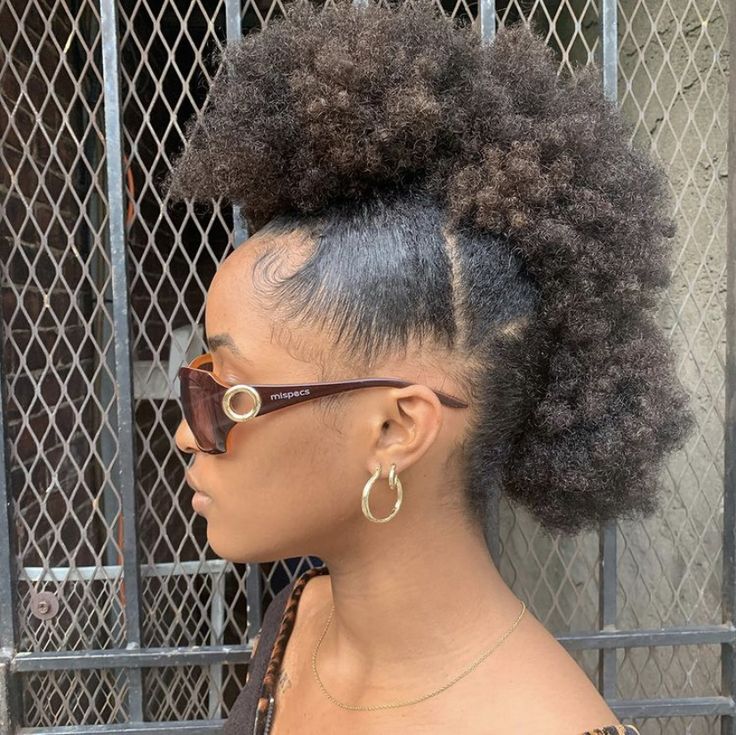
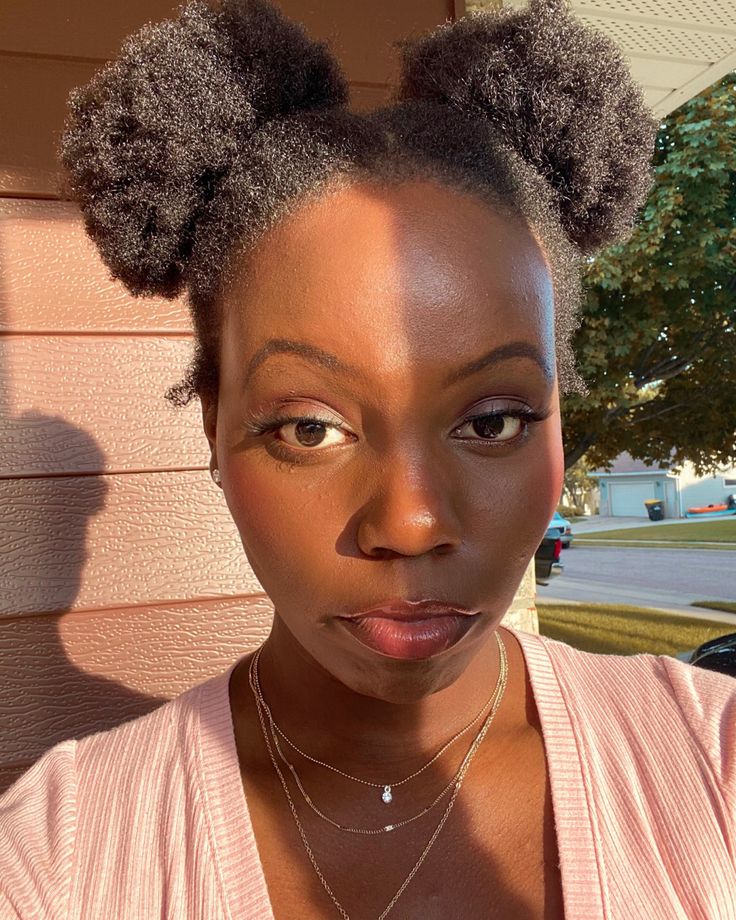
75. Flat-Twist Pigtails
Create flat twists on both sides of your head and secure the ends into two low or high sections.
The symmetrical shape makes the style playful while the twists add detail around the face.
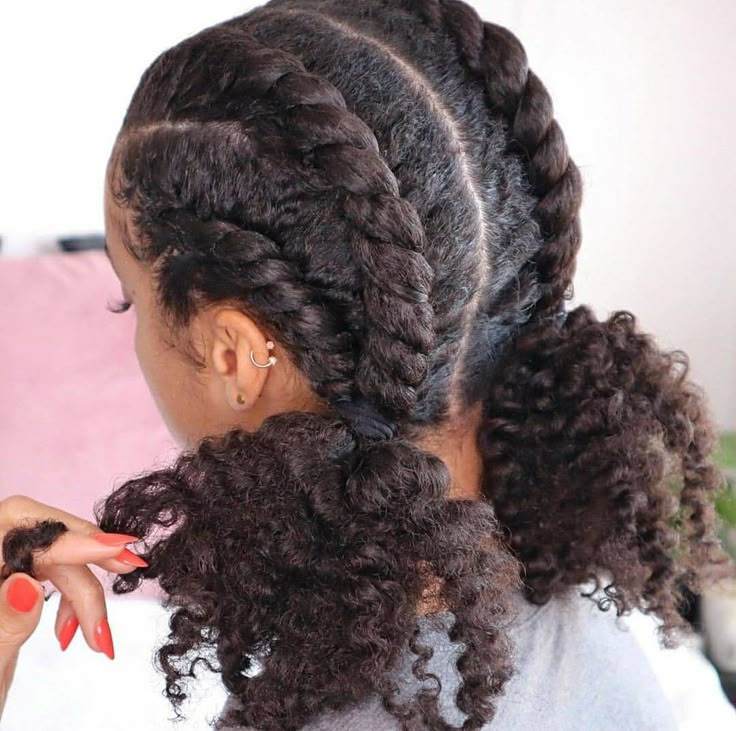
76. Afro Pigtails
Divide your hair into two sections and create a fluffy puff on each side.
This simple hairstyle works especially well when you want something playful without a lengthy styling session.
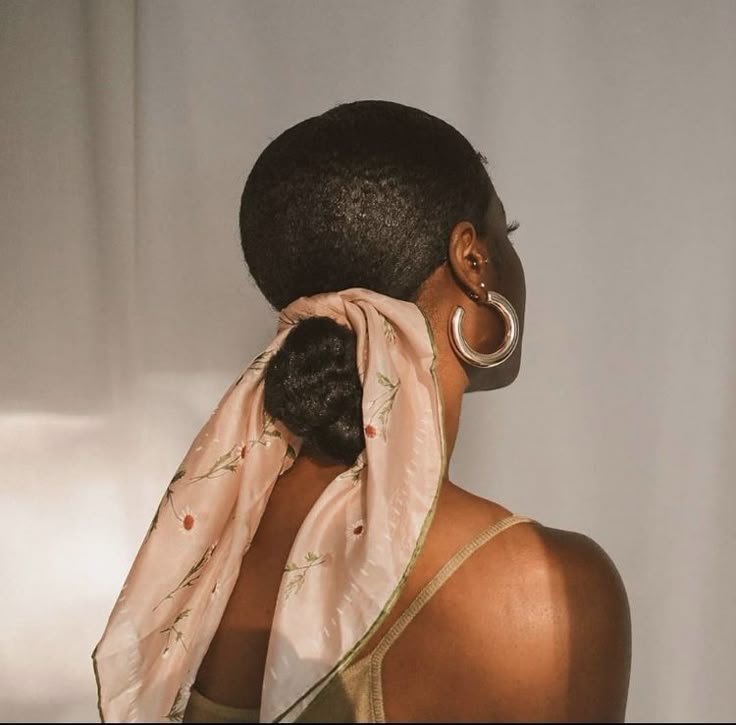
77. Side Ponytail With Scarf
Create a low side ponytail and wrap a scarf around the base.
Choose a patterned scarf when you want the accessory to stand out or a neutral one for a more understated finish.
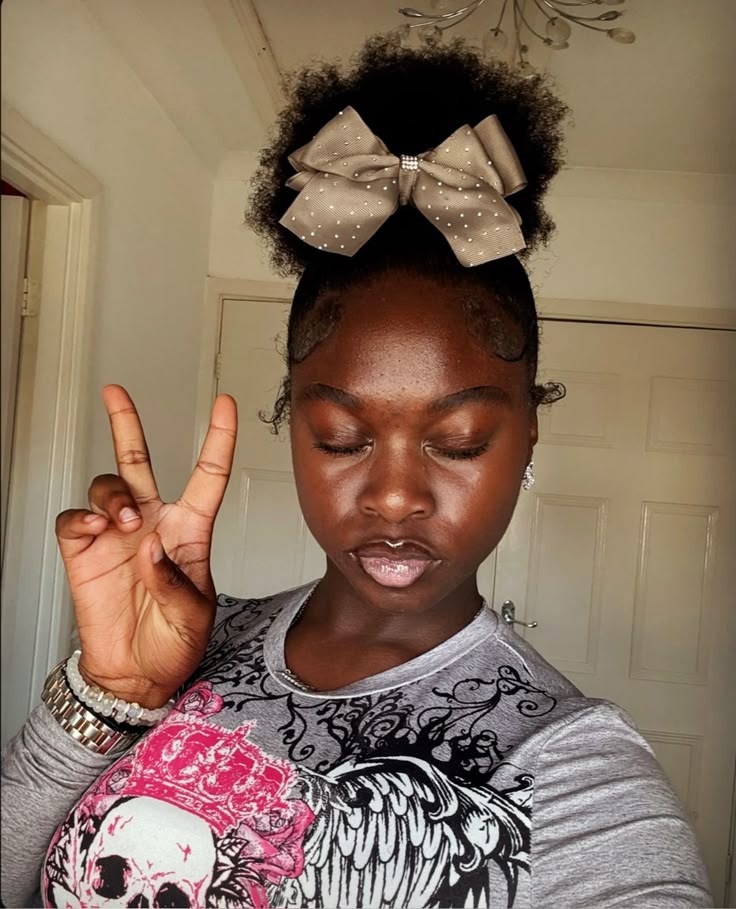
78. Puff With Bow
Add a large bow to a simple puff.
The hairstyle itself can remain completely natural while the bow provides the decorative element. Satin, velvet, or cotton bows can each create a different effect.
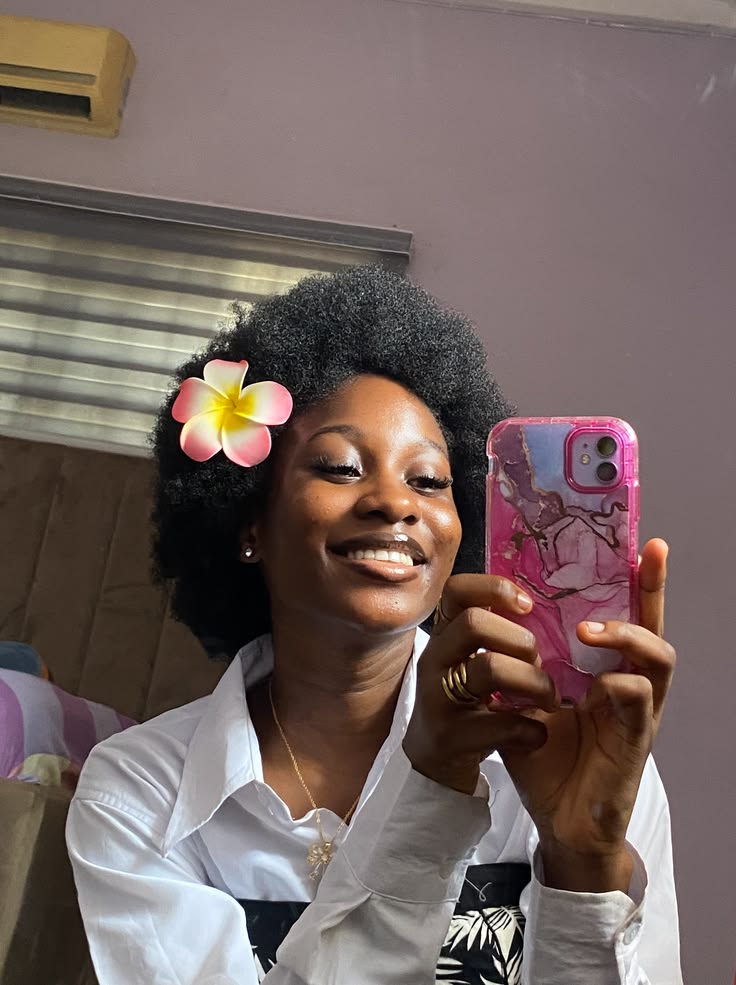
79. Afro With Flowers
Small flowers can make an afro feel romantic and feminine.
Place a few around one side of the hair rather than covering the entire afro. Artificial flowers can be reused for different hairstyles.
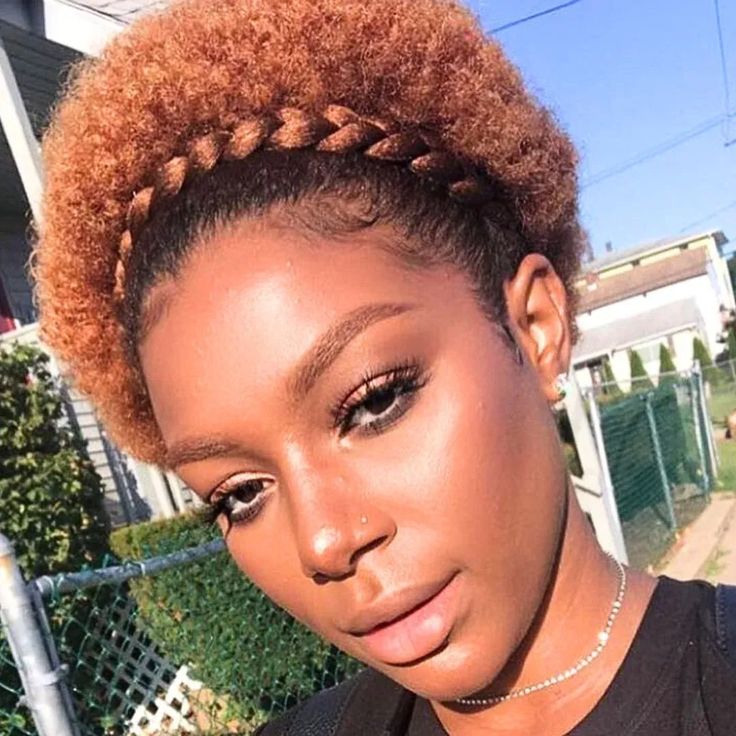
80. Braided Headband
Use your own hair to create a braided section across the front like a headband.
Braid the section from one side toward the other and secure it discreetly. Leave the remaining hair loose.
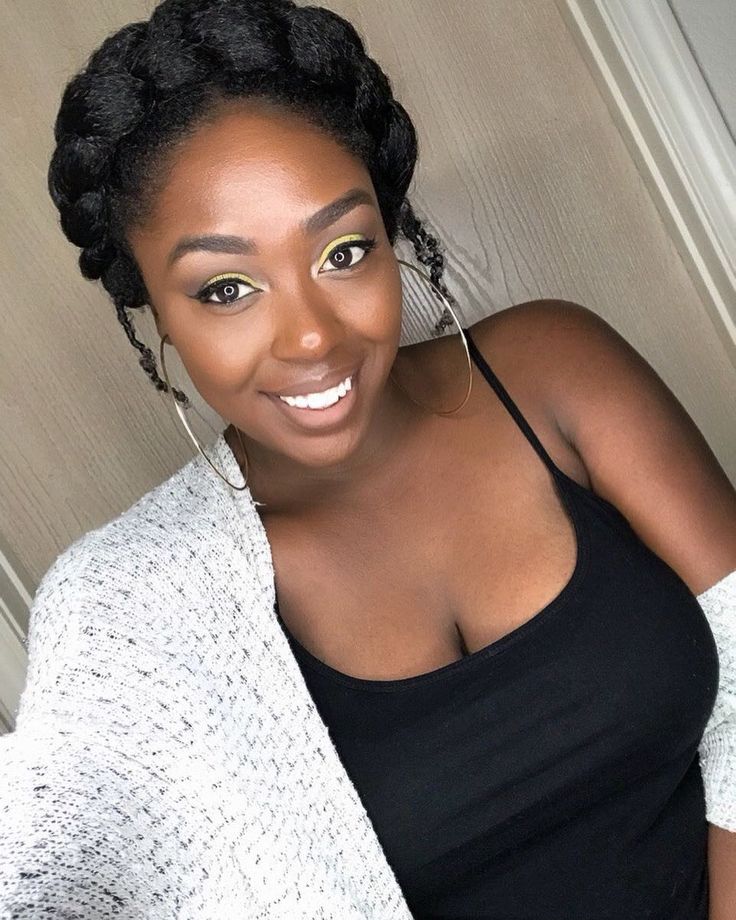
81. Flat-Twist Headband
A flat twist can create the same headband effect with less visible bulk.
Twist a section from one side of the hairline toward the opposite side and pin it securely.
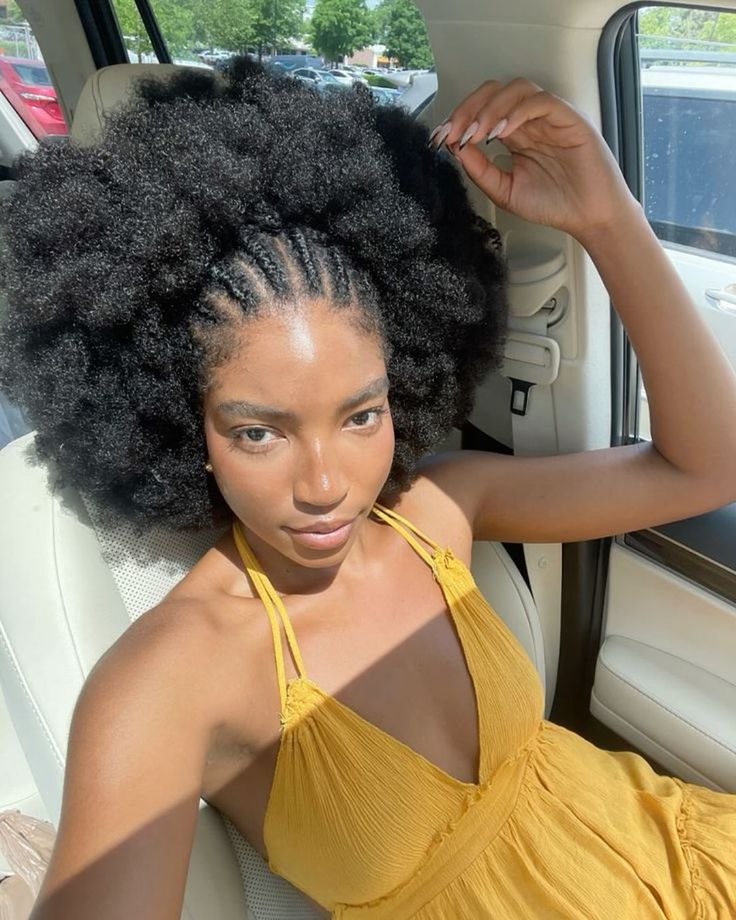
82. Front Braids With Afro
Create several small braids at the front and leave the rest of your hair in a full afro.
The braids create a decorative frame while allowing most of your natural texture to remain visible.
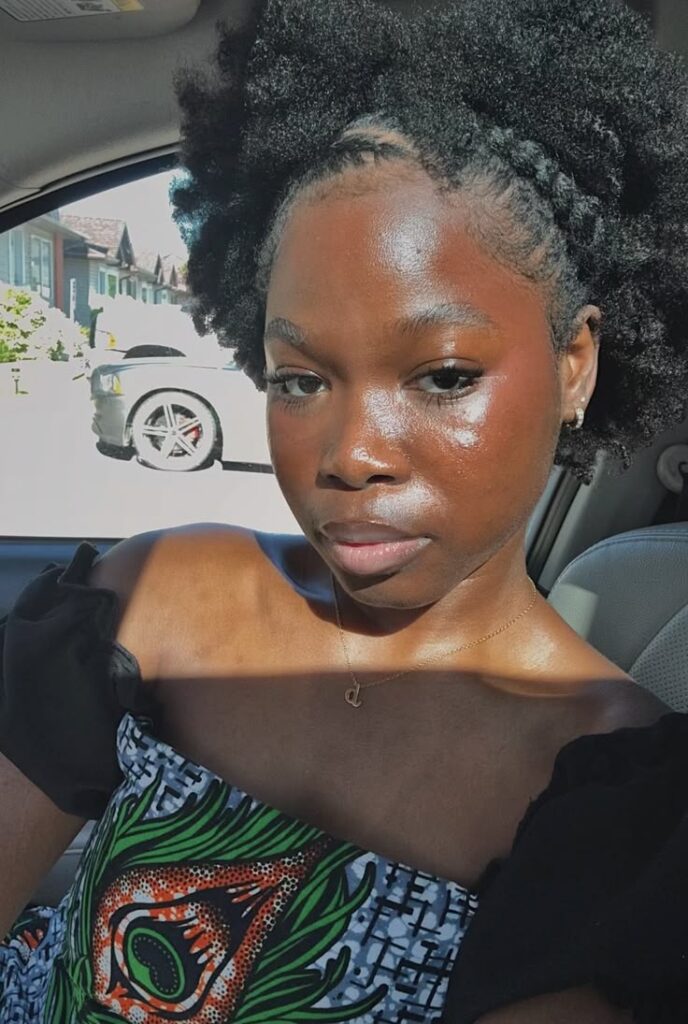
83. Two Front Cornrows
Create two simple cornrows starting near the front and directing them backward.
Leave the rest of the hair loose for a relaxed combination of structure and volume.
84. Three Front Cornrows
Add one more row to create a slightly fuller version of the previous style.
The three braids can run straight back or follow a slight curve depending on the shape you want.
85. Side Cornrow With Puff
Create a few cornrows along one side and gather the remaining hair into a puff.
The contrast between the braided section and the fluffy puff gives the hairstyle plenty of visual interest.
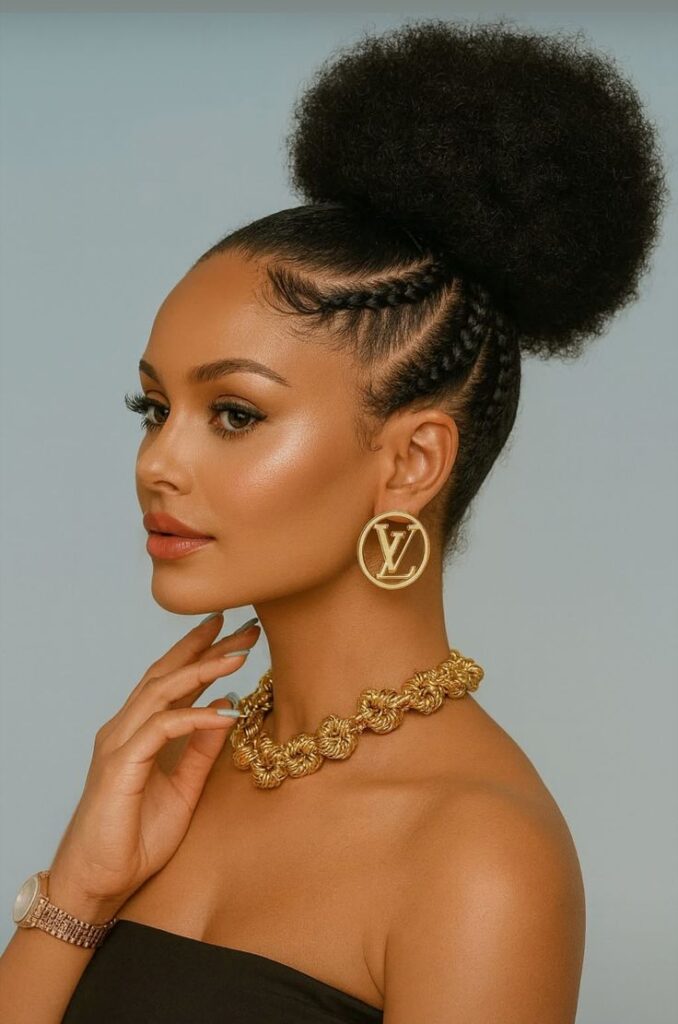
86. Flat Twists Into Bun
Direct several flat twists toward the back and gather their ends into a bun.
The twist pattern provides detail while the bun keeps the overall hairstyle neat.
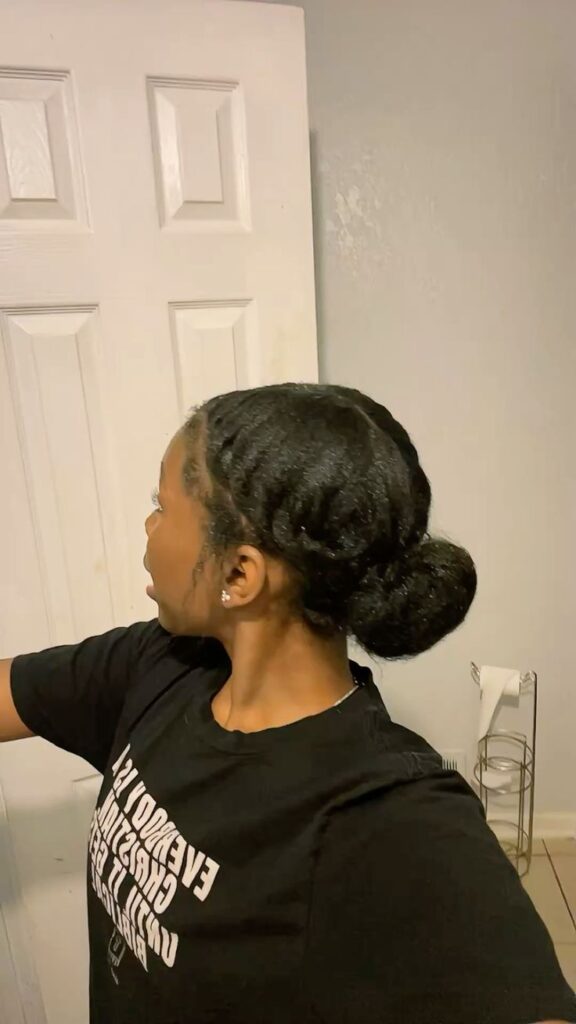
87. Two-Tone Hair Accessories
Keep your hairstyle simple and use two contrasting accessory colours.
For example, pair gold and black cuffs, white and brown beads, or two complementary scarf colours.
The accessories become the focus without requiring a complicated hairstyle.
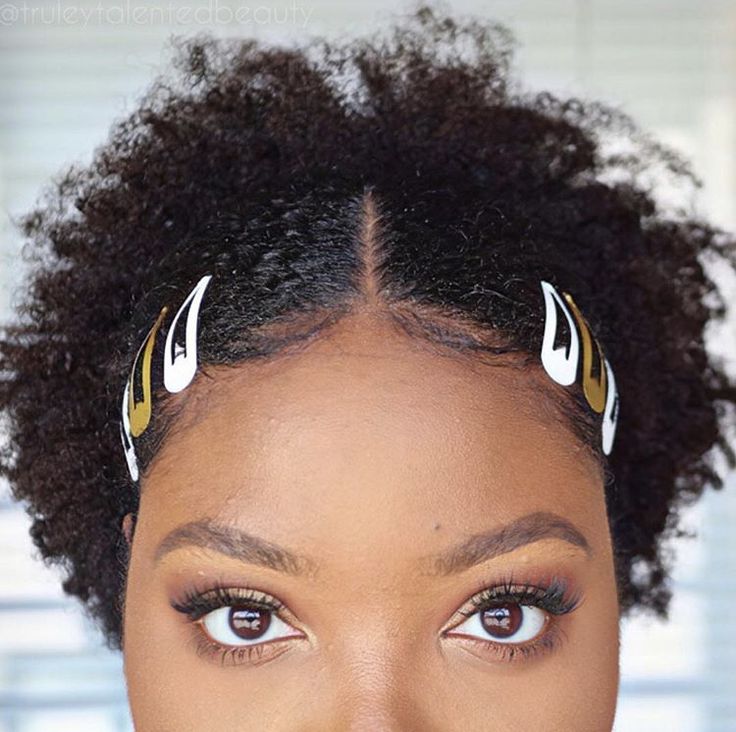
88. Side-Parted Bun
Create a side part before gathering your hair into a low or medium bun.
The visible part adds structure to an otherwise simple updo and creates a more polished finish.
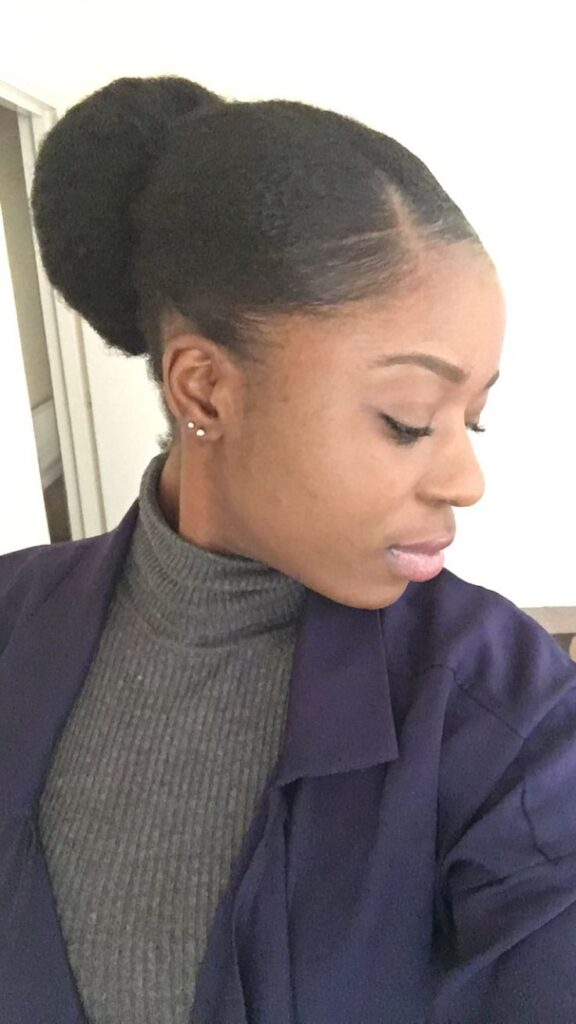
89. High Top Bun With Loose Front
Create a high bun while leaving a few textured sections around the front.
The loose pieces soften the hairstyle and keep it from looking overly structured.
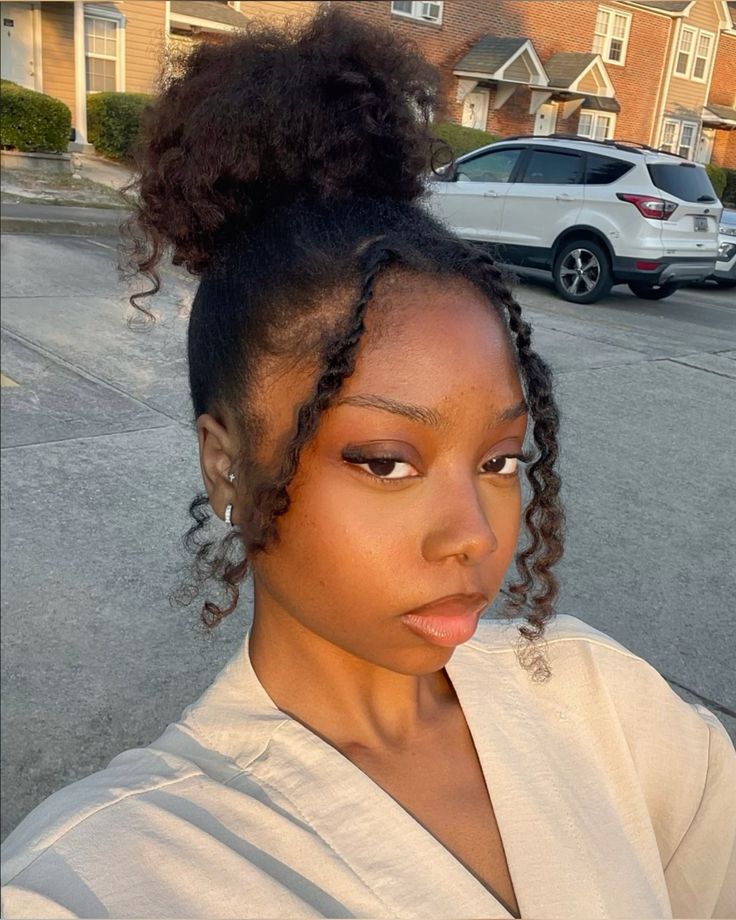
90. Twist Crown With Afro
Create twists around the front and sides of your head while leaving the center or back full.
This gives you a crown-like appearance while allowing the natural texture to remain the star of the hairstyle.
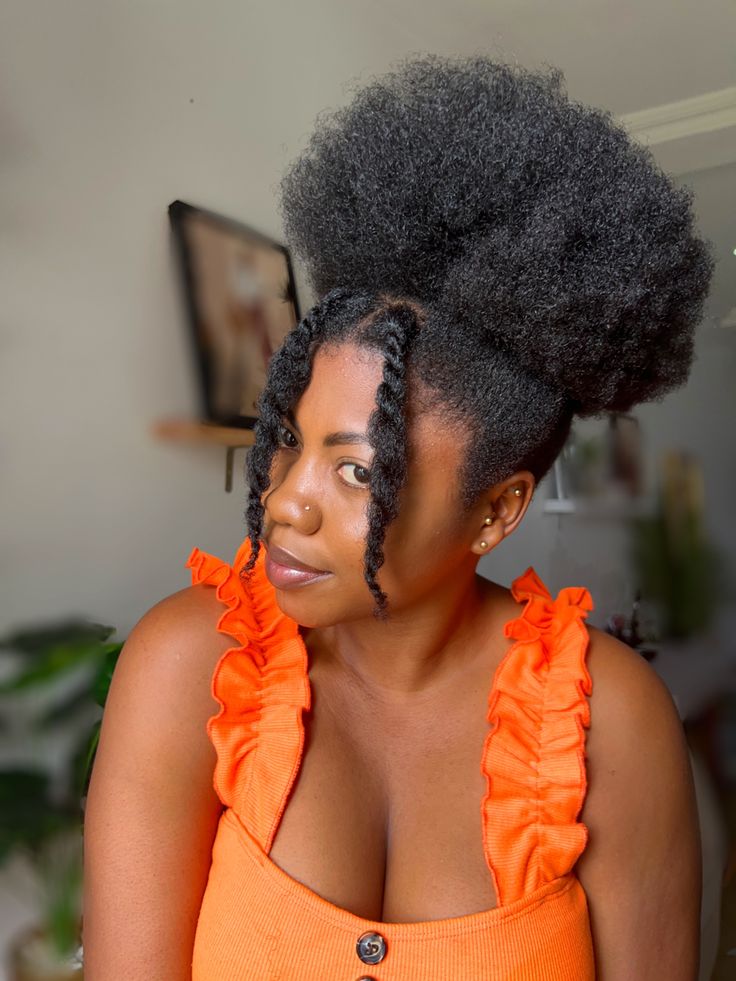
91. Side Twist With Puff
Create one large twist along the side of your head and gather the rest into a puff.
The single twist provides enough detail to make the hairstyle interesting without taking over the entire look.
92. Twisted Bangs
Create several twists at the front and arrange them across your forehead like bangs.
Keep the rest of your hair loose, in a puff, or gathered into a bun.
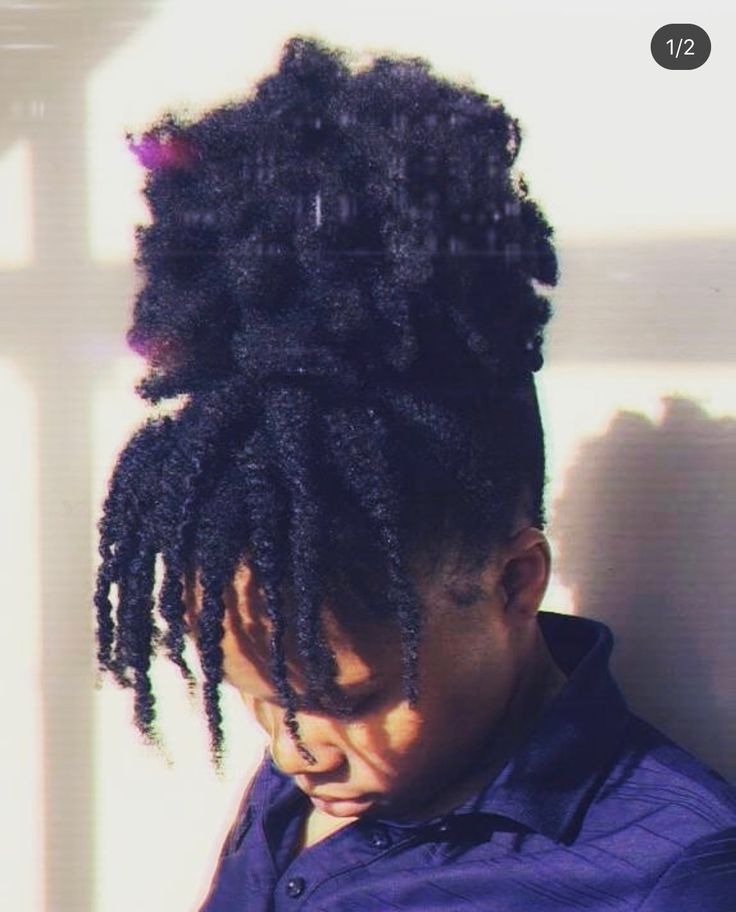
93. Braided Bangs
Small front braids can create the appearance of bangs without cutting your hair.
Arrange them across the forehead and secure them carefully. The rest of your hair can remain loose or be gathered into a puff.
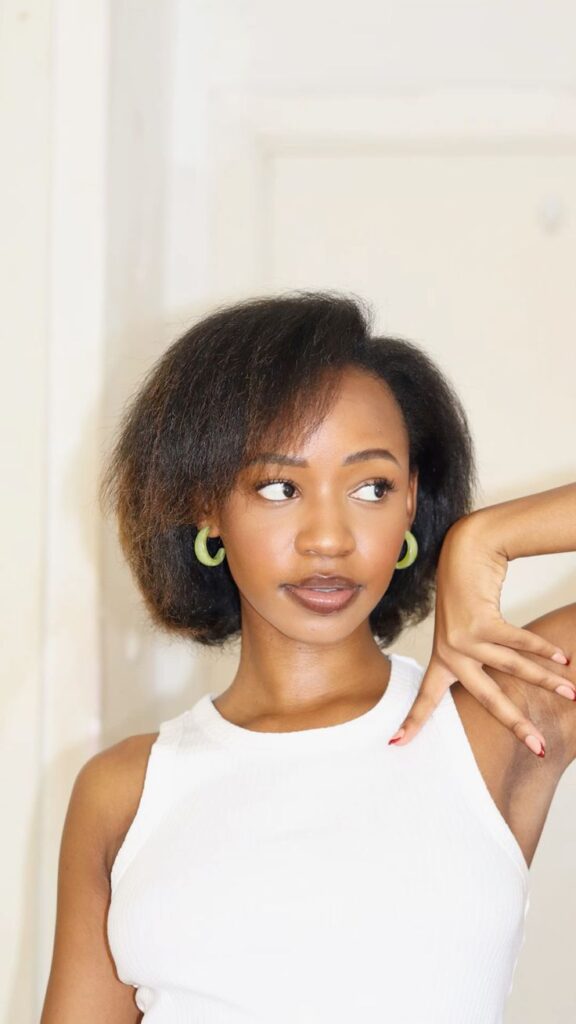
94. Faux Bob
A faux bob allows you to create a shorter hairstyle without actually cutting your hair.
Tuck and pin the ends underneath until the hair forms a bob-like shape. Add a side part for a classic finish.
95. Faux Loc Updo
If you have twists or faux locs, gather them into a high or low updo.
The additional length and texture make it possible to create larger sculptural shapes than you might achieve with loose natural hair.
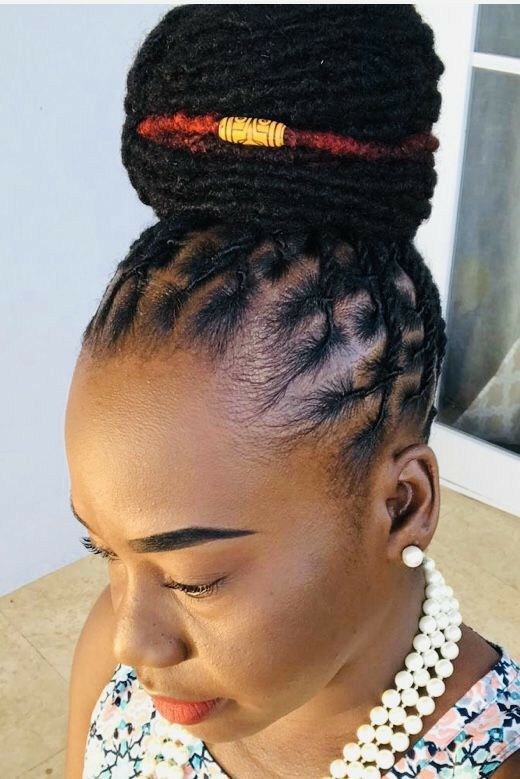
96. Loc Ponytail
Gather locs into a ponytail for a simple but striking look.
A high ponytail creates more drama, while a low ponytail feels softer and more relaxed.
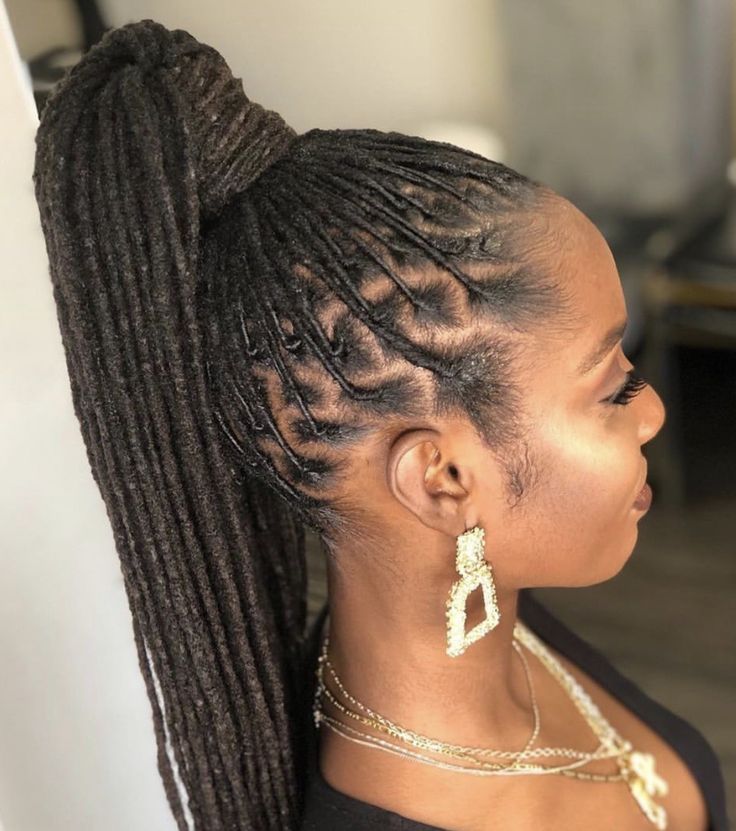
97. Loc Bun
A bun is one of the easiest ways to transform locs into an elegant updo.
Gather the locs upward and wrap them securely into a bun. You can keep it neat or allow a few pieces to remain loose.
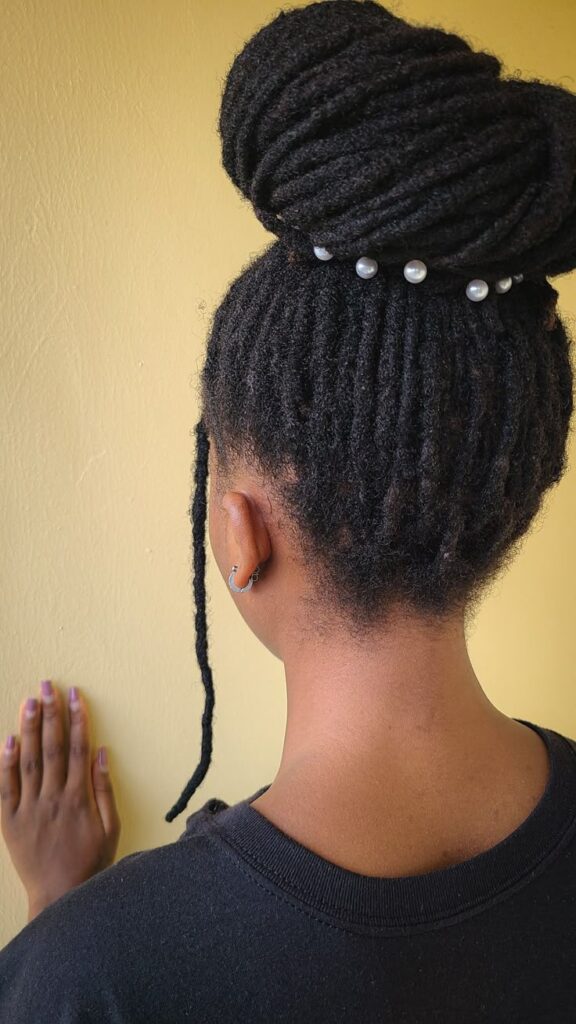
98. Wash-and-Go With Accessories
Take a simple wash-and-go and add a few carefully chosen accessories.
A headband, decorative clips, small flowers, or a scarf can completely change the final appearance without requiring another styling session.
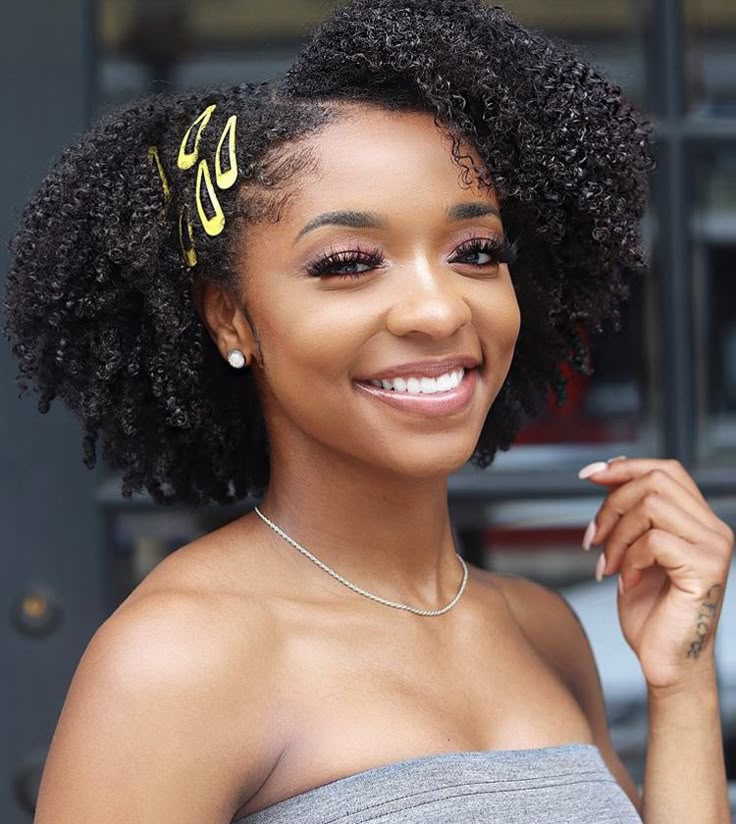
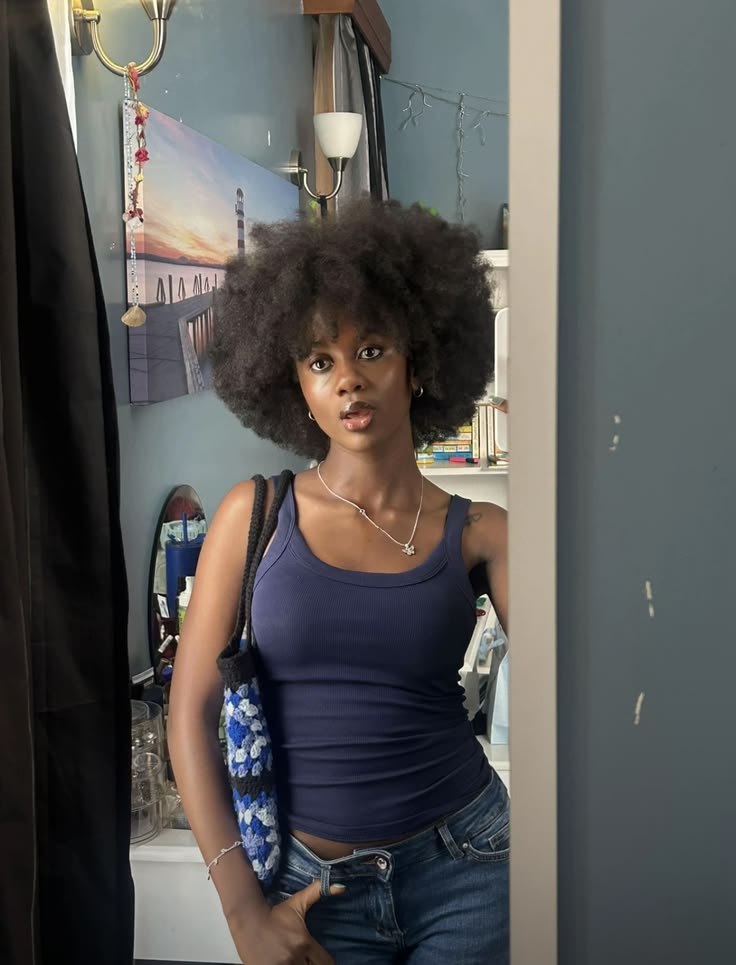
99. Afro With a Deep Side Part
A deep side part gives a traditional afro a completely different silhouette.
Move most of the hair toward one side and shape it with your fingers. Keep the texture fluffy rather than trying to make every strand perfectly defined.
Image Recommendation
Image File: deep-side-part-afro-4c.jpg
Alt Text: Natural 4C afro with a dramatic deep side part
Search Prompt: Black woman with voluminous natural 4C deep side-parted afro, realistic editorial beauty photography
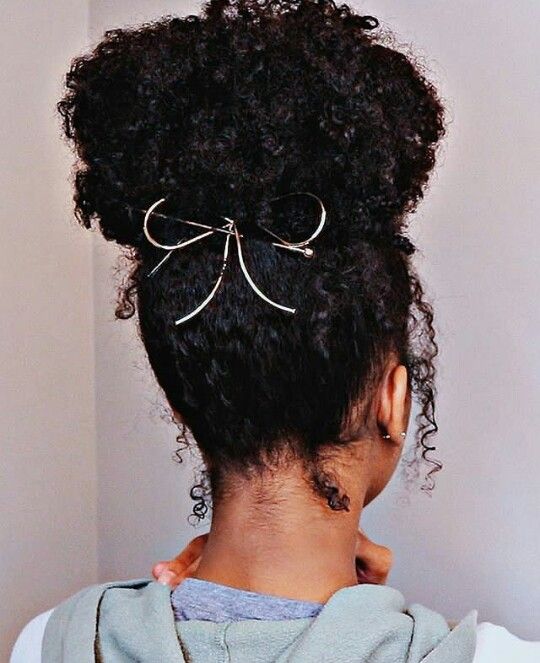
100. Textured High Bun With Accessories
Create a high bun and leave some of your natural texture visible around the shape.
Finish with decorative pins, cuffs, or a scarf for a more personalized look. The accessories can be changed depending on the occasion.
101. Your Natural Hair, Your Way
Sometimes the cutest hairstyle is simply the one that makes you feel like yourself.
You can combine several of the ideas in this list, change the part, add accessories, stretch your hair, define your coils, or leave your texture completely untouched.
There is no rule saying you have to recreate a hairstyle exactly as you see it. Take the parts you like and make them work for your own hair.
Your natural texture does not need to look a particular way to be beautiful. Whether you prefer an afro, puff, twists, braids, buns, or a completely different combination, there is plenty of room to experiment.
If you are trying to keep your hair healthy while exploring new looks, remember that gentle styling matters just as much as the appearance of the finished hairstyle.
Final Thoughts
There is no single hairstyle that makes 4C hair look beautiful.
Your texture already gives you plenty to work with.
Whether you prefer a simple puff, defined twist-out, detailed cornrows, elegant updo, chunky twists, or protective braids, the best style is ultimately one that fits your lifestyle while treating your hair gently.
The great thing about having so many cute 4C hairstyles to choose from is that you don’t have to limit yourself to one look.
Try something simple when you’re busy. Experiment when you have more time.
Dress your natural hair up for special occasions. Let it be big and fluffy when you want volume.
Keep it tucked away when your strands need less manipulation.
Most importantly, pay attention to what your hair is telling you. A hairstyle can be beautiful and still be too tight. A style can be trendy and still not suit your current hair condition. Another person’s favorite look may not be the best choice for your own strands.
Your hair doesn’t have to look exactly like anyone else’s for the style to work.
With the right balance of creativity, patience, moisture, and gentle handling, you can keep discovering new ways to enjoy your natural texture.
And with 101 options on this list, you certainly won’t run out of ideas anytime soon.
2 Comments